Online Magazine
Recent Posts
- Safeguard your Cellphone Photos
- Black & White to Color – Instantly
- Wearing Many Hats
- Video Roundup
- Rescuing Your Blurry Pictures
- Showing Their Age
- What is Your Angle?
- Panorama Photos
- Humorous Photos
- Close Ups
- Fisheye Pictures
- Photo Antiquities
- Printing Big
- Appreciating Scale
- Celebrity Sightings
Tags
More Places to Go
- Free "How-To" Books “How To” books for popular cameras 0
- Vist Us on Facebook keep in touch with us on Facebook 2
Archives
- July 2023 (1)
- March 2023 (2)
- February 2023 (1)
- December 2022 (1)
- October 2022 (1)
- September 2022 (8)
- August 2022 (9)
- July 2022 (1)
- June 2022 (1)
- June 2021 (1)
- May 2021 (1)
- March 2021 (5)
- February 2021 (4)
- January 2021 (2)
- April 2019 (1)
- March 2019 (1)
- February 2019 (1)
- October 2018 (2)
- April 2018 (1)
- March 2018 (4)
- February 2018 (1)
- November 2017 (1)
- August 2017 (1)
- June 2017 (1)
- April 2017 (1)
- March 2017 (5)
- February 2017 (2)
- January 2017 (1)
- October 2016 (1)
- September 2016 (1)
- August 2016 (1)
- July 2016 (1)
- May 2016 (1)
- April 2016 (1)
- March 2016 (2)
- February 2016 (1)
- January 2016 (2)
- December 2015 (1)
- November 2015 (1)
- October 2015 (3)
- April 2015 (1)
- March 2015 (5)
- February 2015 (1)
- January 2015 (4)
- December 2014 (2)
- November 2014 (5)
- October 2014 (2)
- September 2014 (1)
- August 2014 (2)
- July 2014 (1)
- May 2014 (1)
- April 2014 (5)
- March 2014 (5)
- December 2013 (2)
- November 2013 (18)
- October 2013 (1)
- September 2013 (1)
- August 2013 (1)
- July 2013 (1)
- June 2013 (3)
- May 2013 (1)
- April 2013 (2)
- March 2013 (1)
- February 2013 (1)
- January 2013 (1)
- December 2012 (1)
- November 2012 (2)
- October 2012 (2)
- September 2012 (5)
- August 2012 (2)
- July 2012 (1)
- June 2012 (1)
- May 2012 (1)
- April 2012 (4)
- March 2012 (1)
- February 2012 (1)
- January 2012 (3)
- December 2011 (1)
- November 2011 (3)
- October 2011 (1)
- September 2011 (2)
- August 2011 (2)
- June 2011 (3)
- May 2011 (4)
- April 2011 (8)
- March 2011 (8)
- February 2011 (10)
- January 2011 (6)
- December 2010 (11)
- November 2010 (14)
- October 2010 (6)
- September 2010 (12)
- August 2010 (2)
- July 2010 (4)
- June 2010 (3)
- May 2010 (1)
- April 2010 (1)
- March 2010 (2)
- February 2010 (1)
- January 2010 (1)
- December 2009 (1)
- November 2009 (2)
- October 2009 (2)
- September 2009 (1)
- August 2009 (3)
- July 2009 (2)
- June 2009 (1)
- May 2009 (2)
- April 2009 (1)
- March 2009 (2)
- February 2009 (1)
- January 2009 (3)
How I Travel with a Camera
27th September 2012
…or improving my photographic memory
I’ve traveled by plane so often that the routine of traveling overseas has become old hat.
But for this trip, I am diligently recording the steps that I follow with the goal of creating a checklist that other travelers may find handy if they too want to have a photographic memory of their travels.
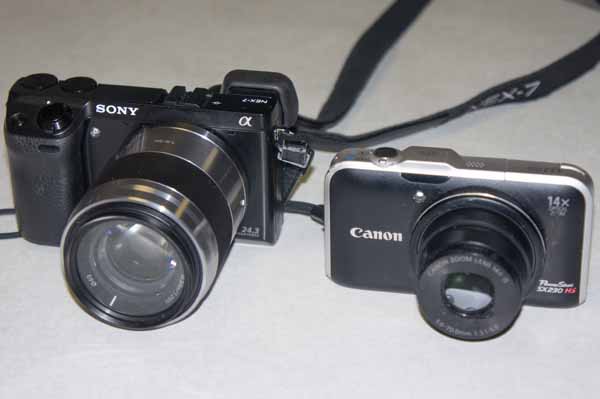
| Choose your weapon Sadly I have more photo equipment than I could ever use at one time. This trip I am taking a lightweight camera with an all-in-one (wide angle to telephoto) zoom lens. My experience has taught me to take fewer pieces of equipment to save space and weight. Besides the camera, don’t forget the battery charger and extra memory cards. I almost always take a notebook computer to review and backup my photos. |
 |
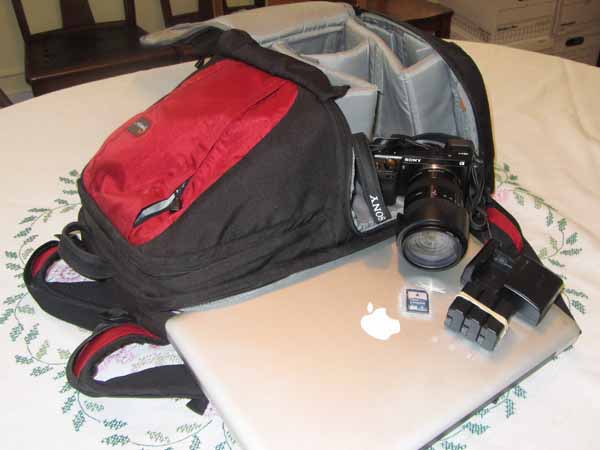
| Luggage rack To save time and avoid the lost luggage syndrome, I rarely check my bags with the airlines. Instead I use a small roll-on-board suitcase and a backpack. My backpack is designed for photo equipment and has a well-padded compartment for my notebook computer. The tendency is to fill the backpack to capacity but you may have second thoughts as you’re rushing to make a tight connection from Gate A-1 to Gate F-99 with 40 pounds hanging from your shoulders while you drag your roll-on-board in tow. Suggestion: lighten your load; your back will be forever grateful. |
 |
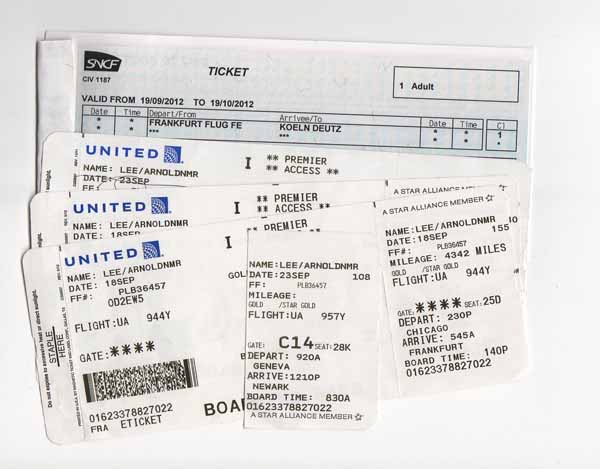
| Reservations please I enjoy taking photos from the airplane window. If you book your airline reservations far enough in advance you may be able to reserve a window seat. As I’m mostly traveling in the northern hemisphere I try to reserve a seat on the left side of the aircraft when traveling east or north and on the right side of the aircraft when traveling west or south. By doing this you’re avoiding the direct sun in the aircraft window. |
 |
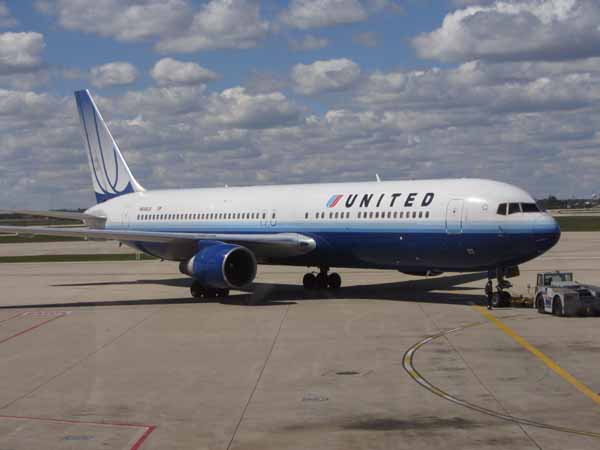
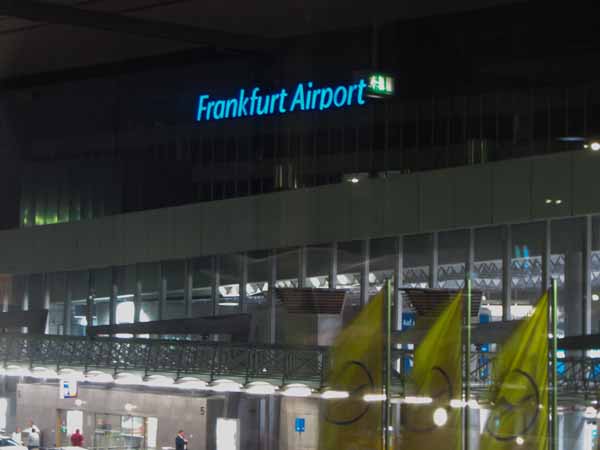
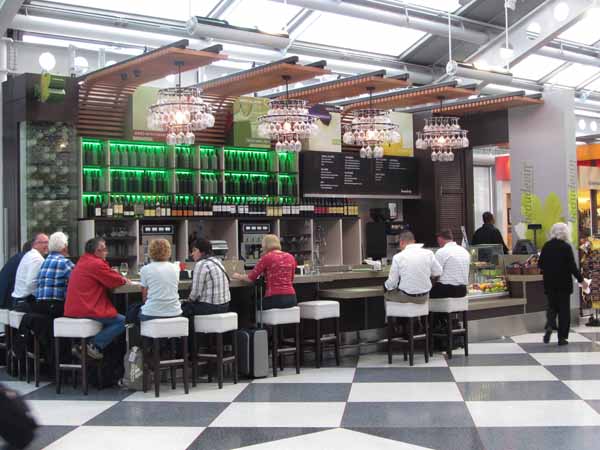
| At the Airport Put your camera away at security – the TSA staff are all camera-shy. After you’ve passed through security, snap a photo at your gate to record your flight and destination. Is there a window overlooking the tarmac? Take a shot of the aircraft that you’ll be flying. Are you traveling with others? You’ll want to capture their faces too. Are you traveling to or through an airport that is new to you? Take a picture of that barnstorm plane hanging from the ceiling or the museum pieces on display in the corridors. Many airports are filled with elegant artwork and designs. Take time to smell the roses as you’re passing through. |
 |
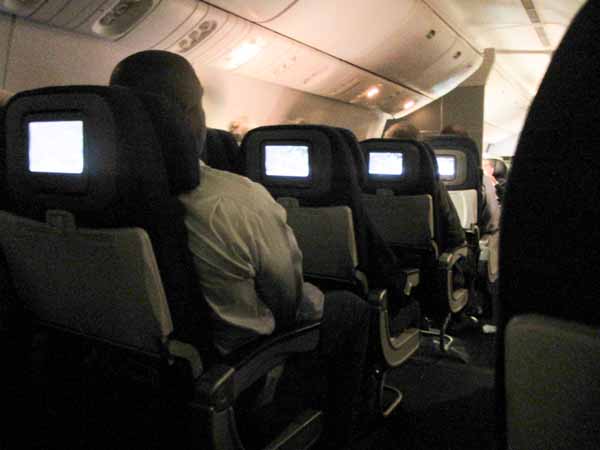
| In the Air Recording the progress of your flight may be difficult. If you happen to have a window seat you may be in luck. However, if the sun is shining brightly on your side of the aircraft, there will be a lot of flare. Or if the skies below are cloudy, you’ll have a very restricted view of the terrain. If you’re traveling overseas, you may be flying during the night. Should you have a clear view, set your camera’s shutter speed to 1/250 second or faster to minimize blur. Remember that during takeoff and landing you’re closest to the detail on the ground. These are both good times to capture your flight. |
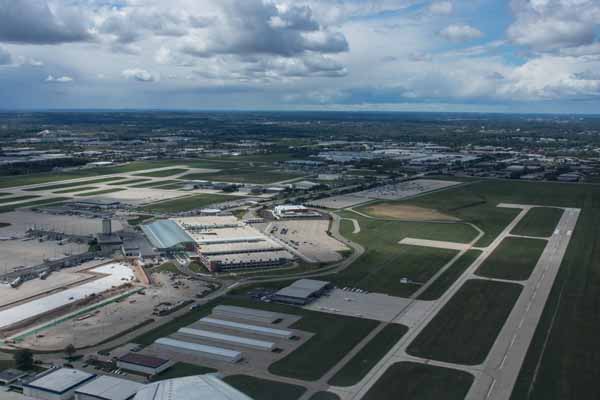 |
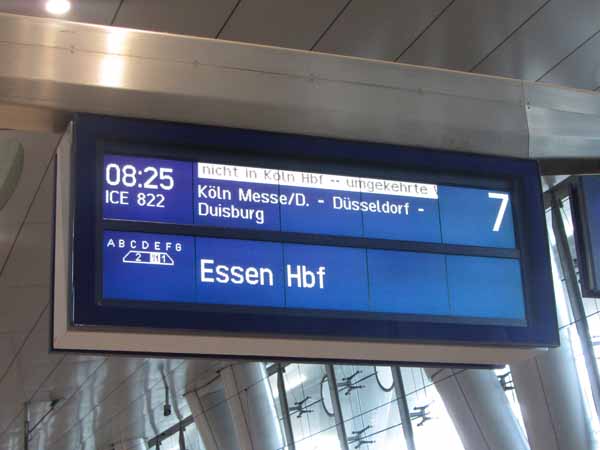
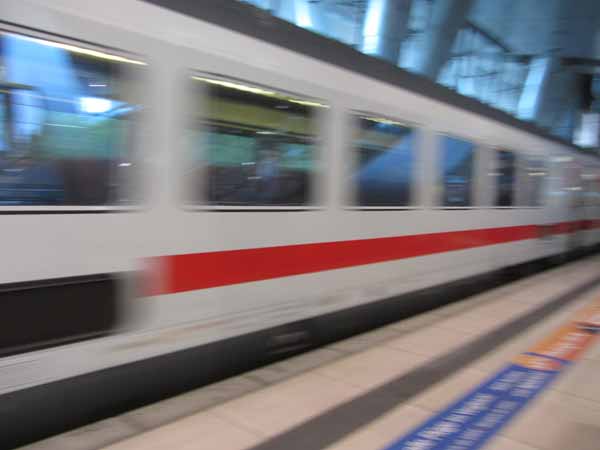
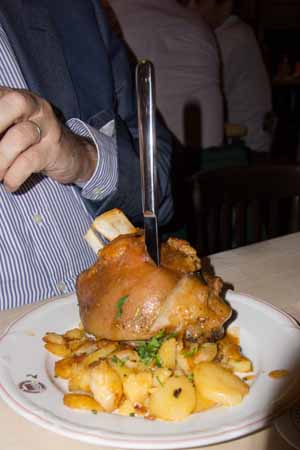
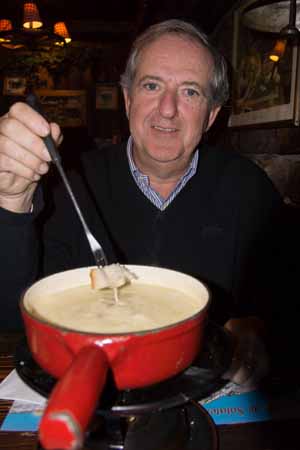
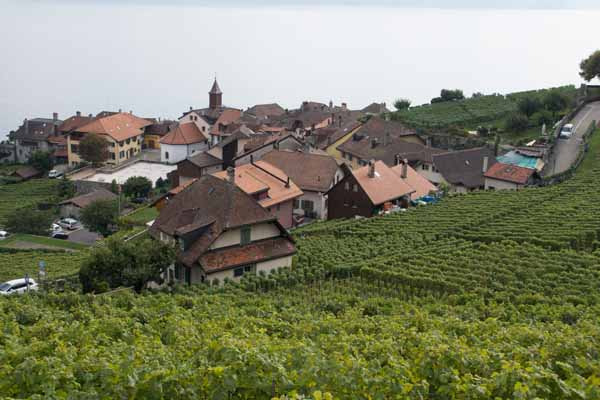
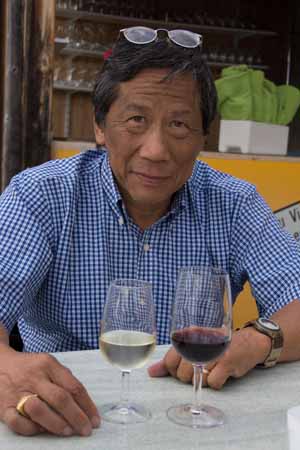
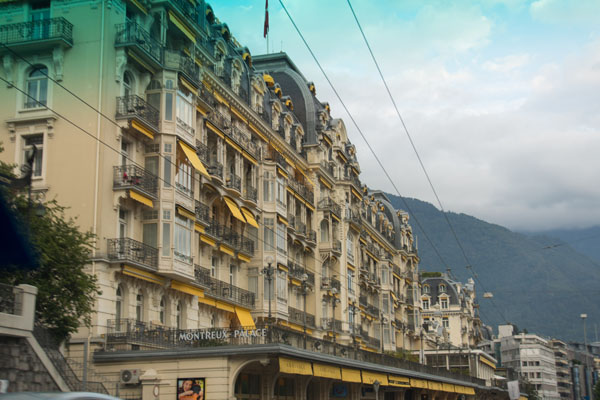
| Arrival and the Sites Here’s where the real photographer in you blossoms. Get out there and snap, snap, snap. Most likely, you already have a list of the landmarks and attractions that you want to photograph. The tendency is to step back and include everything in your photos. Try stepping forward a little to include less (but closer) detail. Instead of posing people, it’s interesting to catch people in action. To prove that you were there, is there someone who can take your picture too? What about the local customs and curiosities of your destination that are different from home? The foods, architecture, landscape and transportation may all be unique to this area. Why not record these? |
 |
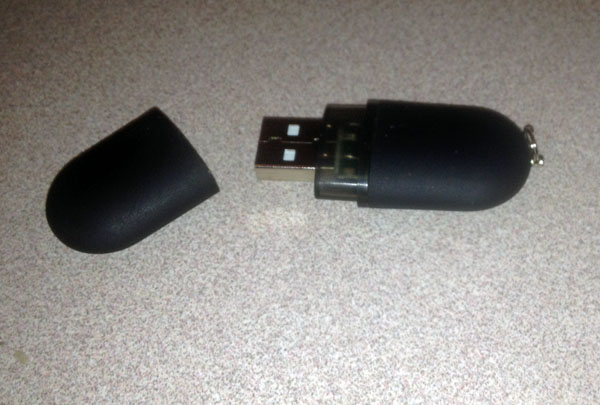
| Backing up your photos I mentioned earlier that I almost always travel with a notebook computer. I’ve also made it a habit to copy my photos from the memory card (SD or CF) to my notebook computer daily. Additionally, I make a backup copy of these digital files to a thumb-drive. Afterwards, I keep the thumb-drive in a place separate from my notebook computer. This gives me two copies of my travel images. |
 |
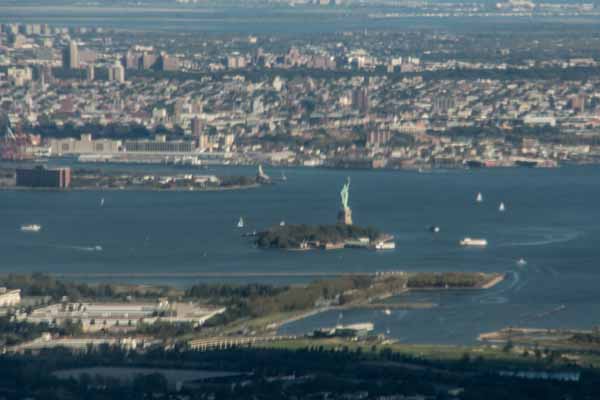
| Returning Home Don’t relax just yet. The reverse flight home may give you a better opportunity for in-flight photos than the flight there. On my return flight home, I had a connection at Newark (New York area). Having grown up in New York, I knew that the Statue of Liberty was sitting in New York Harbor to the south of Manhattan so I was prepared to snap a photo during arrival. Again, having a window seat was the key. |
 |
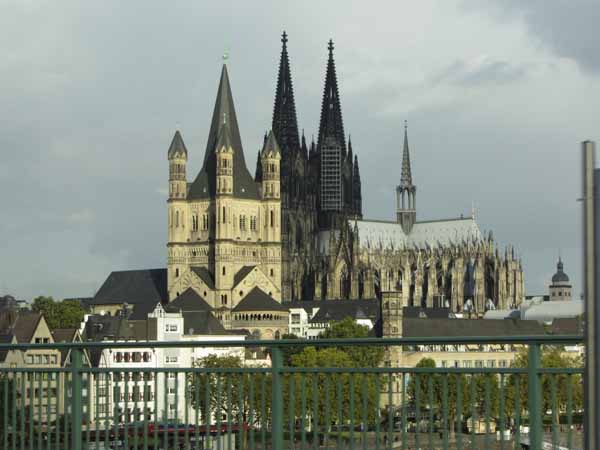
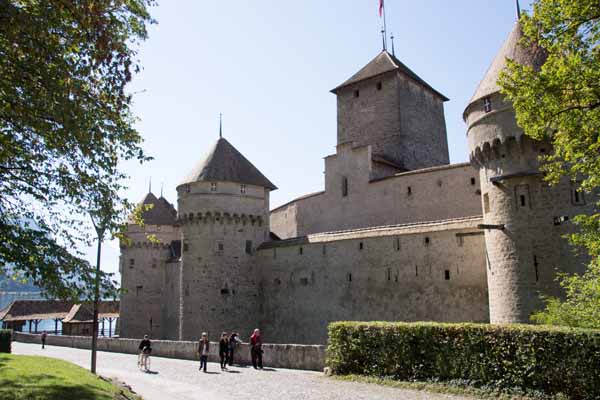
Following are some of my “photographic memories” from my travels to Germany and Switzerland that hopefully illustrate this article – arranged chronologically.
|
|
||
 |
 |
 |
|
|
||
 |
 |
 |
|
|
||
 |
 |
 |
|
|
||
 |
 |
 |
|
|
||
 |
 |
 |
|
|
||
 |
 |
 |
|
|
||
Happy travels.
Written by Arnie Lee
Delivering Higher Performance
16th September 2012
to those users who prefer going lightweight
Not long ago, I acquired a mirrorless interchangeable lens camera (MILC) – the Sony NEX5. I’ve found its small size to be very convenient and its light weight easy on my shoulder. But more importantly its picture-taking capabilities and quality of the photos rival those of the other cameras in my equipment inventory.
Having interchangeable lenses is a necessity for most serious photographers. So for many years SLRs and more recently DSLRs fit this bill. On the other hand, a MILC is designed as a compact alternative to a DSLR camera. Their small size is what attracted me to the Sony NEX series.
|
While on vacation for two weeks I used the NEX5. It proved to be a solid performer producing good exposures under a very wide variety of lighting conditions. This model has a 14mp APS-C size sensor, the same size used in many DSLRs and I found it gave me excellent quality images. MILCs are quiet since they lack moving mirrors. The camera’s controls were straight-forward and easy to use. I took advantage of several unique features not found in others such as sweep panorama (in-camera stitching of photos to make a wide panoramic view) and anti-blur (burst of several shots to increase likelihood of non-blurred image) modes and am more than satisifed with the results. |
|

Overall, I am pleased with the addition of the NEX5 to my arsenal of photo equipment. However it lacks two features that one would normally require for professional use:
- Viewfinder – the NEX5 lacks a viewfinder. Relying the LCD for composing is not only slower, but is often difficult in bright sun.
- Flash – the NEX5 has a small, built-in flash. However it lacks a flash shoe, making it difficult to use a standard strobe.
Can we change your Point Of View?
07th September 2012
Everyone has a point of view
But hold on!
For this discussion, I’m not talking about your opinion. Rather, I’m referring to your visual point of view.
Your view of the real world is determined by the physical specs of your eyes. When standing, the average person’s eyes sit between 5 and 6 feet off of the ground. Looking straight ahead, the eyes can take in about 45-degrees of a scene. Historically, the “normal” lens on a camera was designed to duplicate this angle – thus a 50mm lens on a 35mm camera has this same view.
In today’s photo-frenzied world, we’re taking hundreds of million of photos daily. And aren’t most of these photos taken from the average person’s viewpoint? Probably.
My contention is that changing your point of view slightly results in more interesting (and less boring, me-too) pictures.
How do you do this?
Zoom
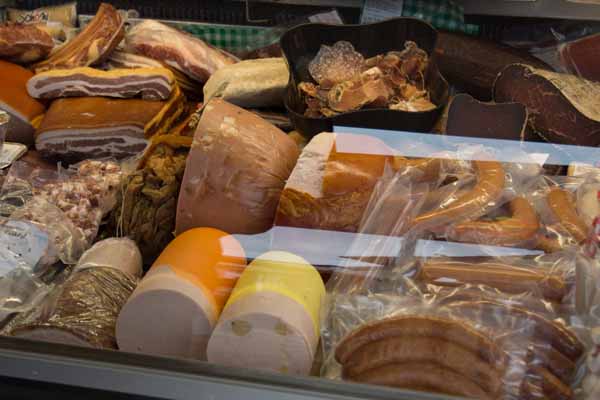
If your camera has a zoom lens – change the zoom factor. Zoom in to get a closer (and more shallow) view of your subject. Zoom out to include a smaller view of your subject. If you’re having a hard time picking out a face that’s far too tiny to see, zooming in can help it magically reappear in your photo. The plate of appetizers below has better appeal up close than at a distance. Unfortunately, some of our commonly used picture-taking devices lack a zoom feature. For example, the popular iPhone 4S has a fixed lens of about 35mm (equivalent on a 35mm camera) so you’ll have to resort to one of the other methods.
Dance a Little
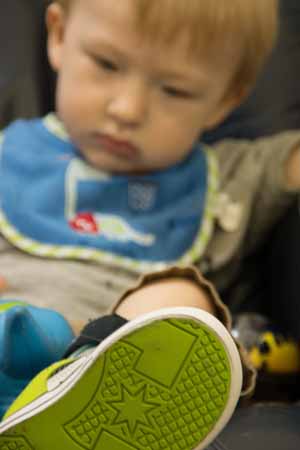
Another way to zoom in is to move closer to your subject. Conversely, zoom out by moving farther away from your subject. This sounds almost silly until you realize that not very many picture-takers use this method. It’s almost as if their feet are cemented to the earth. Dancing with your camera can actually produce interesting views when compared to the immovable object school of photograph. You’ll notice that I danced a little to get closer to the green soles on the young boy’s feet.
Do the Slide
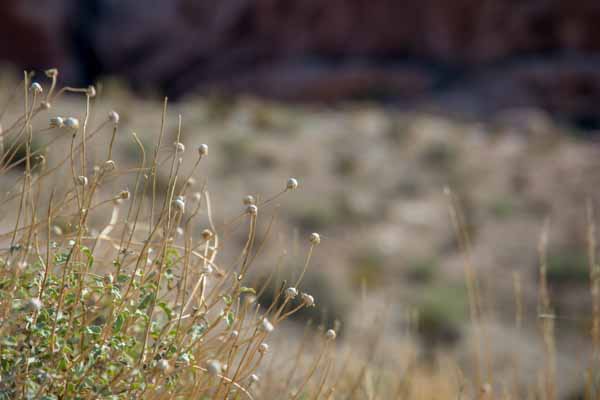
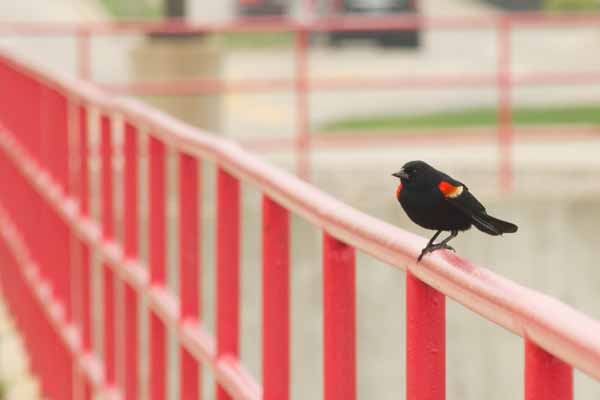
If you see a light post coming out of Betty’s head, move yourself to the right. If you want to see the gentleman’s cellphone instead of the back of his shirt, slide to the left. It’s perfectly reasonable to change the direction from which you snap your photograph. You’ll most likely end up choosing a direction which others don’t often see such as moving closer to the fence to capture the blackbird.
Get a Pair of Stilts
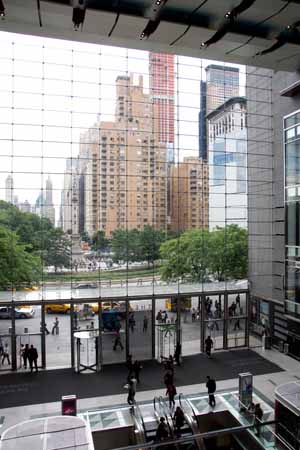
Another way to achieve photos with impact is to shoot down on your subjects. Standing on a stable chair can add two feet to your eye level. Or a set of nearby stairs can also give you a needed boost such as the overhead shot of the table and chairs. Whatever method you use to get up there will make your pictures stand out from the norm.
Things are Looking Up
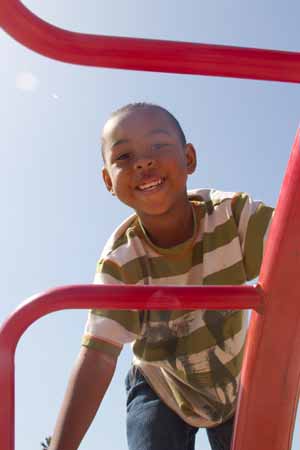
It’s a bird, it’s a plane, it’s … You get the idea. Thankfully, our heads are hinged and move upward and downward. Taking a photo of a kid climbing on the monkey bars and seeing his face up close from beneath is very different from the usual playground photo taken from 20 feet away.
Do Deep Knee Bends
If most of your pictures look like they’ve been taken from 5 to 6 feet off of the ground, you may need to do more calisthenics. Lowering your body slightly by bending or kneeling can produce a dramatic effect in your photos. Instead of capturing the top of the young girl’s hair, I was in the right position to photograph her face.
Down and Dirty
If you have the strength and fortitude, you can shoot by laying flat on your stomach and crawling around. I often use this technique to photograph flowers and the like. This changes my normal perspective to that of a bug and usually results in some interesting shots. However, it usually takes me a bit longer to get myself upright afterwards.
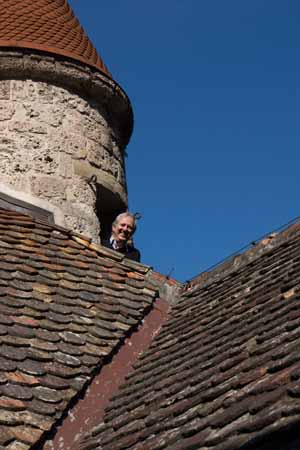
Enough talk. The following are a few photographs that I’ve taken using one one of more of these suggestions.
 |
 |
|
|
|
 |
 |
|
|
|
 |
 |
|
|
|
 |
 |
|
|
|
 |
 |
|
|
|
 |
 |
|
|
|
My last suggestion, is one that you’ve already seen in some of the above photos and that is to:
Mix It Up
Use the above suggestions in combination with one another. For example, zooming out and bending at the knees gives you a wider angle and lower view of your subject. Hopefully, the physical requirements to do this won’t impair your health.
In photography, it’s fine to take a different point of view and go against the masses. Sometimes, it’s like that in life too.
Written by: Arnie Lee