Online Magazine
Recent Posts
- Safeguard your Cellphone Photos
- Black & White to Color – Instantly
- Wearing Many Hats
- Video Roundup
- Rescuing Your Blurry Pictures
- Showing Their Age
- What is Your Angle?
- Panorama Photos
- Humorous Photos
- Close Ups
- Fisheye Pictures
- Photo Antiquities
- Printing Big
- Appreciating Scale
- Celebrity Sightings
Tags
More Places to Go
- Free "How-To" Books “How To” books for popular cameras 0
- Vist Us on Facebook keep in touch with us on Facebook 2
Archives
- July 2023 (1)
- March 2023 (2)
- February 2023 (1)
- December 2022 (1)
- October 2022 (1)
- September 2022 (8)
- August 2022 (9)
- July 2022 (1)
- June 2022 (1)
- June 2021 (1)
- May 2021 (1)
- March 2021 (5)
- February 2021 (4)
- January 2021 (2)
- April 2019 (1)
- March 2019 (1)
- February 2019 (1)
- October 2018 (2)
- April 2018 (1)
- March 2018 (4)
- February 2018 (1)
- November 2017 (1)
- August 2017 (1)
- June 2017 (1)
- April 2017 (1)
- March 2017 (5)
- February 2017 (2)
- January 2017 (1)
- October 2016 (1)
- September 2016 (1)
- August 2016 (1)
- July 2016 (1)
- May 2016 (1)
- April 2016 (1)
- March 2016 (2)
- February 2016 (1)
- January 2016 (2)
- December 2015 (1)
- November 2015 (1)
- October 2015 (3)
- April 2015 (1)
- March 2015 (5)
- February 2015 (1)
- January 2015 (4)
- December 2014 (2)
- November 2014 (5)
- October 2014 (2)
- September 2014 (1)
- August 2014 (2)
- July 2014 (1)
- May 2014 (1)
- April 2014 (5)
- March 2014 (5)
- December 2013 (2)
- November 2013 (18)
- October 2013 (1)
- September 2013 (1)
- August 2013 (1)
- July 2013 (1)
- June 2013 (3)
- May 2013 (1)
- April 2013 (2)
- March 2013 (1)
- February 2013 (1)
- January 2013 (1)
- December 2012 (1)
- November 2012 (2)
- October 2012 (2)
- September 2012 (5)
- August 2012 (2)
- July 2012 (1)
- June 2012 (1)
- May 2012 (1)
- April 2012 (4)
- March 2012 (1)
- February 2012 (1)
- January 2012 (3)
- December 2011 (1)
- November 2011 (3)
- October 2011 (1)
- September 2011 (2)
- August 2011 (2)
- June 2011 (3)
- May 2011 (4)
- April 2011 (8)
- March 2011 (8)
- February 2011 (10)
- January 2011 (6)
- December 2010 (11)
- November 2010 (14)
- October 2010 (6)
- September 2010 (12)
- August 2010 (2)
- July 2010 (4)
- June 2010 (3)
- May 2010 (1)
- April 2010 (1)
- March 2010 (2)
- February 2010 (1)
- January 2010 (1)
- December 2009 (1)
- November 2009 (2)
- October 2009 (2)
- September 2009 (1)
- August 2009 (3)
- July 2009 (2)
- June 2009 (1)
- May 2009 (2)
- April 2009 (1)
- March 2009 (2)
- February 2009 (1)
- January 2009 (3)
Why Photos Matter – a follow up
25th June 2013
|
A couple of years ago, I wrote an article about a friendly face from the past. We knew her as Aunt Rita – an artist, a wife, a mother, a world traveler, an adventurer and a lovely woman. Aunt Rita and her family lived on a Chinese junk, The Amoy which was moored in the harbor of New Rochelle (NY), a few blocks from where we lived. Since my article appeared, I’ve had several email exchanges with Aunt Rita’s family which in turn made me go hunting for this classic painting that she gifted to my mother years ago. I remember her painting vividly since it decorated our childhood home for many years. And when my folks moved to their new home, the painting was part of their spare bedroom. |  Aunt Rita, Mom, my sisters and me |
|
| |
 |
 |
These photos are a pleasant way to enjoy the people and events from days gone by. Photos such as these should be a constant reminder to share your memories with others. Yes, photos matter.
Written by Arnie Lee
A Long Lens Story
12th June 2013
Avoiding the $8,500 shock
Those of us who like to hunt wildlife with a camera know that you can never have enough mm of lens. But sticker shock kicks in when you look at the prices for a fast super-telephoto lens. Last year I made it a high priority to seek out an alternative way to acquire one of these highly sought after gems and ended up with a prized lens at a bargain basement price.
My lucky catch doesn’t have the features of late model glass, but neither does it doesn’t carry an $8,500 price tag. Instead of the a brand spanking new 400mm f/2.8 with auto focusing and vibration reduction I picked up a used 400mm f/3.5 manual focus lens. As you’ll see, although it lacks the convenience of the high price spread, it performs very well for my type of shooting. And at a price of about $600, it is a steal. If you’re a lover of long lenses that isn’t willing to take a mortgage out to buy one, follow along to see if the used lens approach can satisfy your equipment wants.
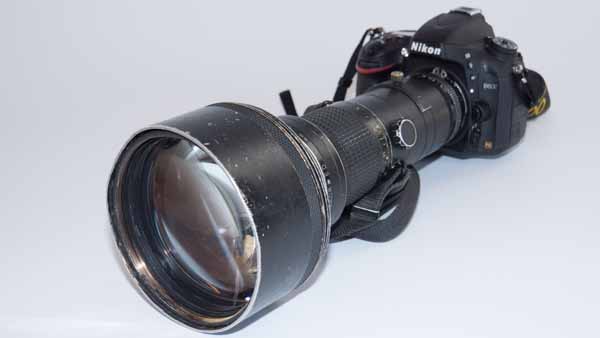
| To be exact, my “find” is a Nikkor ED IF AI-S 400mm f/3.5 lens. There are no marks or scratches on any of the lens surfaces. The lens body shows heavy wear and a few scratches to the paint. It has a tripod collar, a built-in lens hood and accepts affordable 39mm drop-in filters or expensive very 122mm external filters.
Mechanically, this lens has high quality optics; manual internal focusing (lens barrel does not extend or retract as it is focused) and automatic indexing so that the camera can determine the aperture setting. |
 |
|
|
|
 |
 |
|
|
|
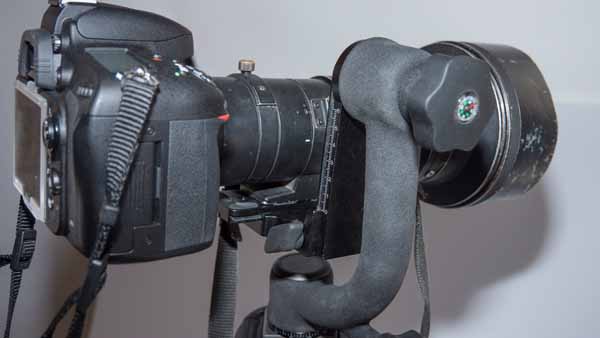
| This monster of a lens weighs more than 6 pounds. You won’t want to handhold this camera and lens combo for very long.
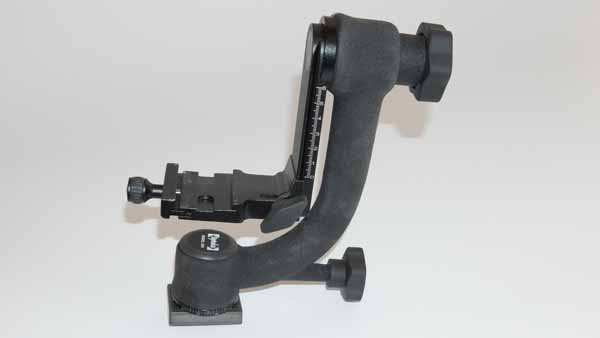
While it is possible to mount this combo directly onto a tripod, a more practical solution is to use a gimbal mount. Here’s one that I use. |
 |
|
|
|
| Using the tripod collar on the lens, the combo is screwed onto the gimbal. The gimbal itself is mounted and balanced onto the tripod.
With the arrangement, you can now frictionlessly tilt, swivel and pan the camera and lens combo to take aim of your subject. |
 |
|
|
|
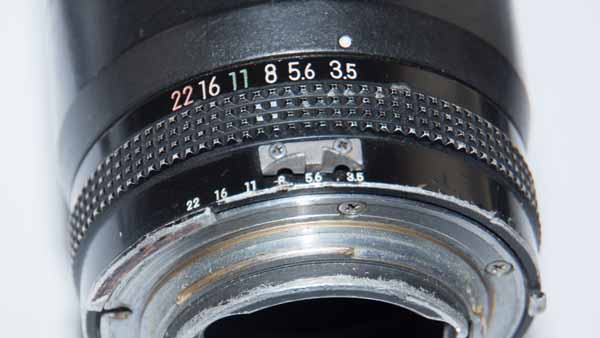
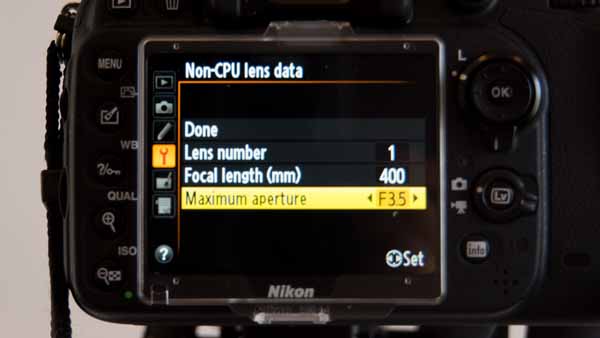
| There’s one final step to complete before we can use this older lens with a newer camera body.
Newer Nikkor lenses owe their intelligence to a tiny CPU which controls the exposure settings. Since this lens does not have a CPU, you must “register” this lens to the camera by setting its maximum (widest) aperture. The Tools menu has an item for doing this. |
 |
|
|
|
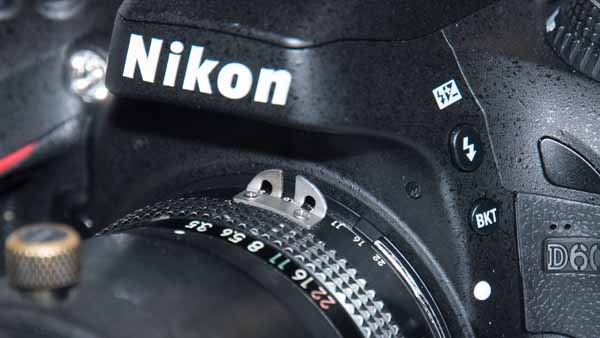
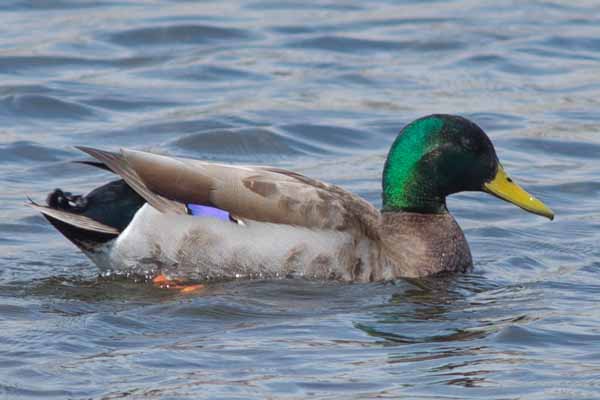
| Having registered the lens, there are two options for setting the exposure: ‘M” manual, where you set both the shutter speed and aperture or “A” aperture priority, where you set the aperture and the camera sets the appropriate shutter speed.
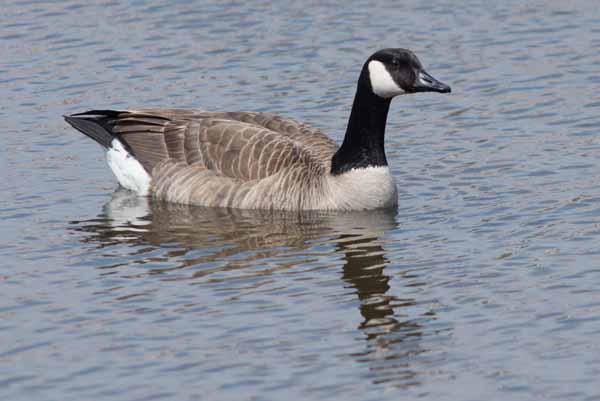
In either case, you rotate the aperture ring on the lens to the desired lens opening. In “M” mode, you also dial in the camera shutter speed. In “A” mode, the camera automatically sets the shutter speed. You’re all set to take aim, carefully focus and fire away. Here’s a few of my first shots with the lens. |
 |
|
|
|
 |
 |
|
|
|
 |
 |
|
|
|
 |
|
|
|
|
At first I was a little hesitant about buying an older lens without the autofocus and autoexposure features that I’ve come to expect from newer lenses. After all, this lens comes from the early 1980s; isn’t it obsolete? Now that I’ve had some positive experience, I realize that quality equipment lasts for many years.
I feel that I hit the jackpot with this lens at a great price. Now I’m hoping to find some time to capture many more birds in the future.
Written by Arnie Lee
NOTE: While this article featured Nikon equipment, I’m hoping to look for similar money-saving angles for my Canon equipment.
In Search of Nemo
11th June 2013
Underwater Photography – Blllllrrrrrpppp!
For those of us who spend their winters in the frigid cold, surrounded by ice and snow for months at a time, a visit to the tropics is a blessing. To me, the mention of the tropics brings warmth and water to mind. And that’s precisely what we were after when we booked a trip to the Big Island of Hawaii.
The weather there is predictably warm so it’s easy to pack: a couple of bathing suits, a few pairs of shorts and several shirts. And don’t forget the snorkeling equipment! As an avid picture-taker, my luggage also includes a camera or two so that I can record the events that we may encounter.
|
The least enjoyable part of the trip is getting there. It’s an all day affair starting with a short hop from our home in Grand Rapids to Chicago followed by a very long, 9-hour flight from Chicago to Honolulu. Clouds covered most of the flight path to the islands. These sparkling beaches of Oahu (to the right) are about the only sites that we see along the way and this only upon leaving Honolulu on a 45 minute connecting flight to Kona. And owing to a six hour time difference, we arrive in time for dinner. |
 |
|
|
|
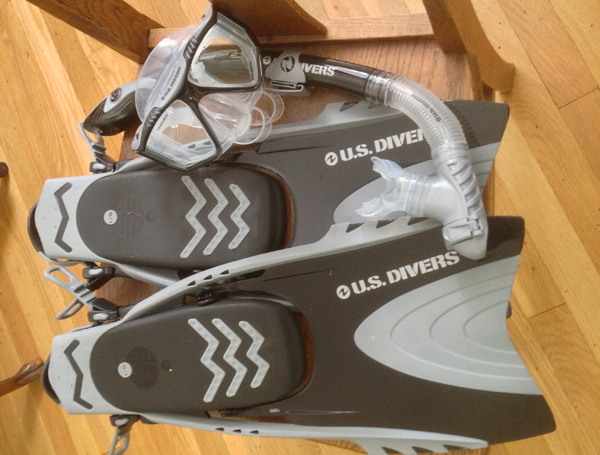
Being in the middle of the Pacific, there’s water galore everywhere. The next morning, with our snorkeling gear in tow we head down to one of the local beaches. |
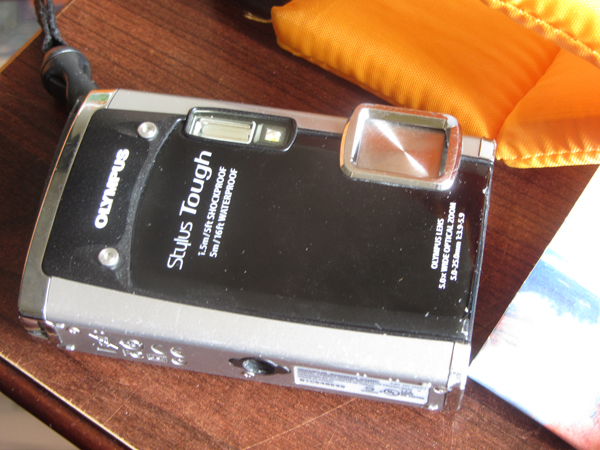
For this trip, I’ve taken a camera that can be used underwater. I’ve never invested the thousands of dollars needed for a “real” underwater outfit, but this Olympus Tough 6000 will do the trick. |
|
|
|
|
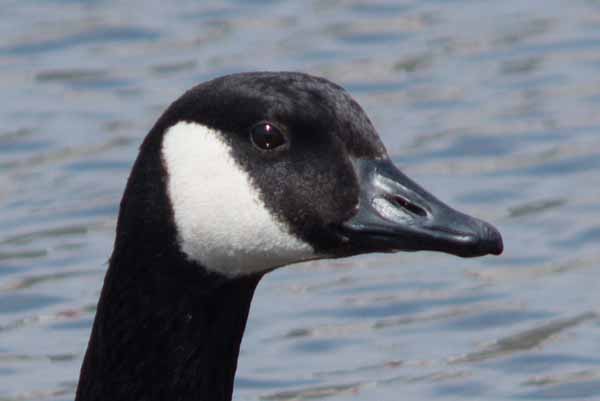
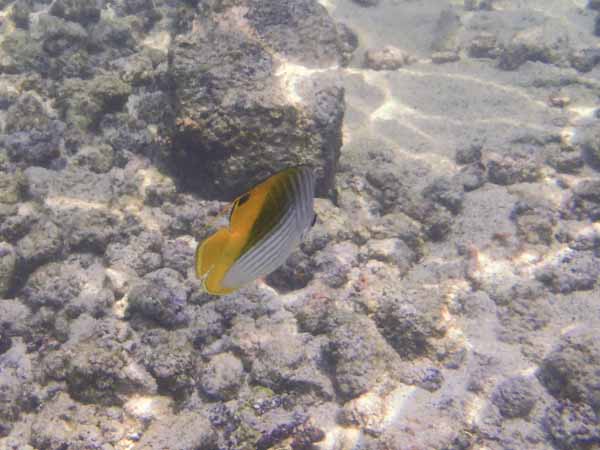
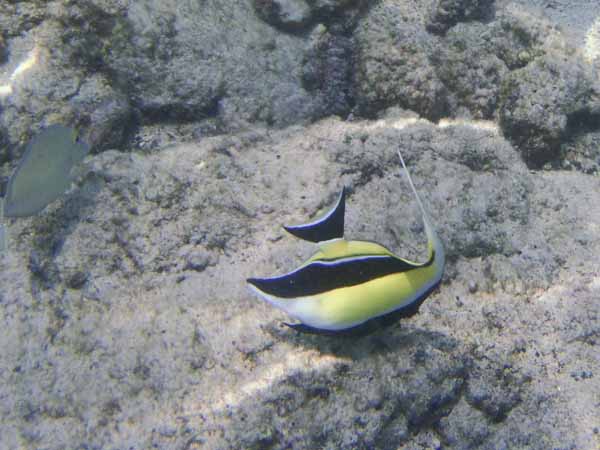
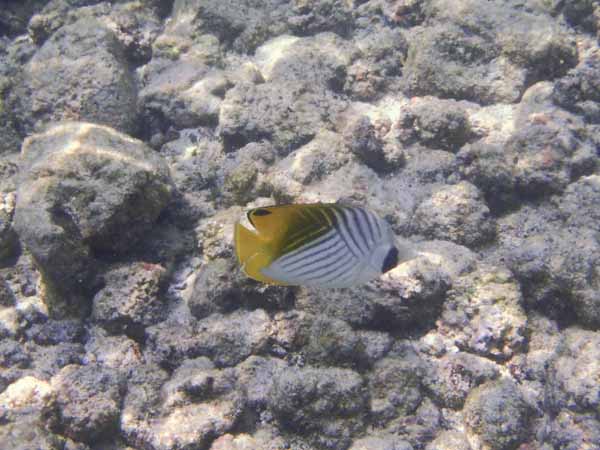
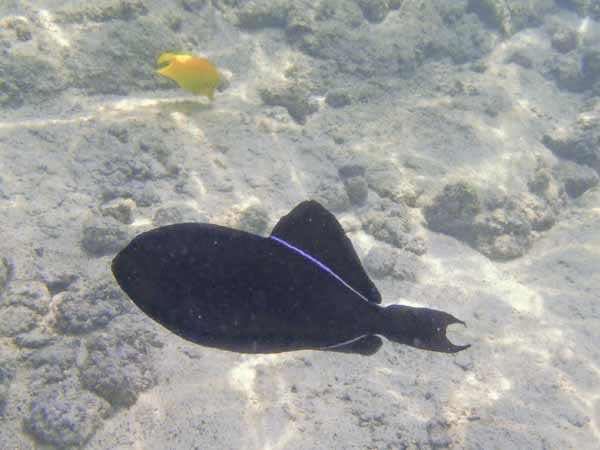
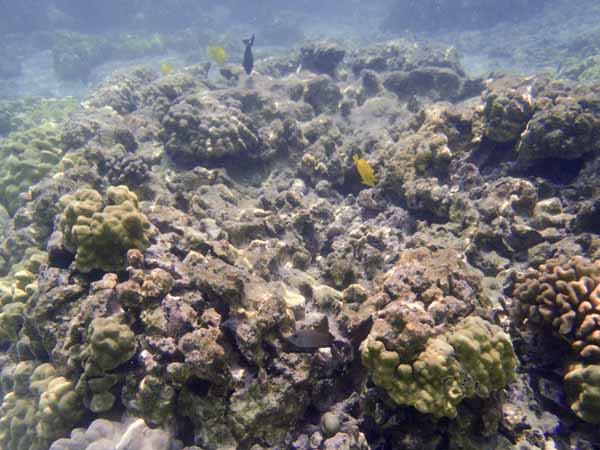
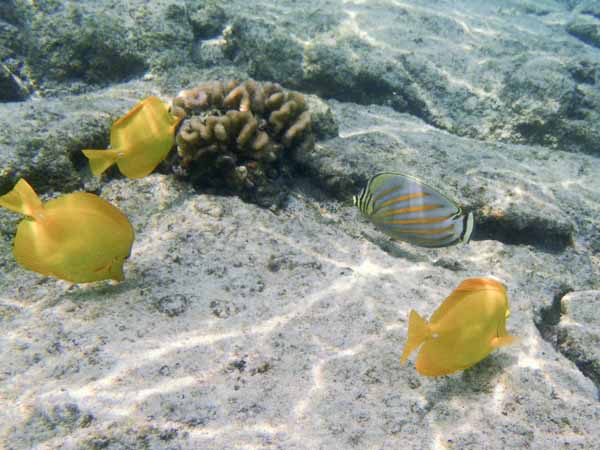
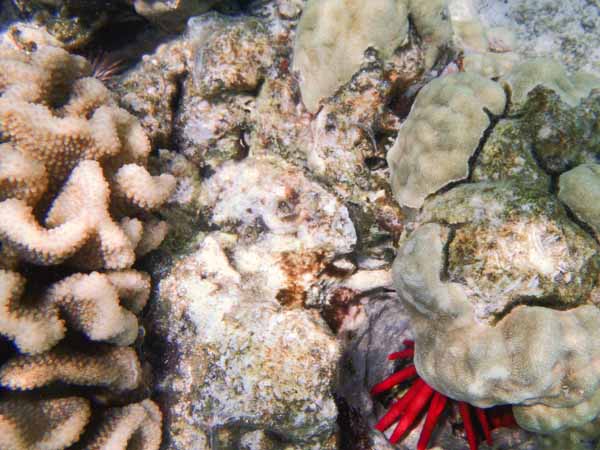
The Big Island is surrounded by shallow reefs lined with coral. Many of the popular beaches attract bathers for this exact reason. The coral is teeming with tropical fish and wildlife just a few feet below the water’s surface. Without heavy scuba equipment and expensive deep water photo gear, my small, relatively inexpensive camera makes it possible for me to record these amazing wonders of the ocean. Here’s some of my “catch” made simply by gently kicking my flippers, goggles and snorkel facing downward and camera in hand. |
|
|

|
|
|
|
|
|
|
|
|
|
 |
|
|
|

|
 |
|
|
|
|

|
|
|
|
|

|
|
|
|
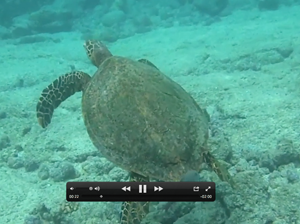
So I returned home with a slight tan, a relaxed body and a nice set of photos of some spectacularly colorful fish. Of course these photos aren’t of the same quality that you’d expect from a full-blown underwater outfit. But I’m happy just the same having recorded some of nature’s gorgeous water landscapes with a very affordable camera.
Written by Arnie Lee