Online Magazine
Recent Posts
- Safeguard your Cellphone Photos
- Black & White to Color – Instantly
- Wearing Many Hats
- Video Roundup
- Rescuing Your Blurry Pictures
- Showing Their Age
- What is Your Angle?
- Panorama Photos
- Humorous Photos
- Close Ups
- Fisheye Pictures
- Photo Antiquities
- Printing Big
- Appreciating Scale
- Celebrity Sightings
Tags
More Places to Go
- Free "How-To" Books “How To” books for popular cameras 0
- Vist Us on Facebook keep in touch with us on Facebook 2
Archives
- July 2023 (1)
- March 2023 (2)
- February 2023 (1)
- December 2022 (1)
- October 2022 (1)
- September 2022 (8)
- August 2022 (9)
- July 2022 (1)
- June 2022 (1)
- June 2021 (1)
- May 2021 (1)
- March 2021 (5)
- February 2021 (4)
- January 2021 (2)
- April 2019 (1)
- March 2019 (1)
- February 2019 (1)
- October 2018 (2)
- April 2018 (1)
- March 2018 (4)
- February 2018 (1)
- November 2017 (1)
- August 2017 (1)
- June 2017 (1)
- April 2017 (1)
- March 2017 (5)
- February 2017 (2)
- January 2017 (1)
- October 2016 (1)
- September 2016 (1)
- August 2016 (1)
- July 2016 (1)
- May 2016 (1)
- April 2016 (1)
- March 2016 (2)
- February 2016 (1)
- January 2016 (2)
- December 2015 (1)
- November 2015 (1)
- October 2015 (3)
- April 2015 (1)
- March 2015 (5)
- February 2015 (1)
- January 2015 (4)
- December 2014 (2)
- November 2014 (5)
- October 2014 (2)
- September 2014 (1)
- August 2014 (2)
- July 2014 (1)
- May 2014 (1)
- April 2014 (5)
- March 2014 (5)
- December 2013 (2)
- November 2013 (18)
- October 2013 (1)
- September 2013 (1)
- August 2013 (1)
- July 2013 (1)
- June 2013 (3)
- May 2013 (1)
- April 2013 (2)
- March 2013 (1)
- February 2013 (1)
- January 2013 (1)
- December 2012 (1)
- November 2012 (2)
- October 2012 (2)
- September 2012 (5)
- August 2012 (2)
- July 2012 (1)
- June 2012 (1)
- May 2012 (1)
- April 2012 (4)
- March 2012 (1)
- February 2012 (1)
- January 2012 (3)
- December 2011 (1)
- November 2011 (3)
- October 2011 (1)
- September 2011 (2)
- August 2011 (2)
- June 2011 (3)
- May 2011 (4)
- April 2011 (8)
- March 2011 (8)
- February 2011 (10)
- January 2011 (6)
- December 2010 (11)
- November 2010 (14)
- October 2010 (6)
- September 2010 (12)
- August 2010 (2)
- July 2010 (4)
- June 2010 (3)
- May 2010 (1)
- April 2010 (1)
- March 2010 (2)
- February 2010 (1)
- January 2010 (1)
- December 2009 (1)
- November 2009 (2)
- October 2009 (2)
- September 2009 (1)
- August 2009 (3)
- July 2009 (2)
- June 2009 (1)
- May 2009 (2)
- April 2009 (1)
- March 2009 (2)
- February 2009 (1)
- January 2009 (3)
Rescuing Your Blurry Pictures
02nd December 2022
The early days of picturetaking had me carefully setting up to take that spectacular photo, sending the film off to develop and patiently waiting for the prints come back from the photofinisher. Unexpectedly I experienced much disappointment when I looked through the returned pictures only to see my favorite subject as a blurred image. The cause may have been my sloppy focusing or me shaking the camera while using a slow shutter speed. No matter, the result was a missed opportunity.
When I review my large collection of photos – especially the older ones – I’m amazed how many aren’t “tack sharp”. Before the advent of autofocus cameras, we had to rely on manual focus techniques to keep the lens properly set. And before the advent of higher ISO film, we had to rely on stabilizing techniques to minimize the camera shake. In my younger days I must have been a photographer with sloppy habits and this explains why I have a bunch of blurry photos from back then.
A few weeks ago I learned of a software product that supposedly “fixed” blurred photos. After reading a couple of reviews of Topaz AI I decided to give it a try. In addition to sharpening images it can reduce image noise and can boost image resolution.
Topaz AI can be used by itself (standalone) or as a plug-in (helper) for Adobe Lightroom or Photoshop. I have used it as a standalone but most often as a plug-in for Lightroom.
Here’s a quick look at how Topaz AI can make those blurry pictures go away.
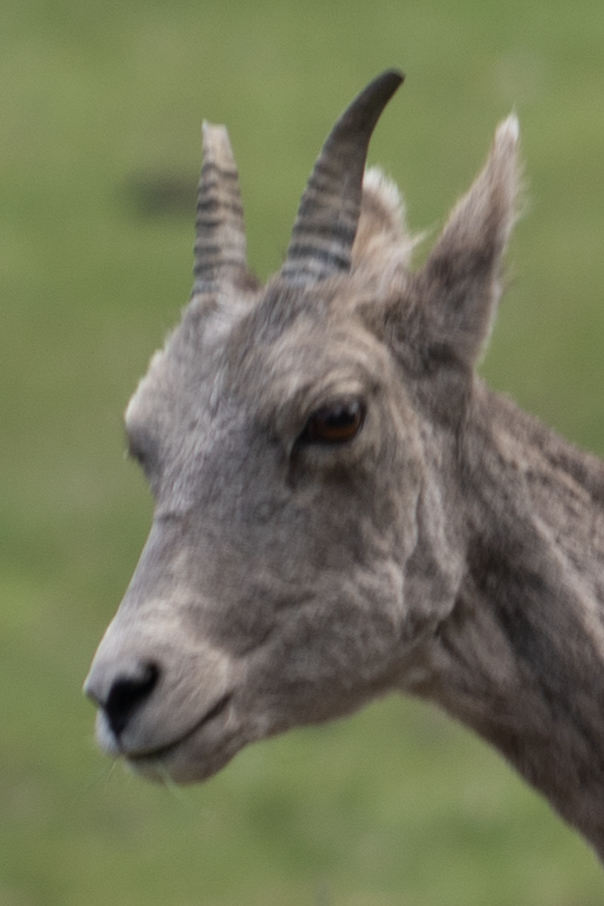
Below is a photograph taken with film in the early 1970’s using a manual focus camera. You can see that the original image on the left is not quite in focus.
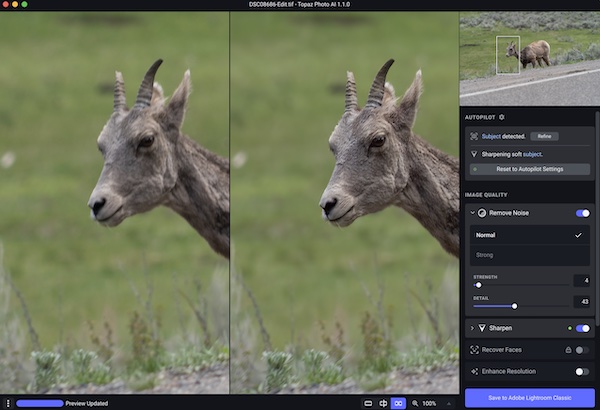
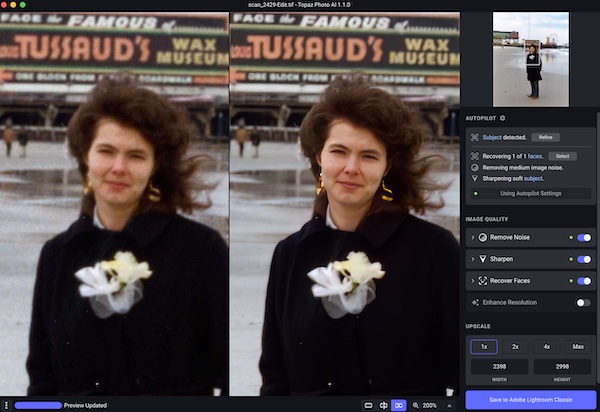 Here I’ve started Topaz AI to process the original image. This is the Topaz AI screen. On the left half of the split screen is the original image while the right half shows the improved image. On the far right is the control panel. By default the software analyzes the image and applies the changes that it believes will improve its appearance. |
|
|
This is an enlargement of the Topaz AI control panel. At the top is a thumbnail of the original image. Move the thumbnail rectangle to view different parts of the original image. In this case Topaz has used its Autopilot settings to find a subject’s face in the original image, apply medium noise reduction and sharpen the subject in the image. You can override these settings if you do not care the resulting changes. You can see that the buttons to Remove Noise, Sharpen and Recover Faces have already been activated (blue) but the Enhanced Resolution has not been activated (grey). If you want to increase the resolution of the original image (Upscale), you can do so by selecting 1X, 2X, 3X, 4X or Max. You might use this if you’d like to make a poster size enlargement from your original image. I did not increase the image resolution. The dimensions of the resulting image are displayed below the enhance resolution choices. |
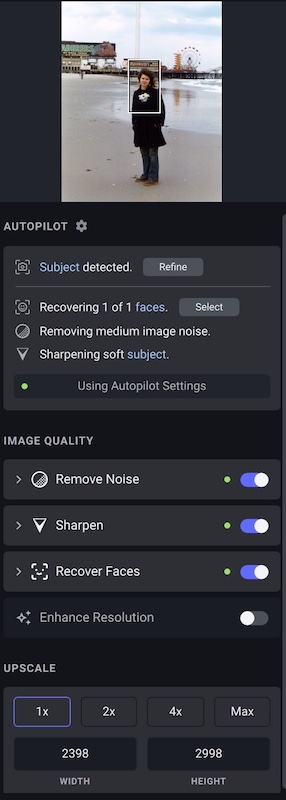 |
|
Here are portions of the original and “fixed” versions of the image. |
|
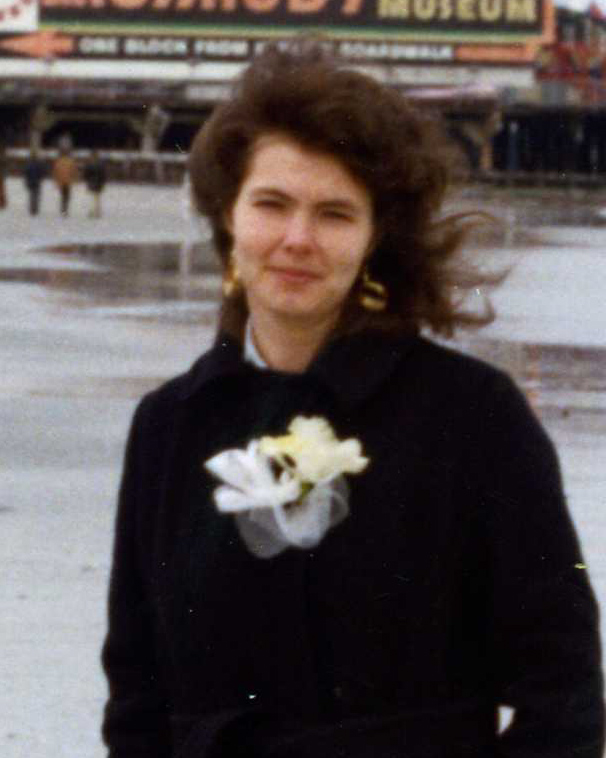 original image – click to enlarge |
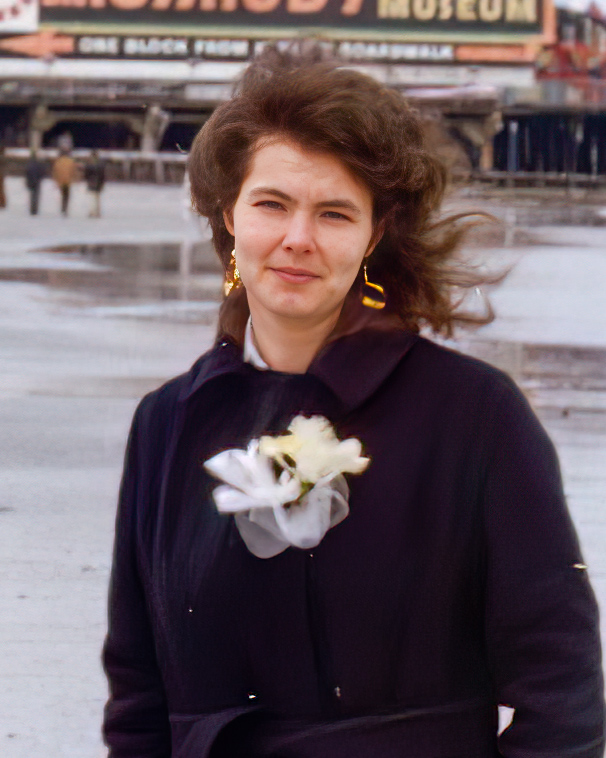 |
|
Clearly you can see that Topaz AI has done a remarkable job in removing the cause of the bad focus in original image. Next is a second image that suffered from focus blur caused by my rush to capture the bighorn sheep before it got away. The original was taken in May 2022 using a digital camera: Below are portions of the original and improved images of the bighorn sheep. |
|
 |
 |
|
Without any changes to the Topaz AI settings this software has produced an amazing image. It has saved another one of my photos from the “throwaway” pile. |
|
For those of you who may be interested in this software, you can get a free trial version for either Mac or Windows personal computers. Visit Topaz Labs and look for the Photo AI package.
What to do with your Photos
29th March 2021
Using Smaller Frames
On my computer desktop, I have a folder labeled “To Be Printed”.
Every once in a while as I’m editing my photos, I’ll drop a copy of a favorite image into the folder. As the number of images within the folder grow, I feel compelled to make prints and get them up on the wall.
Years ago I realized that I didn’t have to always make huge prints. By printing smaller sizes more photos would see the light of day and keep from setting my wallet back too much.
To make best use of the limited wall space, I started to use sets of identically sized frames. They are light weight with glass or plexiglass to protect the prints and easy to hang.
A few of the favorite photographs get special treatment – they are printed in a larger size.
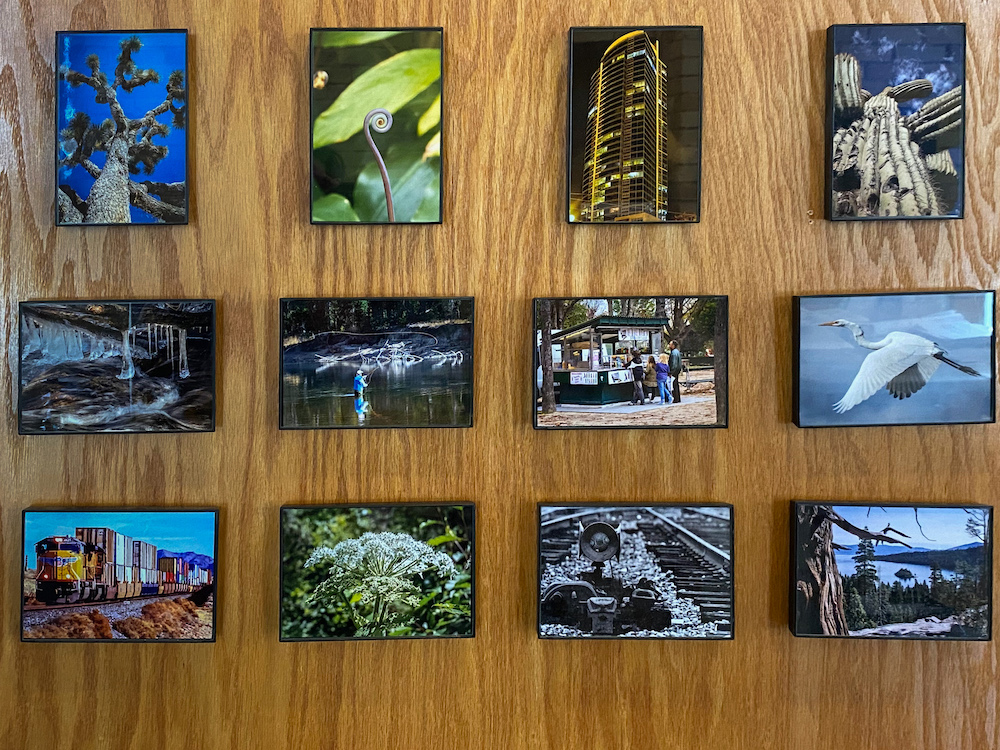
these are all 4″ x 6″ prints
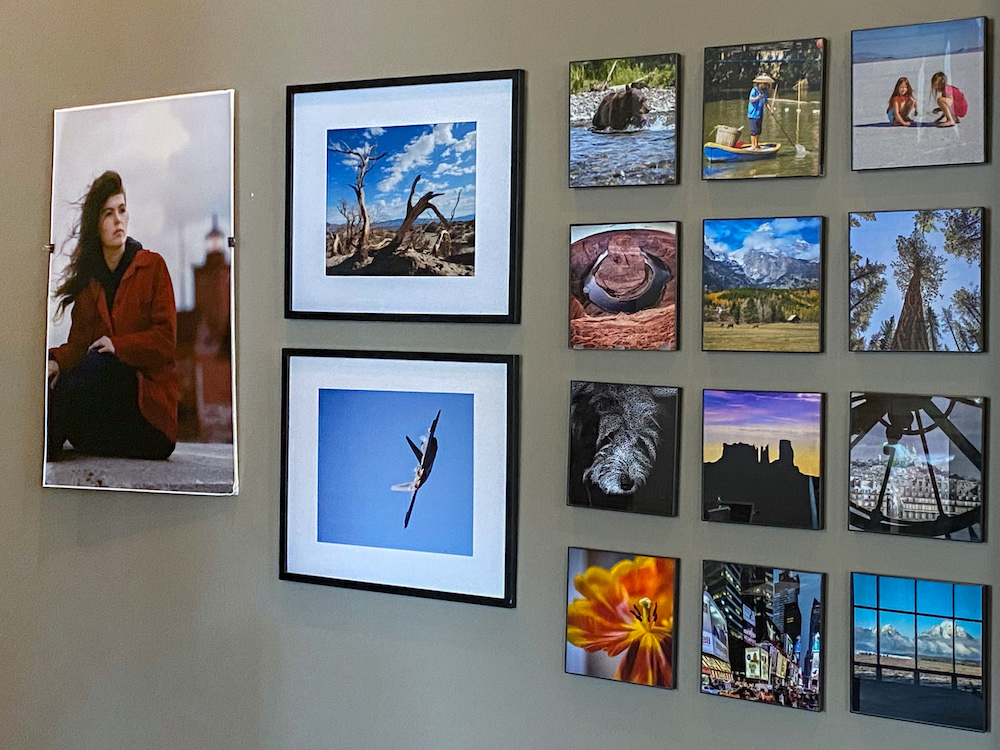
here is a small section of the wall with three different sizes
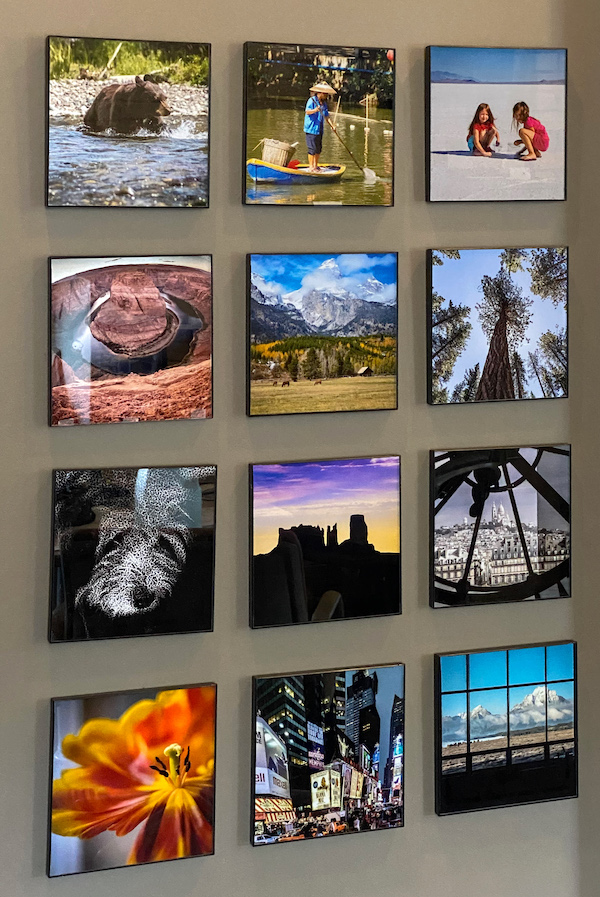
these are all 8″ x 8″ prints
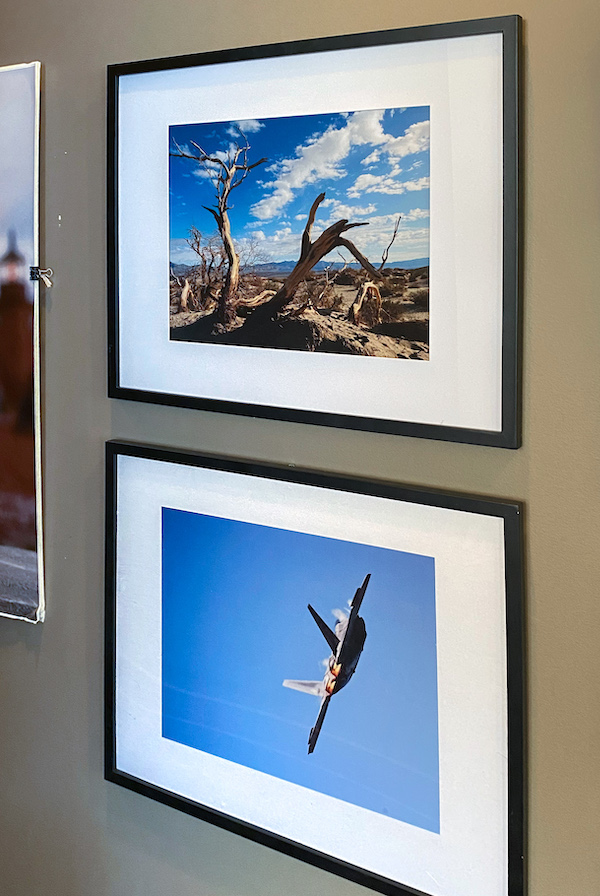
these two prints are mounted in larger 16″ x 20″ frames
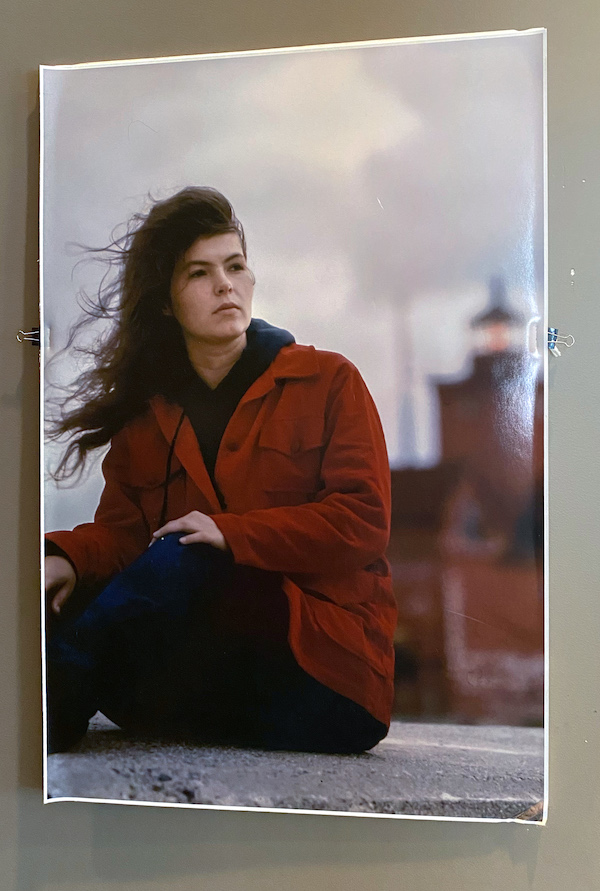
this single print is 24″ x 36″
So get those images out of your “To Be Printed” folder.
When your “To Be Printed” folder gets filled again, you can simply change the photos.
Remember that you don’t have to think big; smaller sizes make attractive displays.
UnFramed
23rd March 2021
Bringing the Feel of Paris to My Living Room
As the river Seine flows from central France to the English Channel it disects Paris the City of Light. In turn, the river is responsible for the large number of bridges that connect the two sides of the city – known as the left bank and the right bank.
By far, my favorite is the Pont Alexandre III, an elaborately decorated structure with gold colored statues at both ends, intricate sculptures arranged along the width of the arches, black elegant light posts, a generous pedestrian walkway.
|
|
 I took this photograph of Pont Alexandre III in 2008. Notice how the gold painted sculptures contribute to the bridge’s beauty. |
|
|
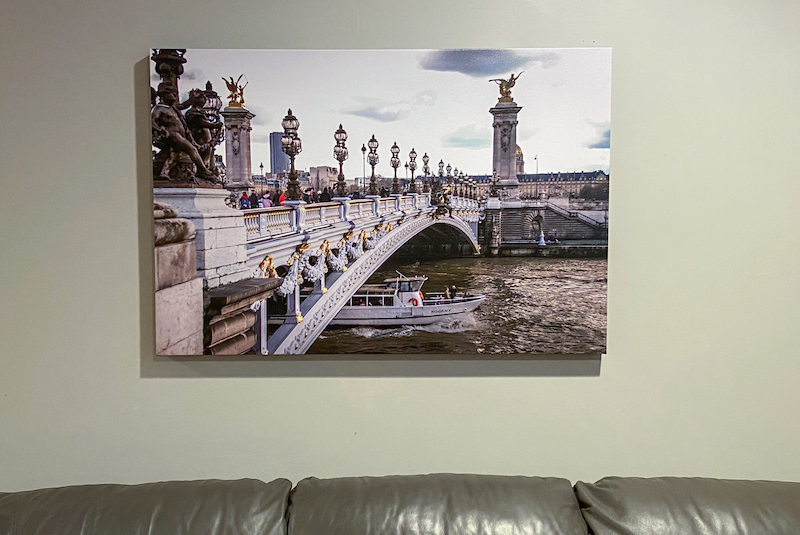 I decided to add a touch of Paris to our home and had the photograph made into a large canvas print. It is a wraparound canvas – the image edges fold over the internal wooden frame to create a simple hanging piece. The canvas print now decorates our living room. |
|
|
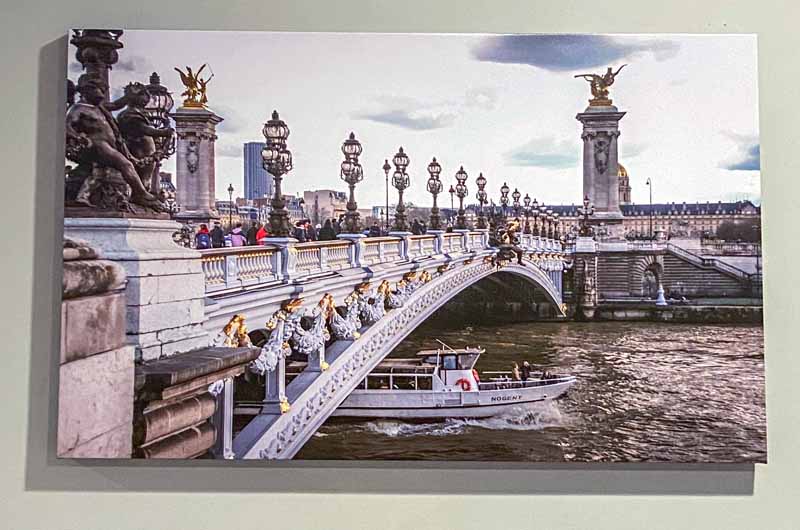 Here’s a close up of that canvas hanging. Its size is 36″ x 24″. You can see that the print closely resembles the original digital image taken in 2008. |
|
|
 Moving even closer to the canvas you can see more of the bridge detail. Despite the rough texture of the canvas print surface the detail remains quite sharp. |
|
|
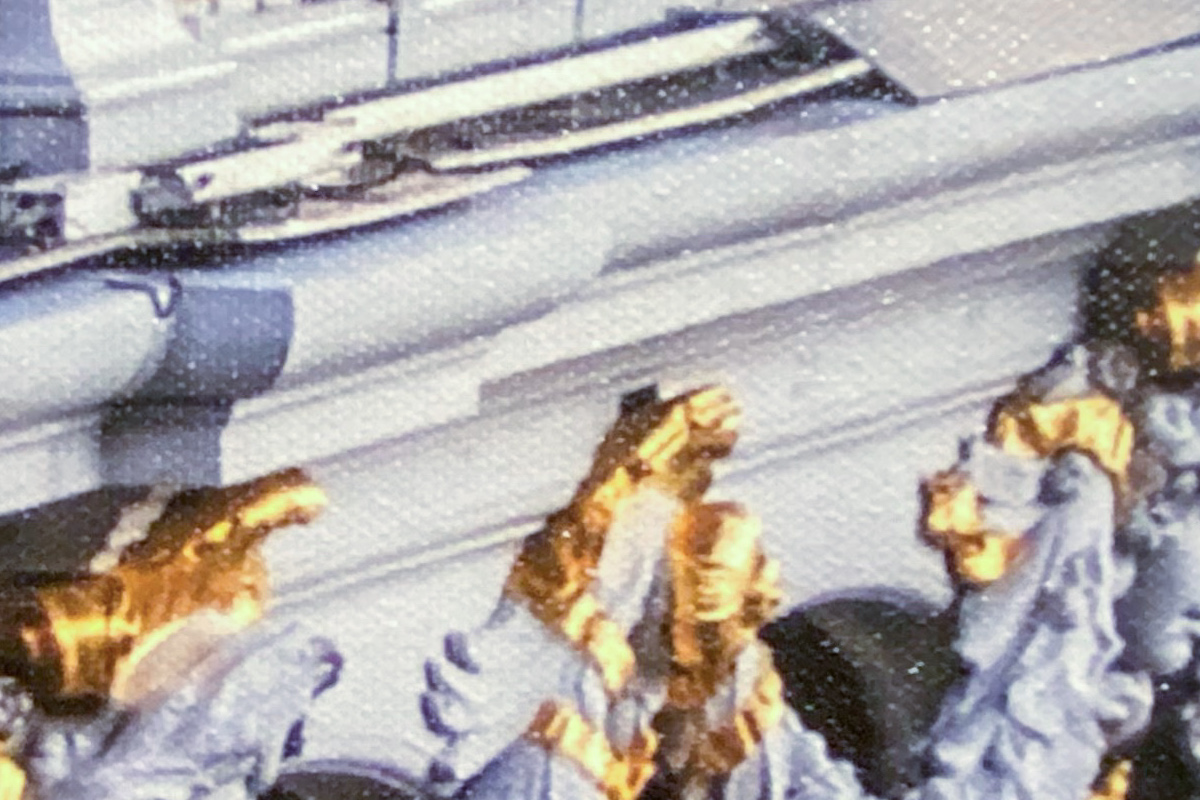
From the above photo I enlarged a small section. While you can clearly see the textured surface, you can also see how the print retains its sharp detail.
What’s your favorite vacation spot? You can easily bring your past travels into your home.
Don’t let your photos sit in a proverbial shoe box. Get them out of there and show them to the world.
Newer Posts »