Online Magazine
Recent Posts
- Safeguard your Cellphone Photos
- Black & White to Color – Instantly
- Wearing Many Hats
- Video Roundup
- Rescuing Your Blurry Pictures
- Showing Their Age
- What is Your Angle?
- Panorama Photos
- Humorous Photos
- Close Ups
- Fisheye Pictures
- Photo Antiquities
- Printing Big
- Appreciating Scale
- Celebrity Sightings
Tags
More Places to Go
- Free "How-To" Books “How To” books for popular cameras 0
- Vist Us on Facebook keep in touch with us on Facebook 2
Archives
- July 2023 (1)
- March 2023 (2)
- February 2023 (1)
- December 2022 (1)
- October 2022 (1)
- September 2022 (8)
- August 2022 (9)
- July 2022 (1)
- June 2022 (1)
- June 2021 (1)
- May 2021 (1)
- March 2021 (5)
- February 2021 (4)
- January 2021 (2)
- April 2019 (1)
- March 2019 (1)
- February 2019 (1)
- October 2018 (2)
- April 2018 (1)
- March 2018 (4)
- February 2018 (1)
- November 2017 (1)
- August 2017 (1)
- June 2017 (1)
- April 2017 (1)
- March 2017 (5)
- February 2017 (2)
- January 2017 (1)
- October 2016 (1)
- September 2016 (1)
- August 2016 (1)
- July 2016 (1)
- May 2016 (1)
- April 2016 (1)
- March 2016 (2)
- February 2016 (1)
- January 2016 (2)
- December 2015 (1)
- November 2015 (1)
- October 2015 (3)
- April 2015 (1)
- March 2015 (5)
- February 2015 (1)
- January 2015 (4)
- December 2014 (2)
- November 2014 (5)
- October 2014 (2)
- September 2014 (1)
- August 2014 (2)
- July 2014 (1)
- May 2014 (1)
- April 2014 (5)
- March 2014 (5)
- December 2013 (2)
- November 2013 (18)
- October 2013 (1)
- September 2013 (1)
- August 2013 (1)
- July 2013 (1)
- June 2013 (3)
- May 2013 (1)
- April 2013 (2)
- March 2013 (1)
- February 2013 (1)
- January 2013 (1)
- December 2012 (1)
- November 2012 (2)
- October 2012 (2)
- September 2012 (5)
- August 2012 (2)
- July 2012 (1)
- June 2012 (1)
- May 2012 (1)
- April 2012 (4)
- March 2012 (1)
- February 2012 (1)
- January 2012 (3)
- December 2011 (1)
- November 2011 (3)
- October 2011 (1)
- September 2011 (2)
- August 2011 (2)
- June 2011 (3)
- May 2011 (4)
- April 2011 (8)
- March 2011 (8)
- February 2011 (10)
- January 2011 (6)
- December 2010 (11)
- November 2010 (14)
- October 2010 (6)
- September 2010 (12)
- August 2010 (2)
- July 2010 (4)
- June 2010 (3)
- May 2010 (1)
- April 2010 (1)
- March 2010 (2)
- February 2010 (1)
- January 2010 (1)
- December 2009 (1)
- November 2009 (2)
- October 2009 (2)
- September 2009 (1)
- August 2009 (3)
- July 2009 (2)
- June 2009 (1)
- May 2009 (2)
- April 2009 (1)
- March 2009 (2)
- February 2009 (1)
- January 2009 (3)
Safeguard your Cellphone Photos
01st July 2023
Have you Backed Up Your Photos?
Many of the photographs that you take are non-replaceable. Whether they are snapshots of family, birthday, anniversary, reunion or other events, most likely they are important possessions that you do not want to lose.
In the days before digital photography, many of us stuffed negatives, slides and snapshots in the proverbial shoebox for safekeeping. But with the advent of digital cameras photography became easier and less expensive resulting in a steep increase of the number of pictures and videos that we took. And of the number has literally exploded with the addition of our always handy cellphone camera.
The question is – are we taking the steps to backup and/or organize all of our photos and videos? Nowadays there are a myriad ways to store images. The one you choose is based on the amount of effort you have to expend to backup and organize your stash and the cost for storing them.
Here’s a few of the ways that I backup and organize my photos and videos. From here on in when I refer to images this is to be both photographs and videos.
Cellphones fall into either the Apple iOS category or the Android category. And since your cellphone doubles as cameras, it’s a good idea to backup the images regularly.
While I’m insistent on safeguarding the images on my cellphone, I’m also interested in doing so as easily and inexpensively as possible. So I’ve chosen several ways to do this that are simple and automated.
My cell is an iPhone so I don’t have a lot of experience with Android models. Android owners can use both the Google and Amazon services for backup up their images.
Apple Photos app
My iPhone can automatically upload all of my photos to the Apple cloud for safekeeping.
- Go to the Settings menu:
- Beneath your name choose Apple ID, iCloud+, Media & Purchases.
- Choose iCloud
- Choose Photos
- Next to Sync this iPhone turn the button on
Apple iCloud users are entitled to 5GB of storage with their account. This amount of storage is enough for about 2500 photos of average size. For larger photo collections, you can purchase 50GB additional storage for $.99 (99 cents) a month. I have 8,000 photos and 1,300 videos in my current collection. If you have a huge collection you can purchase 2TB of storage for $9.99 a month.
Google Photos app
I also have Google Photos app installed on my iPhone. Google Photos copies the photos on my iPhone to my Google Library in the cloud. I purchased 100 GB of storage which cost $1.99 per month. Currently I have more than 30,000 images but using only 36 GB of the allocated storage. There are other options to purchase additional storage on the Google cloud. For Android users the Google Photos app has an option to backup the photos on your cell phone to your Google Library in the cloud.
Google Photos has features to edit, add descriptions and comments, identify faces, organize images into albums and share images.
Google Photos users are entitled to 15GB of storage with their account. This amount of storage is enough for about 7500 photos of average size. For larger photo collections, you can purchase 100GB additional storage for $1.99 a month.
Amazon Photos app
The Amazon Photos app is also installed on my iPhone. Amazon Prime members receive unlimited free storage for photos and 5 GB for videos. You can use either their iOS (iPhone/iPad) or Android app to automatically backup your images. Non-Prime members can purchase 100 GB of storage on the Amazon cloud for $19.99 per year ($1.66/month). Currently, I have about 9,000 photos and 2000 videos stored on the Amazon’s cloud using 82 GB of storage.
Amazon Photos has features to edit, apply filters, add text and organize images into albums or groups and share images.
As you can see, I have safeguarded my cellphone photos in three different places. Maybe it’s “overkill” to have three different backups but the process is automatic. Since I have more images than the allotted free space for the various services I don’t mind the few dollars a month since it saves me the worry that I might otherwise loose an important event.
It’s easy and either free or inexpensive so please don’t forget to protect your photos and videos.
Written by: Arnie Lee
Rescuing Your Blurry Pictures
02nd December 2022
The early days of picturetaking had me carefully setting up to take that spectacular photo, sending the film off to develop and patiently waiting for the prints come back from the photofinisher. Unexpectedly I experienced much disappointment when I looked through the returned pictures only to see my favorite subject as a blurred image. The cause may have been my sloppy focusing or me shaking the camera while using a slow shutter speed. No matter, the result was a missed opportunity.
When I review my large collection of photos – especially the older ones – I’m amazed how many aren’t “tack sharp”. Before the advent of autofocus cameras, we had to rely on manual focus techniques to keep the lens properly set. And before the advent of higher ISO film, we had to rely on stabilizing techniques to minimize the camera shake. In my younger days I must have been a photographer with sloppy habits and this explains why I have a bunch of blurry photos from back then.
A few weeks ago I learned of a software product that supposedly “fixed” blurred photos. After reading a couple of reviews of Topaz AI I decided to give it a try. In addition to sharpening images it can reduce image noise and can boost image resolution.
Topaz AI can be used by itself (standalone) or as a plug-in (helper) for Adobe Lightroom or Photoshop. I have used it as a standalone but most often as a plug-in for Lightroom.
Here’s a quick look at how Topaz AI can make those blurry pictures go away.
Below is a photograph taken with film in the early 1970’s using a manual focus camera. You can see that the original image on the left is not quite in focus.
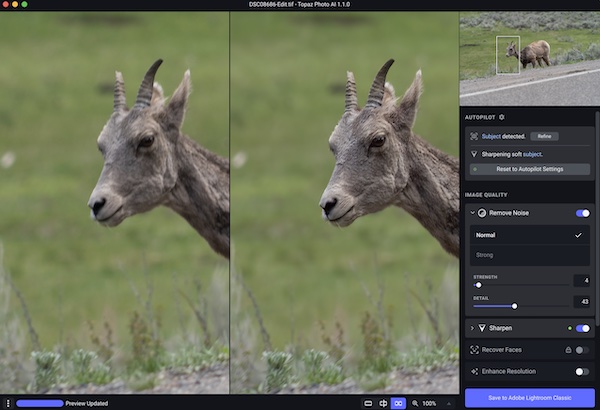
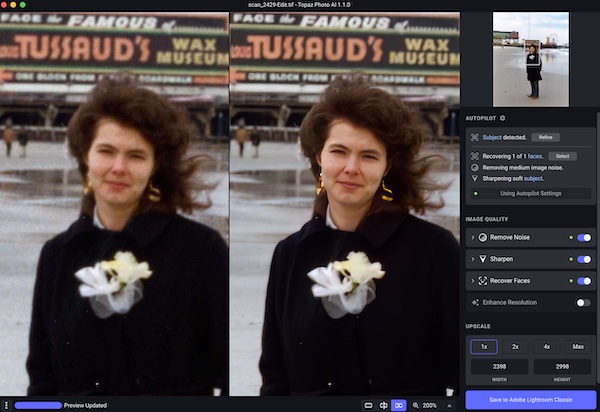 Here I’ve started Topaz AI to process the original image. This is the Topaz AI screen. On the left half of the split screen is the original image while the right half shows the improved image. On the far right is the control panel. By default the software analyzes the image and applies the changes that it believes will improve its appearance. |
|
|
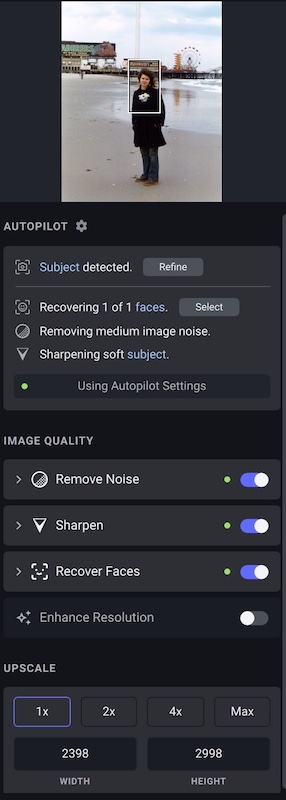
This is an enlargement of the Topaz AI control panel. At the top is a thumbnail of the original image. Move the thumbnail rectangle to view different parts of the original image. In this case Topaz has used its Autopilot settings to find a subject’s face in the original image, apply medium noise reduction and sharpen the subject in the image. You can override these settings if you do not care the resulting changes. You can see that the buttons to Remove Noise, Sharpen and Recover Faces have already been activated (blue) but the Enhanced Resolution has not been activated (grey). If you want to increase the resolution of the original image (Upscale), you can do so by selecting 1X, 2X, 3X, 4X or Max. You might use this if you’d like to make a poster size enlargement from your original image. I did not increase the image resolution. The dimensions of the resulting image are displayed below the enhance resolution choices. |
 |
|
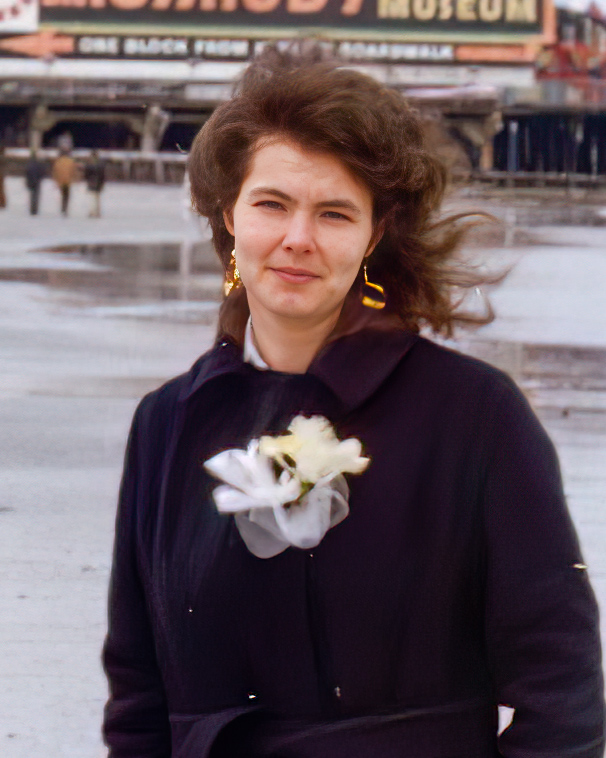
Here are portions of the original and “fixed” versions of the image. |
|
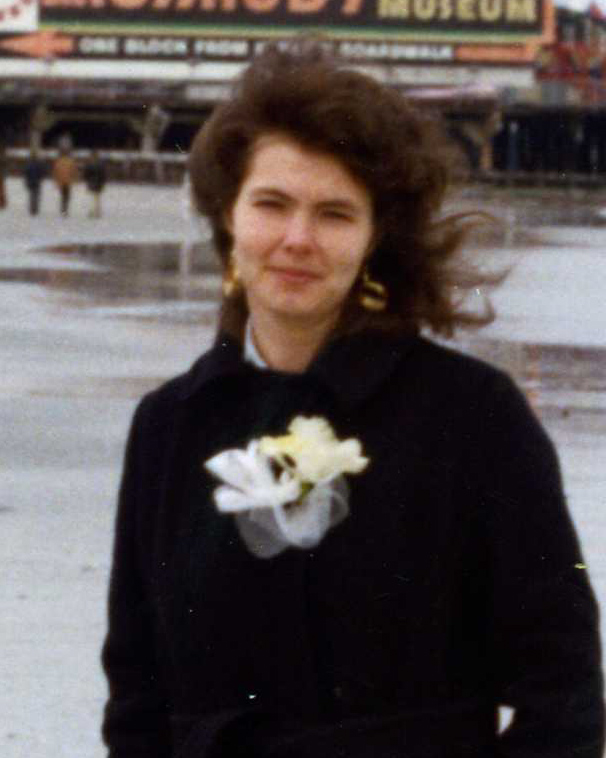 original image – click to enlarge |
 |
|
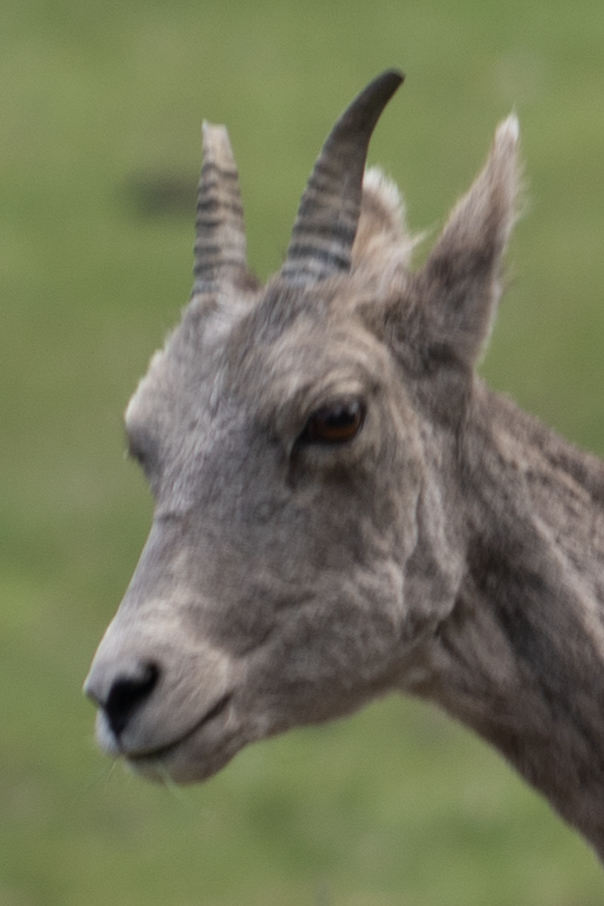
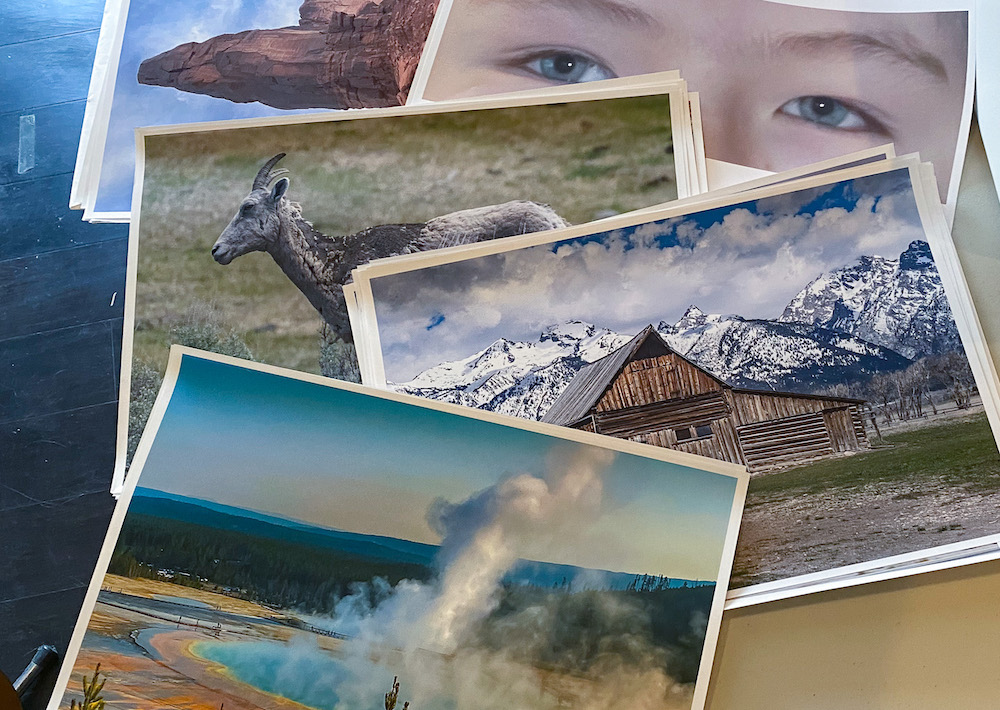
Clearly you can see that Topaz AI has done a remarkable job in removing the cause of the bad focus in original image. Next is a second image that suffered from focus blur caused by my rush to capture the bighorn sheep before it got away. The original was taken in May 2022 using a digital camera: Below are portions of the original and improved images of the bighorn sheep. |
|
 |
 |
|
Without any changes to the Topaz AI settings this software has produced an amazing image. It has saved another one of my photos from the “throwaway” pile. |
|
For those of you who may be interested in this software, you can get a free trial version for either Mac or Windows personal computers. Visit Topaz Labs and look for the Photo AI package.
Printing Big
13th September 2022
Large Size Prints Without a Large Price
Some call me “old school” but I’m not a big fan of showing pictures on the tiny screen of my cellphone.
Quite often I print some of my favorite shots onto photo paper. With my Epson ET-3750 Printer I’ve made hundreds of 4″x6″ prints and dozens of larger 8-1/2″x11″ enlargements. In the two years that I’ve had the ET-3750 printer I have never had to change an ink cartridge. The printer’s large EcoTanks are refillable making the cost of the prints very affordable.
Every so often I’ll take a picture that I’d like to show off – meaning print a bigger enlargement. Earlier this year I found out about the Epson ET-8550 EcoTank that handles paper up to 13″x19″ at an affordable $600 price.
Here’s a few short steps for setting up the printer for use.
|
|
|
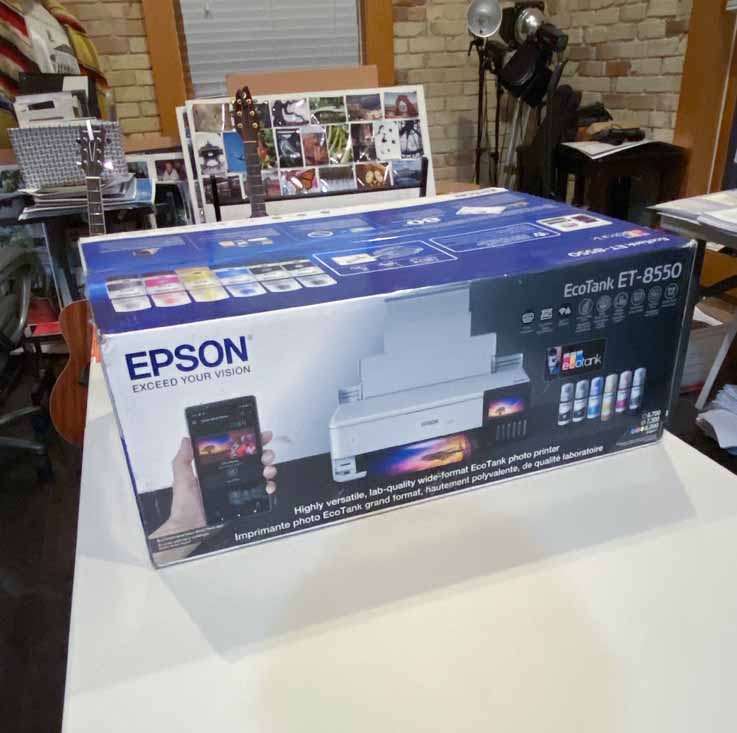 The shipping carton is about 30″ x 20″ x 10″ and weighs about 20 lbs. The shipping carton is about 30″ x 20″ x 10″ and weighs about 20 lbs. |
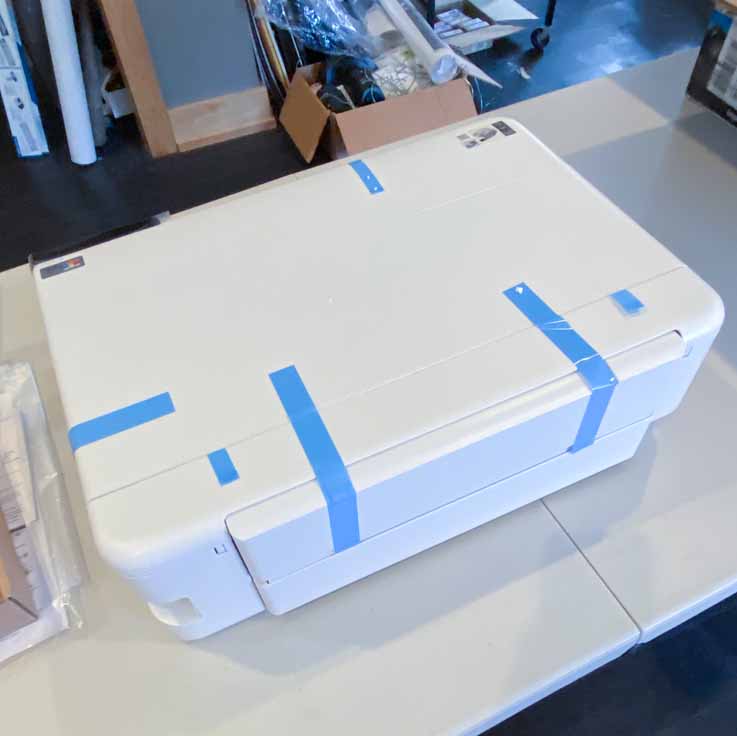 The bright blue tape secures the parts during shipment is easily removed. The bright blue tape secures the parts during shipment is easily removed. |
|
|
|
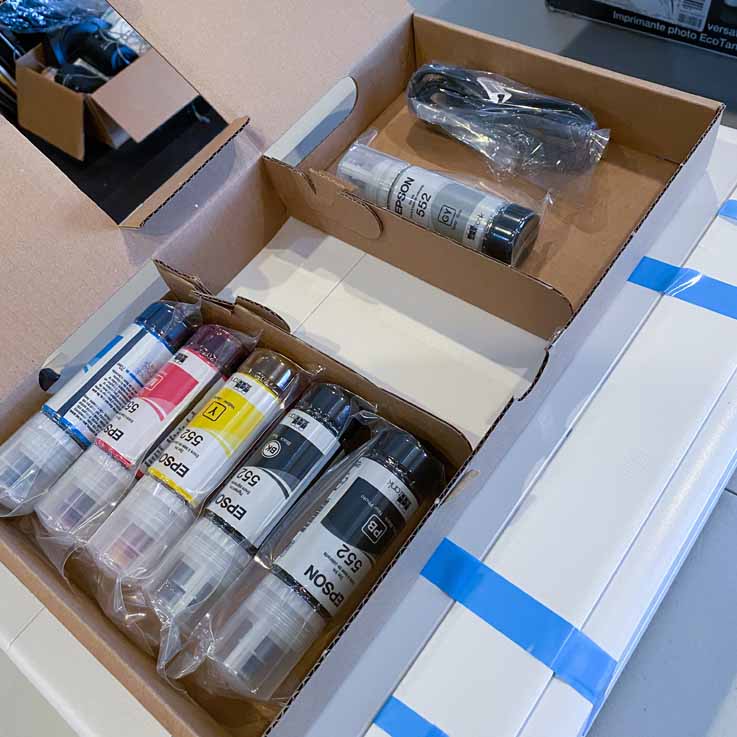 The printer uses four inks: cyan, magenta, yellow and black. The shipment includes a second bottle of black ink. The printer uses four inks: cyan, magenta, yellow and black. The shipment includes a second bottle of black ink. |
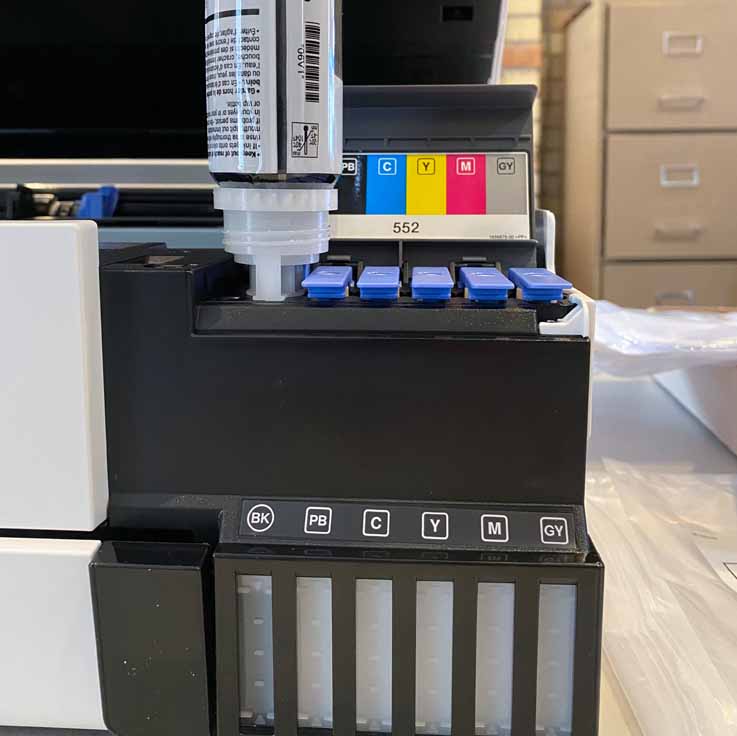 Each ink bottle fills the respective reservoir. The bottles are “coded” to prevent inadvertent filling mistakes. Each ink bottle fills the respective reservoir. The bottles are “coded” to prevent inadvertent filling mistakes. |
|
|
|
 You can visually view the level of each ink reservoir. The ink supply will yield about 2400 4″x6″ prints for about 4 cents each. You can visually view the level of each ink reservoir. The ink supply will yield about 2400 4″x6″ prints for about 4 cents each. |
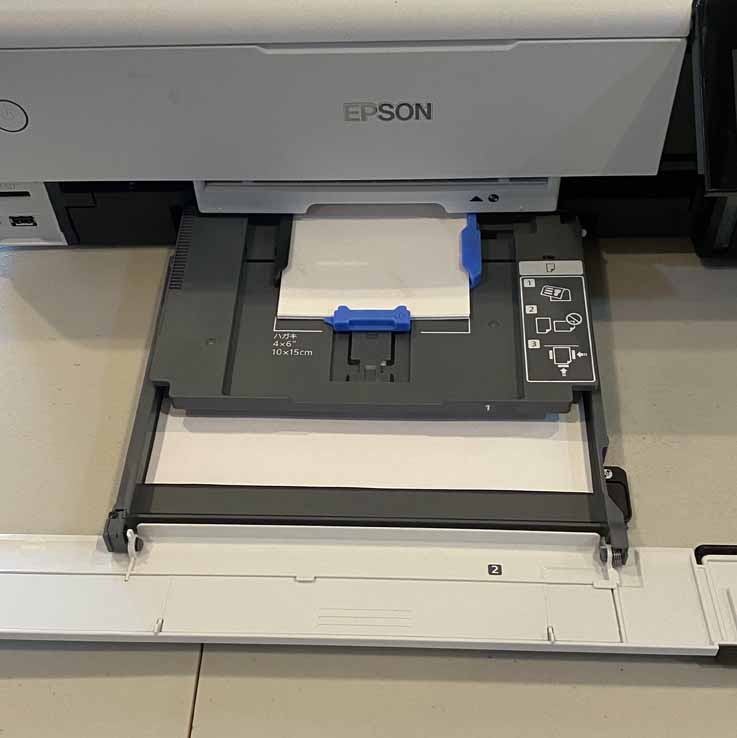 The bottom tray holds smaller paper (e.g. 4″x6″) and larger (8-1/2″x11″). The rear paper feeder holds larger paper up to 13″x19″. The bottom tray holds smaller paper (e.g. 4″x6″) and larger (8-1/2″x11″). The rear paper feeder holds larger paper up to 13″x19″. |
|
|
|
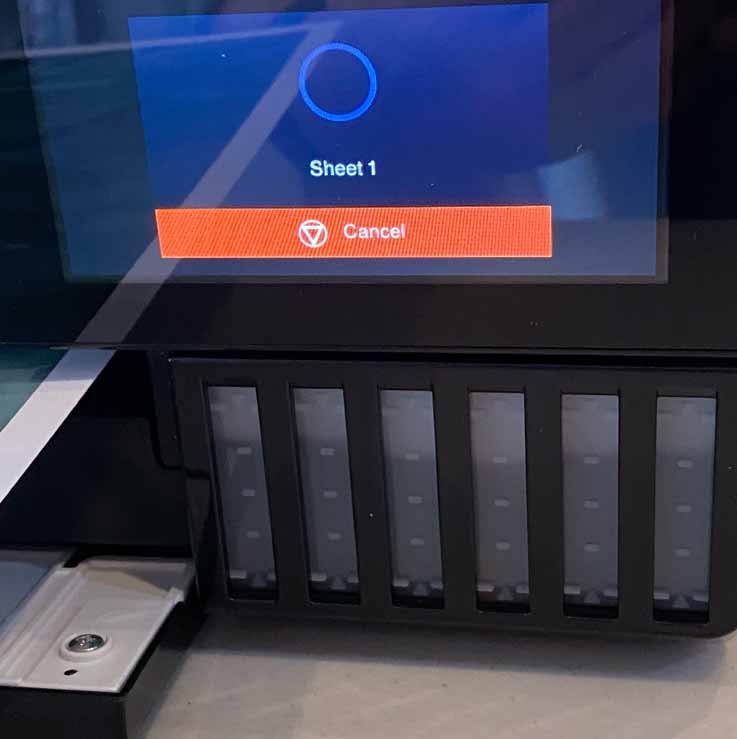
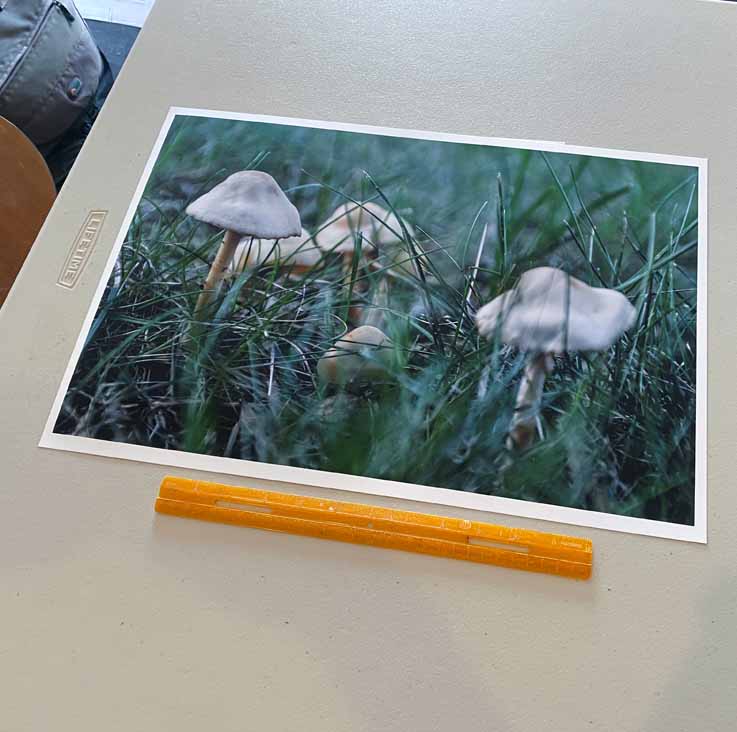
 Here is a completed 13″x19″ print. You can see the rear paper feeder. Here is a completed 13″x19″ print. You can see the rear paper feeder. |
 |
|
|
|
This timelapse is just an example of it’s operation making a 13″x19″ print.The printer doesn’t actually work this quickly.
As you can see I’ve been able to make a bunch of big enlargements – at a reasonable price.
The ET-8550 has other features other than its large print capability.
-
Wireless connection to your Mac or Windows PC
Two-sided printing
High resolution document scanning and copying up to 8-1/2″ x 14″
Handles variety of papers including glossy, matte, texture, cardstock
For those of you who like to print big – this is an affordable and capable printer.