Online Magazine
Recent Posts
- Safeguard your Cellphone Photos
- Black & White to Color – Instantly
- Wearing Many Hats
- Video Roundup
- Rescuing Your Blurry Pictures
- Showing Their Age
- What is Your Angle?
- Panorama Photos
- Humorous Photos
- Close Ups
- Fisheye Pictures
- Photo Antiquities
- Printing Big
- Appreciating Scale
- Celebrity Sightings
Tags
More Places to Go
- Free "How-To" Books “How To” books for popular cameras 0
- Vist Us on Facebook keep in touch with us on Facebook 2
Archives
- July 2023 (1)
- March 2023 (2)
- February 2023 (1)
- December 2022 (1)
- October 2022 (1)
- September 2022 (8)
- August 2022 (9)
- July 2022 (1)
- June 2022 (1)
- June 2021 (1)
- May 2021 (1)
- March 2021 (5)
- February 2021 (4)
- January 2021 (2)
- April 2019 (1)
- March 2019 (1)
- February 2019 (1)
- October 2018 (2)
- April 2018 (1)
- March 2018 (4)
- February 2018 (1)
- November 2017 (1)
- August 2017 (1)
- June 2017 (1)
- April 2017 (1)
- March 2017 (5)
- February 2017 (2)
- January 2017 (1)
- October 2016 (1)
- September 2016 (1)
- August 2016 (1)
- July 2016 (1)
- May 2016 (1)
- April 2016 (1)
- March 2016 (2)
- February 2016 (1)
- January 2016 (2)
- December 2015 (1)
- November 2015 (1)
- October 2015 (3)
- April 2015 (1)
- March 2015 (5)
- February 2015 (1)
- January 2015 (4)
- December 2014 (2)
- November 2014 (5)
- October 2014 (2)
- September 2014 (1)
- August 2014 (2)
- July 2014 (1)
- May 2014 (1)
- April 2014 (5)
- March 2014 (5)
- December 2013 (2)
- November 2013 (18)
- October 2013 (1)
- September 2013 (1)
- August 2013 (1)
- July 2013 (1)
- June 2013 (3)
- May 2013 (1)
- April 2013 (2)
- March 2013 (1)
- February 2013 (1)
- January 2013 (1)
- December 2012 (1)
- November 2012 (2)
- October 2012 (2)
- September 2012 (5)
- August 2012 (2)
- July 2012 (1)
- June 2012 (1)
- May 2012 (1)
- April 2012 (4)
- March 2012 (1)
- February 2012 (1)
- January 2012 (3)
- December 2011 (1)
- November 2011 (3)
- October 2011 (1)
- September 2011 (2)
- August 2011 (2)
- June 2011 (3)
- May 2011 (4)
- April 2011 (8)
- March 2011 (8)
- February 2011 (10)
- January 2011 (6)
- December 2010 (11)
- November 2010 (14)
- October 2010 (6)
- September 2010 (12)
- August 2010 (2)
- July 2010 (4)
- June 2010 (3)
- May 2010 (1)
- April 2010 (1)
- March 2010 (2)
- February 2010 (1)
- January 2010 (1)
- December 2009 (1)
- November 2009 (2)
- October 2009 (2)
- September 2009 (1)
- August 2009 (3)
- July 2009 (2)
- June 2009 (1)
- May 2009 (2)
- April 2009 (1)
- March 2009 (2)
- February 2009 (1)
- January 2009 (3)
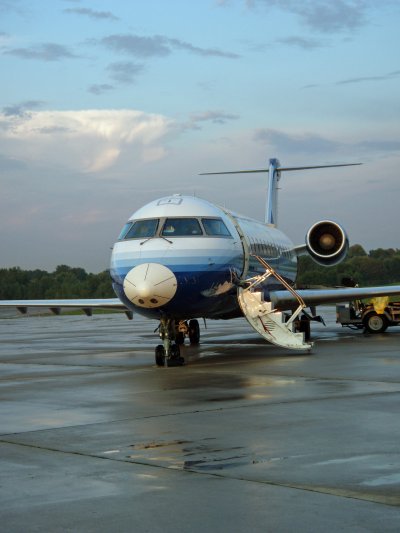
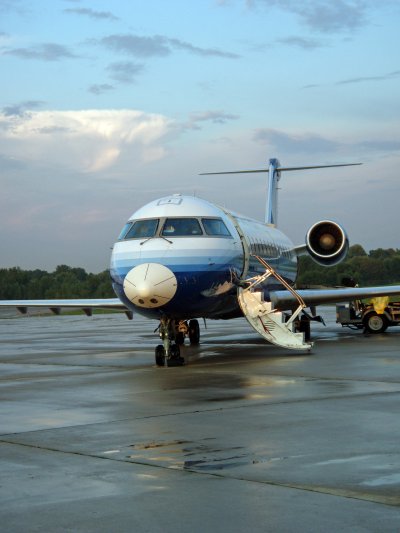
Shooting Planes
30th November 2010
Aviation Photography
learn from my many years of practice |
|||
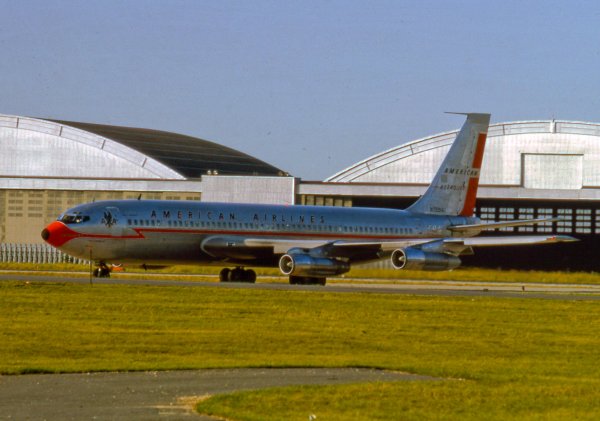
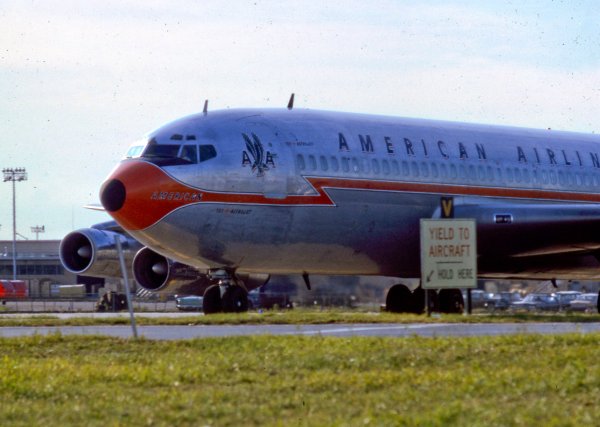
| Over the years, I’ve shot many planes – with a camera. In fact, I’ve been interested in aviation for a long time. I began taking pictures of all things aviation at a young age and recall the excitement of visiting the airport to pick up relatives. I would race to the rooftop viewing area to catch a glimpse of the planes like these: | |||
|
|||
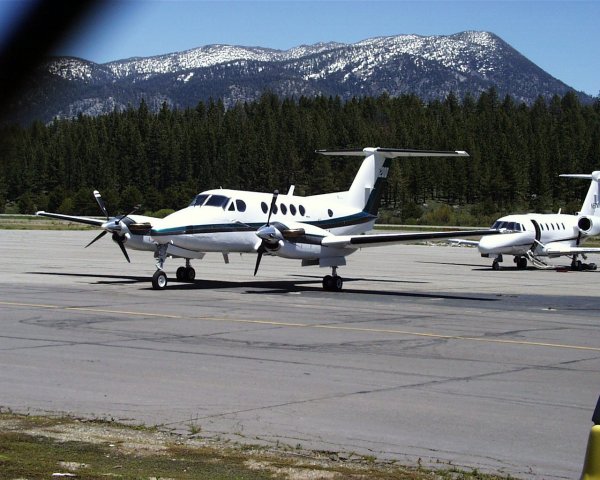
Let’s skip forward 30 years to the mid-1990s when our company has already become involved with flight simulation. I find myself immersed in the emerging new world of digital photography and am now ready to marry two of my long time interests: photography and aviation. With digital, the equipment and processing techniques are radically different from conventional film photography. But the basics of photography haven’t changed much. Therefore I’m in a position to benefit from my prior photographic know-how. The remainder of this article are a collection of tips that I hope you can use. TIP: you don’t have to buy an expensive digital camera to take quality aviation photos. Below, I’ve listed the camera used for each photo. But you’ll see from the wide range of equipment I’ve used, that the camera’s maximum resolution isn’t all that important unless you are going to make large, printed enlargements. You’ll see that for web pages, resolutions that starting at 1.4 MP and increasing to 10+ MP are all quite satisfactory. The vast array of digital cameras make taking aviation photos very forgiving …. and very inexpensive – verging on free. And with instant development that’s faster than a Polaroid, the built-in color LCD gives you immediate feedback so you can try again when you need to reshoot. You can hardly miss using a digital camera with silicon film and a computer as your darkroom. The first digital camera that I used was a single lens reflex (SLR) called the Olympus C-1400L. With a resolution of 1.4 MP and 3x zoom lens, it produced very acceptable images. To take the photo of the Beech B200 below, I was standing behind a chain link fence. You can clearly see the vignetting of the image (shadow) at the upper left corner due to the fence. TIP: avoid fences Click the thumbnail below of the Beech B200 to see an enlargement. You’ll see that the photo is quite sharp and has a lot of detail. So you can see that 1.4 MP is quite adequate for photos that are destined for web pages. |
|||
|
|||
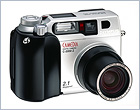
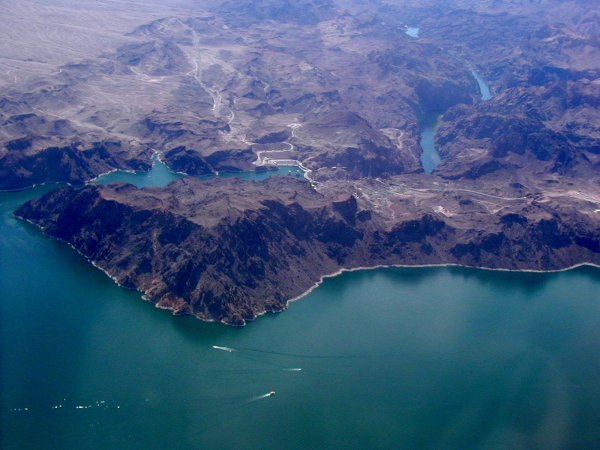
| A few years later, I graduated to the Olympus C-2000 with 2.1 MP resolution, also with a 3X zoom lens. The picture of Lake Mead was taken on approach into Las Vegas. TIP: sit by the window From my window seat, I was able to capture the rugged shoreline of the Colorado River / Lake Mead and the Hoover Dam. The resolution here is fine enough to capture the boats skimming across the water. Minimize the glare by keeping the lens close to the window surface. If the sunshine is falling on your window, you may not be able to take quality shots since the glare may be excessive. When you’re ready to take a picture out of the windows, sometimes the direction of sunshine is a matter of luck. | |||
|
|||
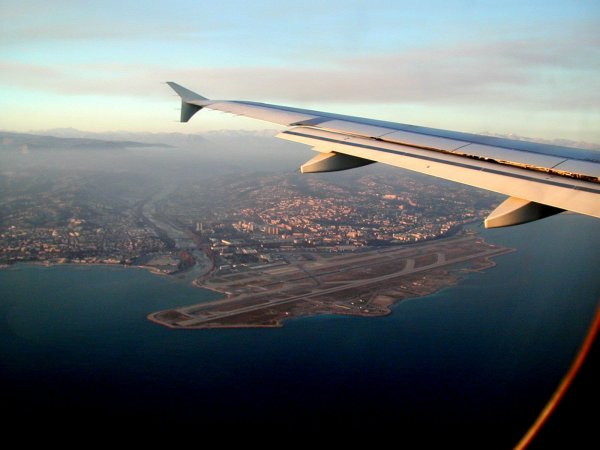
Aircraft normally make left-hand traffic – left hand turns on the approach to landing. So before the flight from Paris to Nice, I requested a window on the left side of the plane. This would allow me to see the approach to the airport over the blue Mediteranean. Had I been sitting on the right-hand side, I would be looking at a lot of sky as the pilot made left-hand turns! TIP: choose a window seat on the left side of the aircraft
|
|||
| Many photos of aircraft are taken through the window of an airport terminal. While this is often the most practical way to get your snapshots, shooting through the glass introduces an extra layer which can degrade the final image. TIP: when possible, get out from behind the glass Many airports have rooftop viewing areas which not only are glass free but get you closer to the the action. On the roof, you may have views of the tarmac that are totally inaccessible from the terminal below. | |||
|
|||
| Many of the most impressive aviation photos are of planes that are either taking off or landing. TIP: take shots of takeoffs and landings For takeoffs, wait until the nose wheel is lifting off the runway. For landings, wait until the main wheels are just making contact with the runway. With a little practice you’ll hit it just right. | |||
|
|||
| One common complaint is that photos taken with digital cameras often lack contrast. TIP: boost contrast with software This problem is often solved after-the-fact after you’ve transferred your images to the computer. Many photo editing programs offer the “auto levels” feature which enhances the contrast, adjusts the white balance and make the overall photo snappier and more pleasing. | |||
|
|||
| When shooting with lower cost digital cameras, there is often a delay between the time you take the first shot and the camera is ready for the next. If the delay is lengthy, you may miss an important photo. More capable cameras are able to capture multiple shots rapidly. TIP: be patient and don’t hurry the shot Very often, you’ll get the best shot by waiting patiently until the plane passes at the closest point to the camera. Below, you can see that by waiting for only a short time I was able to capture the right hand shot with much more detail. | |||
|
|||
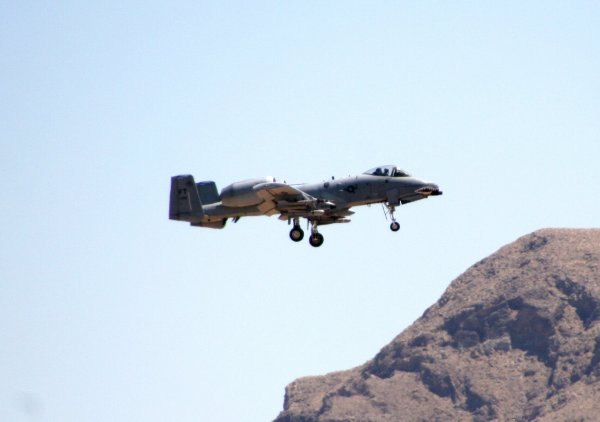
| For action shots, you’ll need to use a high shutter speed. TIP: use a shutter speed high enough to stop the action A shutter speed of 1/300 or shorter is usually able to stop the action. Most digital SLR cameras have a sports mode which can be used to photograph flying aircraft. With other digital cameras you can set the shutter speed manually. The fast-moving A-10 below was shot using the sports mode. | |||
|
|||
| Get the lighting right. For maximum detail, you’ll want to make sure that the sunlight is shining over your shoulder as you shoot. TIP: keep the sun shining over your shoulder Backlighting (light coming from behind the subject) makes for great silhouettes and shots of the sun, but it usually hides or obscures the detail. For best results, keep the light behind the camera. | |||
|
|||
| Now is a good time to take the camera out of its case and head on down to the airport. I’ve found the best way to gain proficiency is to take shot after shot after shot. Afterwards, review the captured images to see your results and adjust your techniques accordingly. After all, digital film is free.
For other examples, visit our Photo Gallery that has hundreds of other aviation related photos. To view another fantastic site with very impressive photos taken by talented photographer Ralph Duenas and other members, visit Jet Wash Images |
|||
|
|||
| Author: Arnie Lee Unless otherwise noted, photos are from the author’s personal collection. |


Good Photos Can Come Cheap
28th November 2010
I’ve been interested in photography since I was a very young kid; so much so that I wanted to study photography at college. However, I somehow became distracted and ended up studying something completely different. Yet for these past 50 years, photography has remained a professional interest.
I’ve also been involved with computers for my entire working life. In the early 70’s, there was no such thing as a personal computer. When PCs started to appear about 1976, I yearned for a way to marry the computer with photography. But the movement to digital imagery was slower than even molasses. Of course we know that this has all changed in the past ten years or so and now digital is the standard – having all but replaced conventional film photography.
(more…)
Winter Care For Your Camera
27th November 2010
The cold weather of winter is now upon us here in the upper midwest, but that doesn’t mean there won’t be plenty of opportunities for wonderful photographs. What it does mean, however, is that you’ll need to take extra care of your camera when you’re out in the cold. This is true for both digital SLRs and point-and-shoots.
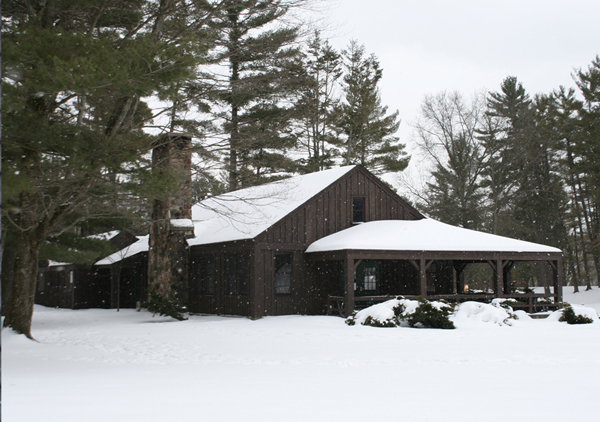 Snow scenes require special care for your camera |
You can help your camera stay warm as possible by keeping it under your coat. This will not only help it keep warm but will also protect it from the elements. The same is true for an external flash unit if you’re using one.
Another precaution against the cold is to bring spare batteries with you when you go outside. The batteries in your camera are likely to lose power faster at lower temperatures even if you’re not using the camera. Therefore, carry at least one extra set of batteries in your coat pocket where your body heat will keep them warm. Then, if your camera or flash batteries begin to fail, you can insert warm fresh batteries.
Condensation may be a problem you’ll have when you come inside from the winter cold. You’ve probably seen condensation on a glass of icy lemonade on a hot summer day. Your camera, especially the lens, is affected the same way when you bring it inside from the cold. The moisture from the warm air inside condenses on the cold surfaces of not only the lens, which can become completely covered, but also on the camera.
You can prevent condensation by wrapping the camera in a plastic bag or newspaper until it slowly reaches room temperature. The moisture will settle on the outside of the newspaper or bag and not on the camera. An even better idea is to place the bag on the camera while you’re still outside before you bring the camera inside.
Don’t use the camera if you notice that condensation has occurred. Instead, remove batteries and memory card and leave the compartments open until everything dries out. Don’t use the camera or take it back out in the cold until the condensation has disappeared.
So by dressing appropriately and properly caring for your camera, you’ll be taking great photographs in the cold of winter.
 Dress appropriately and enjoy the fun of winter photography |
Written by Scott Slaughter
Newer Posts »