Online Magazine
Recent Posts
- Safeguard your Cellphone Photos
- Black & White to Color – Instantly
- Wearing Many Hats
- Video Roundup
- Rescuing Your Blurry Pictures
- Showing Their Age
- What is Your Angle?
- Panorama Photos
- Humorous Photos
- Close Ups
- Fisheye Pictures
- Photo Antiquities
- Printing Big
- Appreciating Scale
- Celebrity Sightings
Tags
More Places to Go
- Free "How-To" Books “How To” books for popular cameras 0
- Vist Us on Facebook keep in touch with us on Facebook 2
Archives
- July 2023 (1)
- March 2023 (2)
- February 2023 (1)
- December 2022 (1)
- October 2022 (1)
- September 2022 (8)
- August 2022 (9)
- July 2022 (1)
- June 2022 (1)
- June 2021 (1)
- May 2021 (1)
- March 2021 (5)
- February 2021 (4)
- January 2021 (2)
- April 2019 (1)
- March 2019 (1)
- February 2019 (1)
- October 2018 (2)
- April 2018 (1)
- March 2018 (4)
- February 2018 (1)
- November 2017 (1)
- August 2017 (1)
- June 2017 (1)
- April 2017 (1)
- March 2017 (5)
- February 2017 (2)
- January 2017 (1)
- October 2016 (1)
- September 2016 (1)
- August 2016 (1)
- July 2016 (1)
- May 2016 (1)
- April 2016 (1)
- March 2016 (2)
- February 2016 (1)
- January 2016 (2)
- December 2015 (1)
- November 2015 (1)
- October 2015 (3)
- April 2015 (1)
- March 2015 (5)
- February 2015 (1)
- January 2015 (4)
- December 2014 (2)
- November 2014 (5)
- October 2014 (2)
- September 2014 (1)
- August 2014 (2)
- July 2014 (1)
- May 2014 (1)
- April 2014 (5)
- March 2014 (5)
- December 2013 (2)
- November 2013 (18)
- October 2013 (1)
- September 2013 (1)
- August 2013 (1)
- July 2013 (1)
- June 2013 (3)
- May 2013 (1)
- April 2013 (2)
- March 2013 (1)
- February 2013 (1)
- January 2013 (1)
- December 2012 (1)
- November 2012 (2)
- October 2012 (2)
- September 2012 (5)
- August 2012 (2)
- July 2012 (1)
- June 2012 (1)
- May 2012 (1)
- April 2012 (4)
- March 2012 (1)
- February 2012 (1)
- January 2012 (3)
- December 2011 (1)
- November 2011 (3)
- October 2011 (1)
- September 2011 (2)
- August 2011 (2)
- June 2011 (3)
- May 2011 (4)
- April 2011 (8)
- March 2011 (8)
- February 2011 (10)
- January 2011 (6)
- December 2010 (11)
- November 2010 (14)
- October 2010 (6)
- September 2010 (12)
- August 2010 (2)
- July 2010 (4)
- June 2010 (3)
- May 2010 (1)
- April 2010 (1)
- March 2010 (2)
- February 2010 (1)
- January 2010 (1)
- December 2009 (1)
- November 2009 (2)
- October 2009 (2)
- September 2009 (1)
- August 2009 (3)
- July 2009 (2)
- June 2009 (1)
- May 2009 (2)
- April 2009 (1)
- March 2009 (2)
- February 2009 (1)
- January 2009 (3)
Running out of Ink?
15th June 2021
I quickly get tired of using my computer monitor to show others a photo or two. Of course one way to “fix” this is to make prints of these pictures. But this brings up another problem – making a bunch of prints quickly drains my ink cartridges and puts a dent in my wallet too.
A few weeks ago, I saw an advertisement for a printer that uses large, refillable ink tanks. My only hesitation was about the quality of the prints from a relatively inexpensive printer. With a money-back guarantee, I decided to go for it.
Sitting on my computer’s desktop is a folder labeled “To Be Printed”. As I take snapshots or find an interesting image, I drop it into this folder. By the time the printer arrived, I had accumulated close to a hundred images.
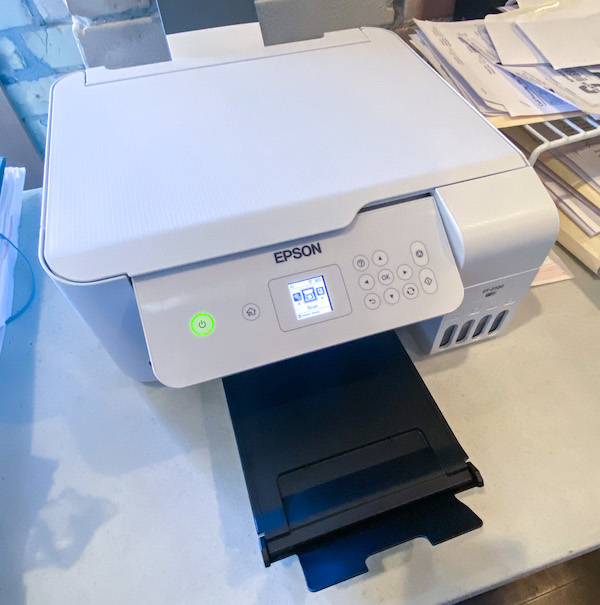
Here’s my experience with the Epson Ecotank 2720
|
|
|
 |
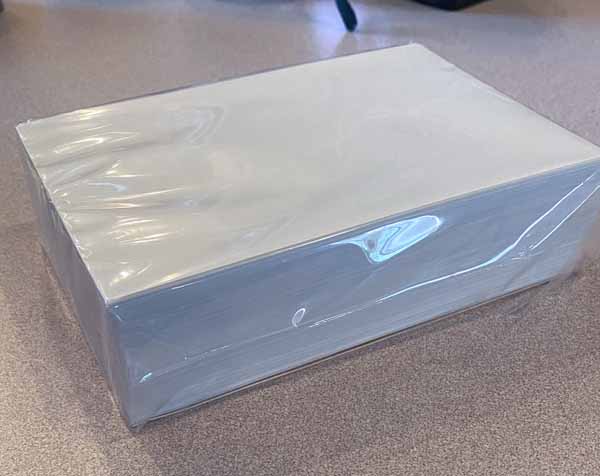 The printer itself is quite compact but capable of printing onto 8-1/2″ x 11″ media. I purchased the printer primarily to make smaller prints. Here’s my stack of 4″ x 6″ glossy photo paper. |
|
|
|
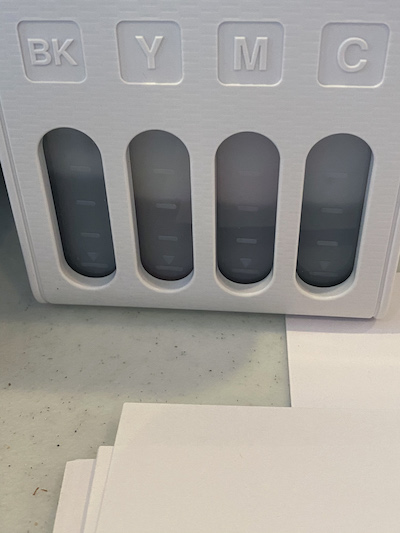
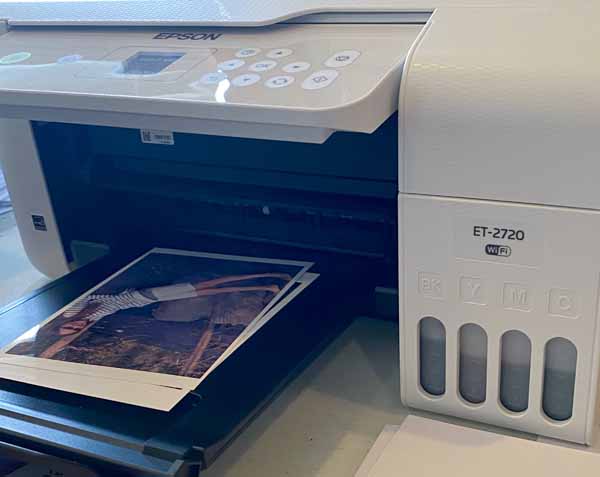 These are the first couple of prints that I made. Note the initial ink levels on the front of the printer. |
 During my first session with the new printer, I made about thirty 4″ x 6″ prints. |
|
|
|
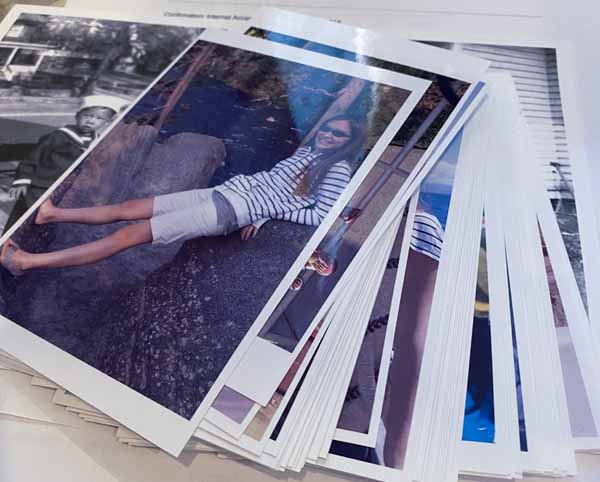
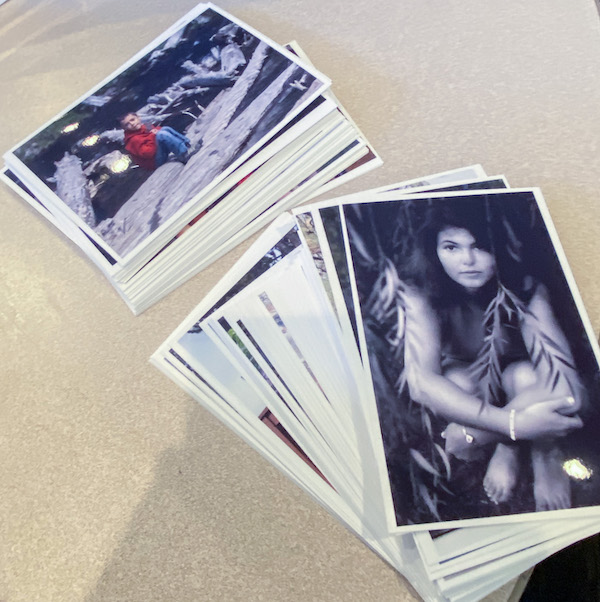 I found the print quality to be very good for both color and black and white images. |
 After printing my stack of 100 of so images, the ink levels dropped only slightly. |
|
|
|
Epson claims that out of the box the printer includes enough ink for about two years of “normal” printing. My guess is that the ink will not last that long for the type of printing that I intend to do. Refills cost about $50 per set. To date, I’m happy with this printer which set me back $200. Compared to other ink jet printers this is more costly, but factoring in the significantly lower cost of ink and the sparing me the inconvenience of having to run to the office supply store to get a replacement cartridge, I feel that this was a good purchase. The printer is “attached” to my computer via wi-fi so there are no cables to worry about. It also doubles as a copier and has a built-in scanner too. |
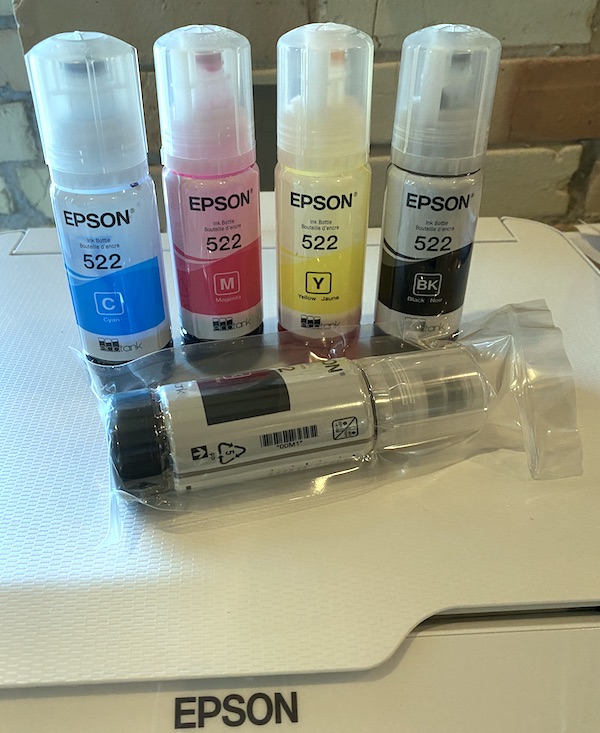 The printer ink is delivered in four containers – cyan, magenta, yellow and black with an additional black container. |
|
|
|
Epson claims that they provide enough ink
Fisheye On The Cheap
14th March 2021
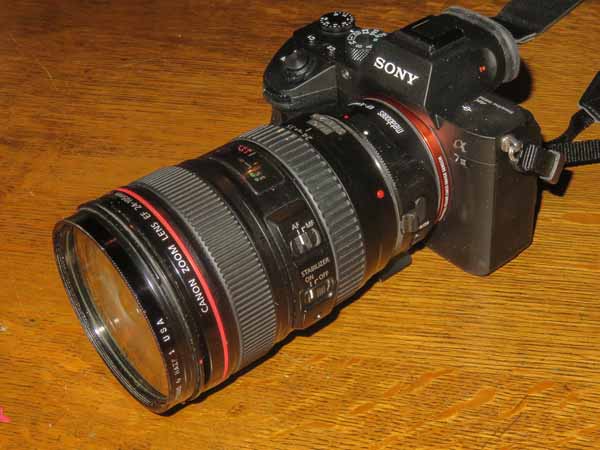
A few years ago I upgraded from a Sony NEX7 to the newer Alpha 6000.
The A6000 became my everyday walk around camera. But I didn’t want to let the NEX7 collect dust, nor did I want to spend a lot more investing in more glass.
The one drawback is that this lens is manual aperture control and manual focus but I decided that I could live with these limitations.
|
|
|
|
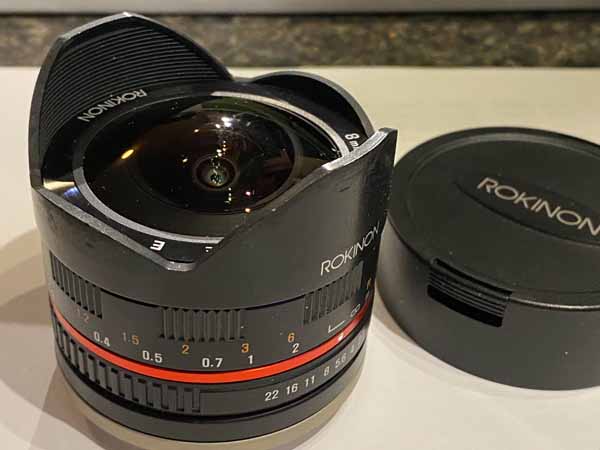
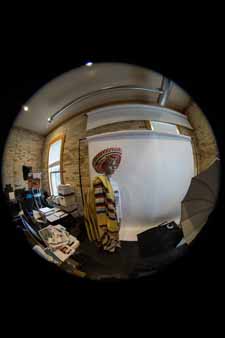
So I started looking for an inexpensive lens. My preference was to go wide so I did a little looking around and found an affordable 8mm fisheye. I’m a fan of the way the images are elegantly distorted by lens’ curvature. The lens adds lots of interest to common everyday scenery and subjects. The lens I chose is the 8mm Rokinon fisheye for about $300. When the 8mm lens is coupled on the camera’s APS-C sensor it is equivalent to a 12mm full frame lens. To use the lens, I set the camera to Auto ISO and using the manual exposure mode (M) rotate the aperture ring on the lens to a specific aperture (f/stop) and dial the shutter speed until the exposure indicator is centered. |
 |
|
|
|
 |
 |
| Measuring about 3″ long and weighing just a few ounces, it is miniscule compared to the two other DSLR fisheyes in my equipment stable. The Rokinon 8mm has a well-marked aperture ring, smooth focus ring, a small built-in sunshade and lens cap that total covers the outer lens surface. I am very happy that when mounted, my fisheye camera is very compact and easy to carry. | |
|
|
|
|
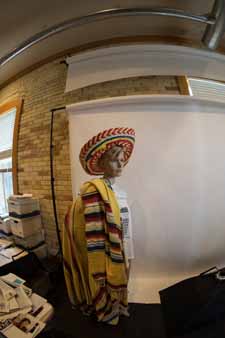
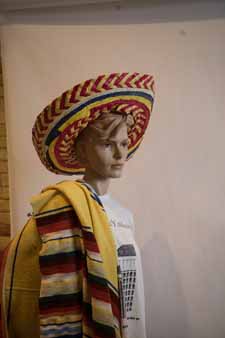
The important question is how does this inexpensive fisheye perform? I’ve taken hundreds of photos with the 8mm. I’ve found that the images are tack sharp. The resolution of the NEX-7 is 24MP and with this lens I’ve made several 16″ x 20″ enlargements including three below. |
|
 |
 |
 |
 |
|
|
|
The compact size of this camera/lens combination makes it a great way to have a tag along camera and use it for the wide views without having to change lenses.
For many excursions, I carrythree cameras: this fisheye combo, a second with a long lens telephoto (80-400mm) for wildlife and a third with a medium zoom (24mm to 200mm) – all without breaking my back with the weight. In the case of the 8mm fisheye lens, I have a winner at a very decent price.
Having done a little looking around, I know that there are other inexpensive fisheye lenses available for all of the major brand cameras. If you too like the interesting effects that the come from the ultra curved lens surface you’ll be able to find a fisheye to add to your camera bag.
My First Days with the Sony Alpha 7 III
17th April 2018
Full Frame Mirrorless
Although I have been a longtime user of mirrorless cameras, I’ve been sitting on the fence about moving to a full-frame model. What was holding me back was my reluctance to make a sizable investment for a new set of lenses.
|
|
|
| This past February while attending the Wedding & Portrait Professional Conference & Expo in Las Vegas, Sony introduced a new camera – the Alpha 7 III. In case you’re curious about it, see my previous article about the WPPI Expo here.
A couple of features of the 24 megapixel A7 III caught my attention. First was the camera’s autofocus system. Using 693 phase detection AF points focusing was fast and accurate. Second the camera’s Eye AF which identifies and tracks the subject’s eye as the focus point. Third was its high continuous shooting speed – up to 10 frames per second. And forth was the comfortably adjustable LCD screen. And I saw that the A7 III had dual SD card slots. I spent about 30 minutes inspecting the camera and bouncing questions off of Sony rep Dave Rhodes. I left the expo with a very positive opinion about Sony’s brand new model. After returning home from WPPI, I pre-ordered the camera with a 28-70mm lens. Along with it I ordered an accessory that would allow me to use my collection of Canon lenses with this new model. This device is the Metabones Smart Adapter. |
 |
|
Last week Sony released the first batch of A7 IIIs and my order arrives by courier, but due to my workload I wait a few days to open it. When I finally free up some time I find that the package contains the body, lens, USB charging cord, shoulder strap and instruction manual. Strike 1 on Sony. I see that the package does not have a battery charger. Instead I have to use a USB cord to connect to the camera body to charge the battery. |
|
 |
 |
| Now I think that I’m ready to take a few shots so I attach the lens, insert the battery and a blank SD card and turn on the camera. Strike 2 on Sony. The battery is not charged so I cannot power on the camera. Disappointed, I unwrap the USB charging cord only to find that there isn’t an A/C adapter for the cord. Strike 3 on Sony. It would be nice for Sony to al least supply an A/C adapter for the USB cord.
After striking out, I have to take a break. I hunt around for an A/C adapter and then proceed to charge the battery (in camera) for a couple of hours. After the battery is charged, I head outdoors to take a few shots. |
|
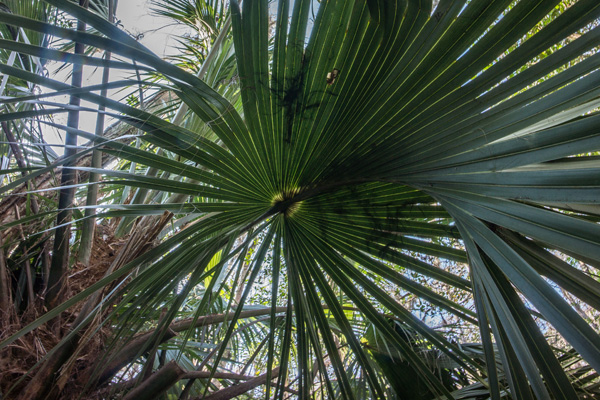
 my first photo with the A7 III |
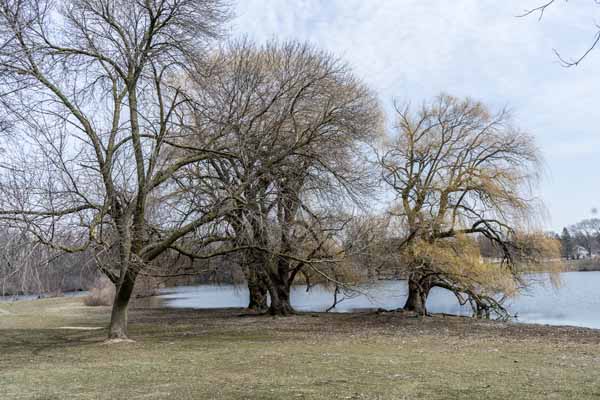 still – landscape |
 close up autofocus |
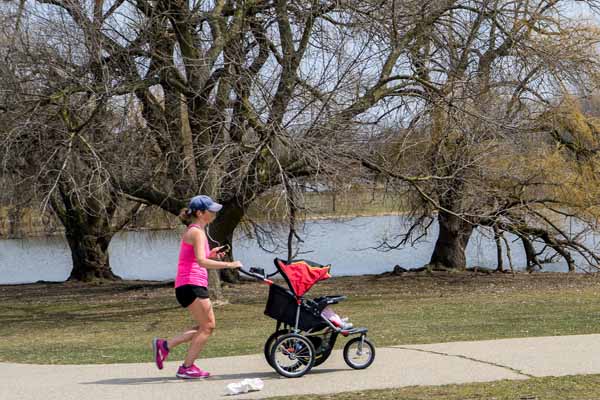 action autofocus |
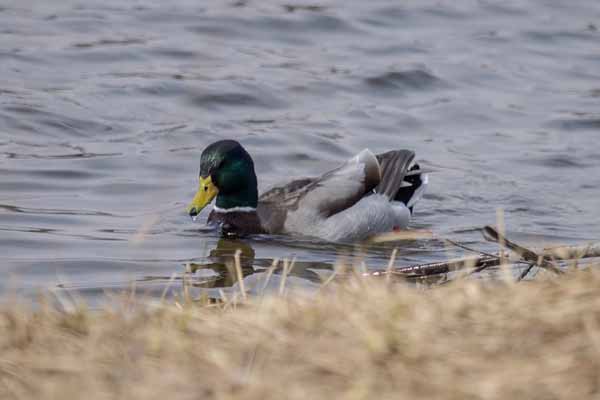 high speed frame rate |
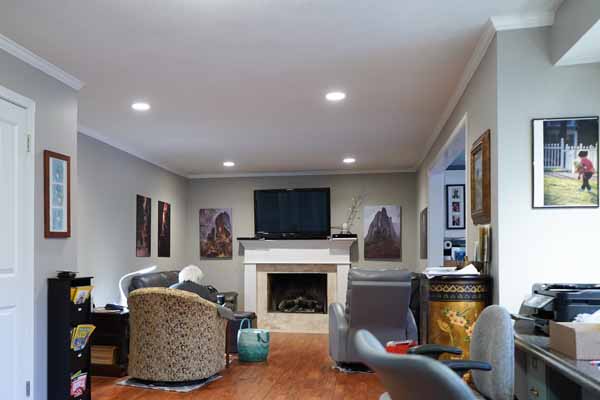 auto white balance |
| While there isn’t anything remarkable about the photos, I want to see the camera shoot still, close auto focus (branch), action (runner), high frame rate (duck) and auto white balance (indoor).
|
|
|
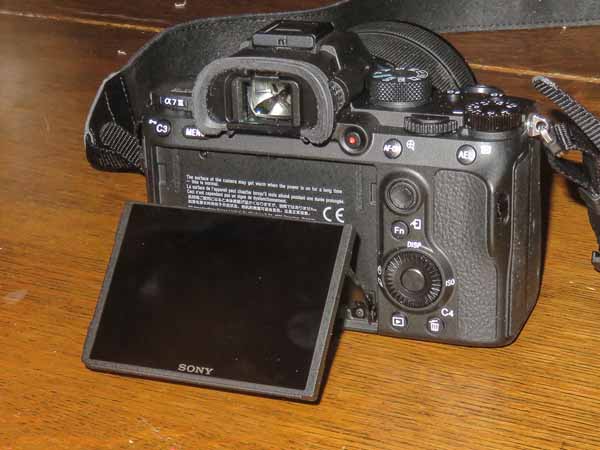 |
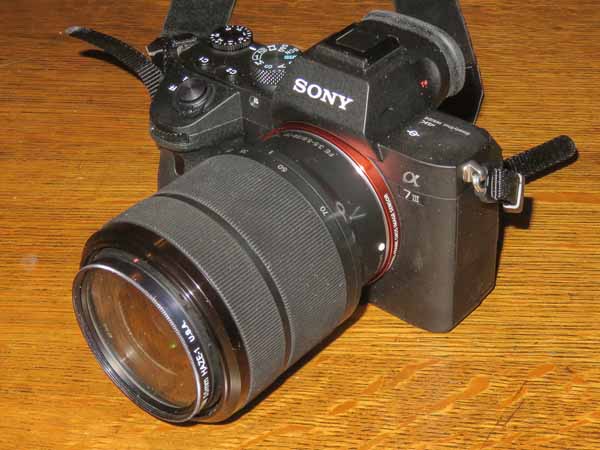
| I’m right-handed. The camera grip feels solid. Overall the body is compact without miniature features. The electronic viewfinder is bright and crisp. The LCD screen is adjustable making it easy to compose your shots whether they are overhead or low to the ground..
|
|
 convenient and customizable control |
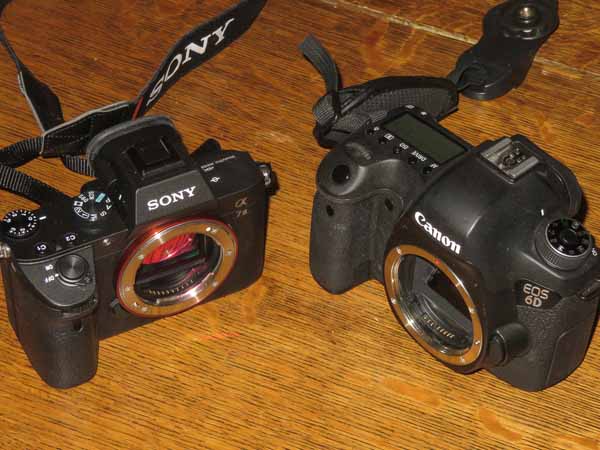 the A7 III next to my Canon 6D |
| I like this camera’s dedicated exposure adjustment dial. A control wheel on the rear and another on the front are useful for changing exposure combinations. There are four buttons that let you customize the settings to your preferences. For those in a hurry to share photos, one of the controls lets you send images to a smartphone by Wi-Fi. And compared to my other full-frame DSLRs, the A7 III is noticeably smaller and lighter.
|
|
|
|
||
| To be honest, I would not have purchased the A7 III had not the Metabones adapter been available.
This accessory allows me to use my full-frame Canon lenses with Sony full-frame FE-mount bodies including the A7 III. Having read dozens of reviews of the Metabones adapter beforehand, I was convinced that it was the only way for me to afford a new A7 III without having to buy a new set of lenses. |
 the A7 III, Metabones adapter and a Canon E-mount lens. |
 the A7 III with the Canon 24-105mm F/4L lens attached. |
|
As part of checking out this new camera, I tested all of the Canon lenses in my collection with the A7 III using the Metabones adapter. I was pleasantly surprised. The adapter worked with all of my lenses. Additionally the lens information (ID, shutter speed, f-stop, focal length) was transferred to the images’ EXIF data (two lenses were incorrectly identified). Below are images made using those respective lenses. |
||
 135mm F/2L |
 35mm F/2 |
 75-300 F/4-5.6 @75mm |
|
|
||
 75-300 F/4-5.6 @300mm |
 24-105mm F/4L @24mm |
 24-105mm F/4L @105mm |
|
|
||
 50mm F/1.4 |
 8-15mm F/4L Fisheye @8mm |
 8-15mm F/4L Fisheye @15mm |
|
|
||
 17-40mm F/4L @17mm |
 17-40mm F/4L @40mm |
 85mm F/2 |
|
|
||
 100mm F/2.8 macro |
 Sigma 20mm F/2 |
 24mm F/3.5L TS-E |
|
|
||
 100-400mm F/4.5-5.6L @100mm |
 100-400mm F/4.5-5.6L @400mm |
All of these photos were taken from a distance of about eight feet except for the two 100-400mm photos which were taken from a distance of about 16 feet. In short, the Metabones adapter lets you use Canon EF-lenses on Sony FE-mount bodies. Sony E-mount lenses (designed for the smaller APS-C size sensor) can be used on the A7 III. My E-mount 18-200mm lens worked perfectly. However using an E-mount lens reduces the image resolution from 4000 x 6000 pixels to 2624 x 3936 pixels. |
|
|
||
One neat feature that I am going to use for portraits is coined Eye AF. Long ago I was taught that for portraits it is important to focus on the subject’s eye. With Eye AF activated, the camera identifies the subject’s eye and makes it the main focusing point even if the subject moves. Eye AF worked well with the several subjects that I photographed.
I should mention that there’s an app on my iPhone that lets me grab images from the A7 III. The app is called PlayMemories Mobile and lets me download the images (JPGs only, not the raw ARWs) from the SD card to my iPhone. Having used the app with other Sony cameras previously, I’ve found it to be easy and very reliable.
I should also mention that PlayMemories Mobile also lets me record location information for the images. Using the smartphone’s GPS capabilities, the app sends the location coordinates via Bluetooth to the camera as it is capturing the images onto the SD card. Again, in my short time using this feature, it worked reliably. Bravo Sony.
I use the classic version of Lightroom to perform most of my image editing. To be exact, I’m now using Lightroom 6.14 but it’s my understanding that Adobe will not be making any further upgrades to this version. Therefore it’s unfortunate that I am unable to edit the raw ARW files with my copy of Lightroom without performing an extra step. Luckily I’ve found a way to fool Lightroom into believing that the camera’s raw ARW files were created with the previous generation Sony A7 II camera. Still this “fix” is an inconvenience before editing with Lightroom.
Despite my initial frustration (lack of a charger, uncharged battery, etc) out of the box, I remain very positive about its impressive features and performance. Having spent a few hours “playing” with this new mirrorless, I’ve used only several of the features that first attracted me to this camera. There are many more that I plan to become familiar with and use. Additionally, there are a large set of features that should be of interest to the movie enthusiasts. Admittedly, I’m not deep into moviemaking so I will cede the reviews on this aspect of the camera to other photographers.
In the mean time, if you’d like to learn more about this new model, Sony has an extensive description of the Alpha 7 III features here.
The suggested retail price of the A7 III is $2000 for the body or $2200 for the body with 28-70mm lens and is now available.
Written by: Arnie Lee