Online Magazine
Recent Posts
- Safeguard your Cellphone Photos
- Black & White to Color – Instantly
- Wearing Many Hats
- Video Roundup
- Rescuing Your Blurry Pictures
- Showing Their Age
- What is Your Angle?
- Panorama Photos
- Humorous Photos
- Close Ups
- Fisheye Pictures
- Photo Antiquities
- Printing Big
- Appreciating Scale
- Celebrity Sightings
Tags
More Places to Go
- Free "How-To" Books “How To” books for popular cameras 0
- Vist Us on Facebook keep in touch with us on Facebook 2
Archives
- July 2023 (1)
- March 2023 (2)
- February 2023 (1)
- December 2022 (1)
- October 2022 (1)
- September 2022 (8)
- August 2022 (9)
- July 2022 (1)
- June 2022 (1)
- June 2021 (1)
- May 2021 (1)
- March 2021 (5)
- February 2021 (4)
- January 2021 (2)
- April 2019 (1)
- March 2019 (1)
- February 2019 (1)
- October 2018 (2)
- April 2018 (1)
- March 2018 (4)
- February 2018 (1)
- November 2017 (1)
- August 2017 (1)
- June 2017 (1)
- April 2017 (1)
- March 2017 (5)
- February 2017 (2)
- January 2017 (1)
- October 2016 (1)
- September 2016 (1)
- August 2016 (1)
- July 2016 (1)
- May 2016 (1)
- April 2016 (1)
- March 2016 (2)
- February 2016 (1)
- January 2016 (2)
- December 2015 (1)
- November 2015 (1)
- October 2015 (3)
- April 2015 (1)
- March 2015 (5)
- February 2015 (1)
- January 2015 (4)
- December 2014 (2)
- November 2014 (5)
- October 2014 (2)
- September 2014 (1)
- August 2014 (2)
- July 2014 (1)
- May 2014 (1)
- April 2014 (5)
- March 2014 (5)
- December 2013 (2)
- November 2013 (18)
- October 2013 (1)
- September 2013 (1)
- August 2013 (1)
- July 2013 (1)
- June 2013 (3)
- May 2013 (1)
- April 2013 (2)
- March 2013 (1)
- February 2013 (1)
- January 2013 (1)
- December 2012 (1)
- November 2012 (2)
- October 2012 (2)
- September 2012 (5)
- August 2012 (2)
- July 2012 (1)
- June 2012 (1)
- May 2012 (1)
- April 2012 (4)
- March 2012 (1)
- February 2012 (1)
- January 2012 (3)
- December 2011 (1)
- November 2011 (3)
- October 2011 (1)
- September 2011 (2)
- August 2011 (2)
- June 2011 (3)
- May 2011 (4)
- April 2011 (8)
- March 2011 (8)
- February 2011 (10)
- January 2011 (6)
- December 2010 (11)
- November 2010 (14)
- October 2010 (6)
- September 2010 (12)
- August 2010 (2)
- July 2010 (4)
- June 2010 (3)
- May 2010 (1)
- April 2010 (1)
- March 2010 (2)
- February 2010 (1)
- January 2010 (1)
- December 2009 (1)
- November 2009 (2)
- October 2009 (2)
- September 2009 (1)
- August 2009 (3)
- July 2009 (2)
- June 2009 (1)
- May 2009 (2)
- April 2009 (1)
- March 2009 (2)
- February 2009 (1)
- January 2009 (3)
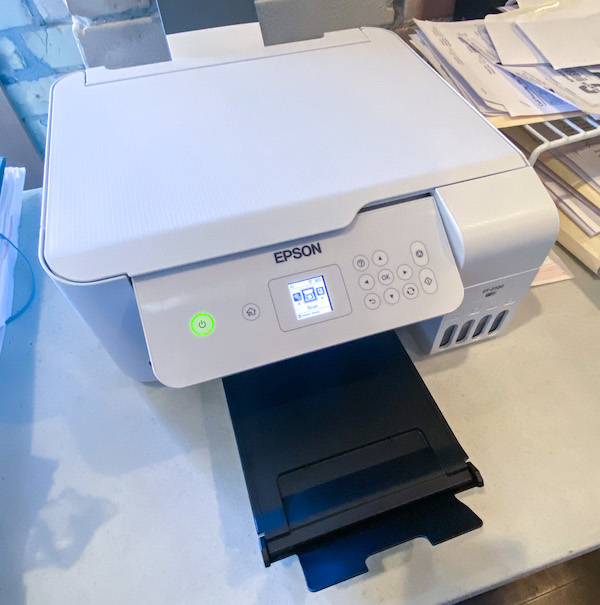
Running out of Ink?
15th June 2021
I quickly get tired of using my computer monitor to show others a photo or two. Of course one way to “fix” this is to make prints of these pictures. But this brings up another problem – making a bunch of prints quickly drains my ink cartridges and puts a dent in my wallet too.
A few weeks ago, I saw an advertisement for a printer that uses large, refillable ink tanks. My only hesitation was about the quality of the prints from a relatively inexpensive printer. With a money-back guarantee, I decided to go for it.
Sitting on my computer’s desktop is a folder labeled “To Be Printed”. As I take snapshots or find an interesting image, I drop it into this folder. By the time the printer arrived, I had accumulated close to a hundred images.
Here’s my experience with the Epson Ecotank 2720
|
|
|
 |
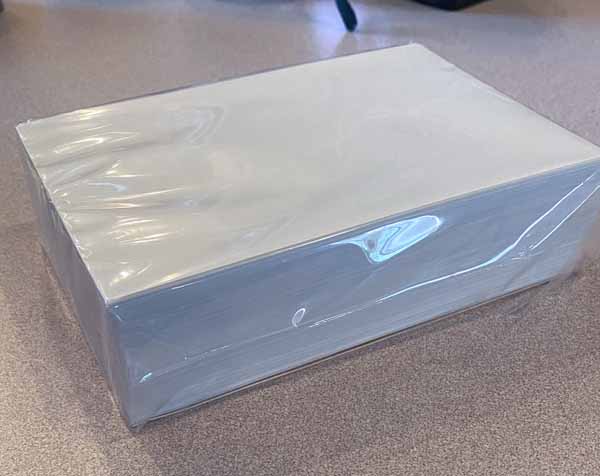 The printer itself is quite compact but capable of printing onto 8-1/2″ x 11″ media. I purchased the printer primarily to make smaller prints. Here’s my stack of 4″ x 6″ glossy photo paper. |
|
|
|
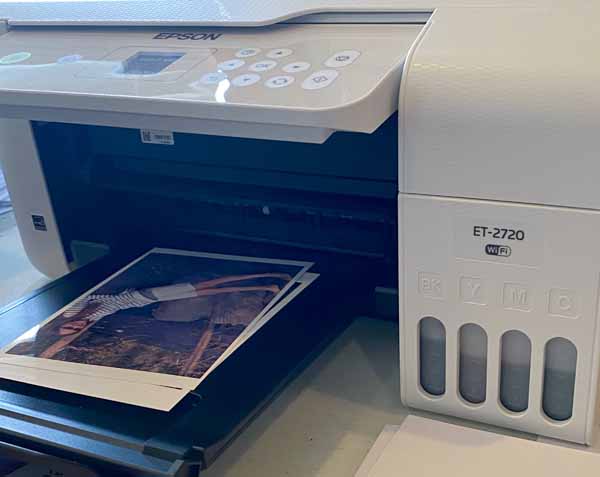 These are the first couple of prints that I made. Note the initial ink levels on the front of the printer. |
 During my first session with the new printer, I made about thirty 4″ x 6″ prints. |
|
|
|
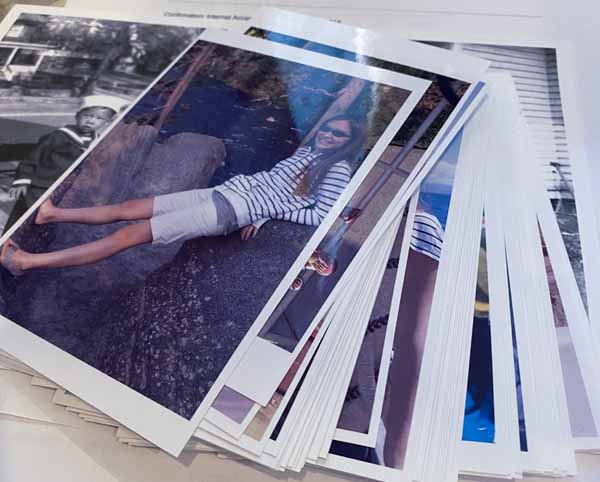
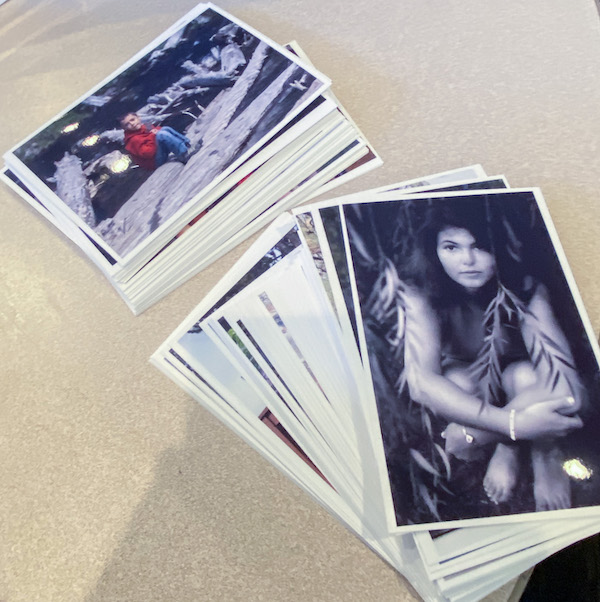 I found the print quality to be very good for both color and black and white images. |
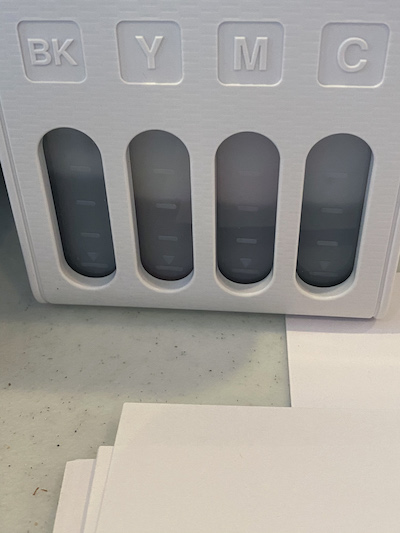 After printing my stack of 100 of so images, the ink levels dropped only slightly. |
|
|
|
Epson claims that out of the box the printer includes enough ink for about two years of “normal” printing. My guess is that the ink will not last that long for the type of printing that I intend to do. Refills cost about $50 per set. To date, I’m happy with this printer which set me back $200. Compared to other ink jet printers this is more costly, but factoring in the significantly lower cost of ink and the sparing me the inconvenience of having to run to the office supply store to get a replacement cartridge, I feel that this was a good purchase. The printer is “attached” to my computer via wi-fi so there are no cables to worry about. It also doubles as a copier and has a built-in scanner too. |
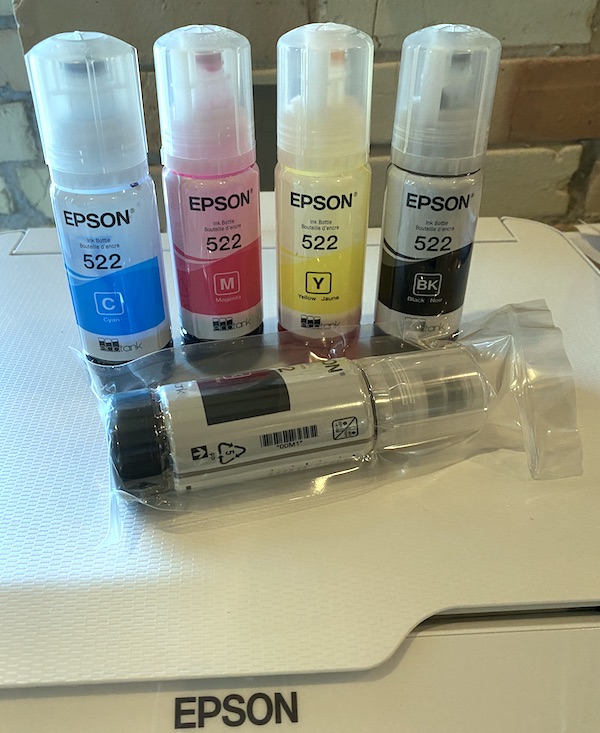 The printer ink is delivered in four containers – cyan, magenta, yellow and black with an additional black container. |
|
|
|
Epson claims that they provide enough ink
Seen at WPPI – Quality Printing Papers
12th March 2017
Some Day My Prints Will Come
For decades I was schooled in conventional (film) photography. So it’s natural that I am a lover of photographic prints. And although I enjoy the convenience and portability of electronic display devices, I simply prefer to view my work on hardcopy prints.
Last last year, I ordered a large format printer – the Epson P800. Normally it makes prints up to size 17″ x 22″. Add a roll paper feeder and it can produce enormous panoramas up to 129″ wide. Since the printer was in high demand at the time, my waiting time was about a month for delivery.
When I finally received the printer, I was preoccupied with a lot of other work. To ensure that the printer was working properly I used to make only two or three prints and then set it aside.
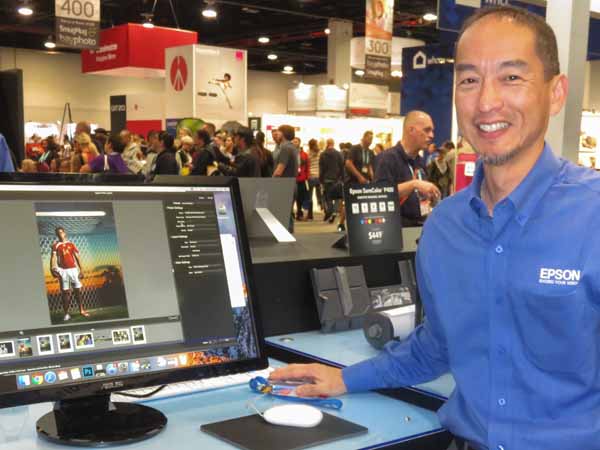
Jump ahead two months and I’m attending the WPPI Conference & Expo. I think to myself that I should learn about printing papers to get the best results from the investment in my Epson P800. And so at WPPI I stop at several makers of fine art papers to get educated.
|
|
|
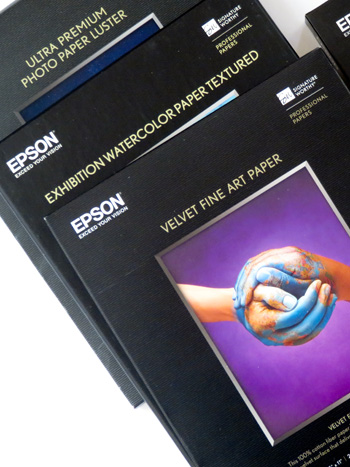
| Hahnemuhle is a German based company that offers a wide variety of papers. I look at their large catalog and am stumped by some of the terminology. So I start asking questions.
What is baryta paper? I’m told that it is paper coated with barium sulphate, a substance used on traditional photographic paper. When baryta paper is used for inkjet printing, it supposedly reproduces the effect of silver halide processing. Many of the paper descriptions include a gsm value. I find that gsm is an acronym for grams per square meter. Thus a square meter of Canvas Metallic 350 gsm paper is heavier than FineArt Baryta Satin 3500 gsm paper. I am also curious about paper with the rag description. I learn that this paper is made from cotton linters or rags and is superior to wood-based paper. |
 |
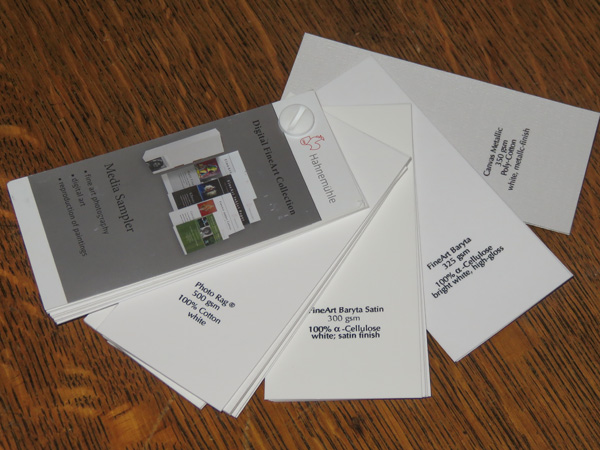 The helpful representative left me with this sampler – a collection of their fine art photography papers and other helpful literature. For more information please visit Hahnemuhle. |
 |
|
|
|
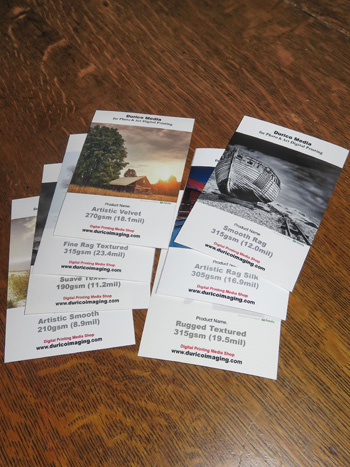
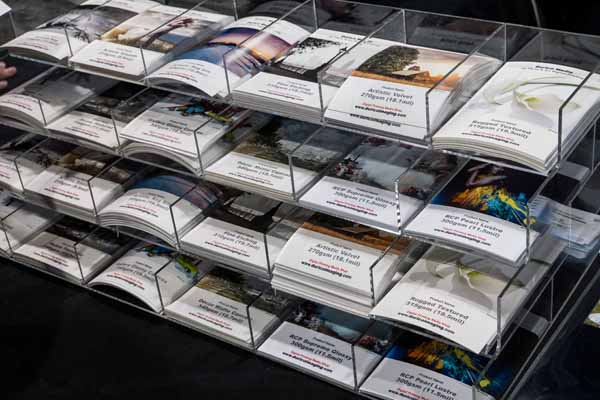
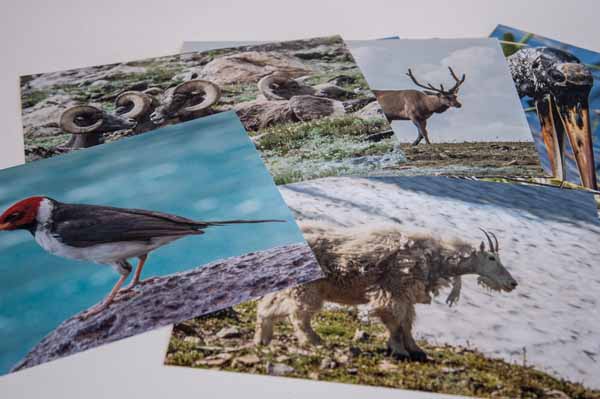
| Namhoon Kim is the Marketing Manager for Durico Media. The company is based in southern California. As you can see from the below photograph, they have a rather large selection of papers.
I helped myself to about a dozen of their print samples all on different paper stock. I find that the samples are the only way to determine if a paper is suitable for one of my prints. Reading a catalog description does not give me the know-how to select a paper – I require hands-on to feel the surface and a sample photograph to give me the visual feedback. For more information, please visit Durico Imaging. |
 |
 |
 |
|
|
|
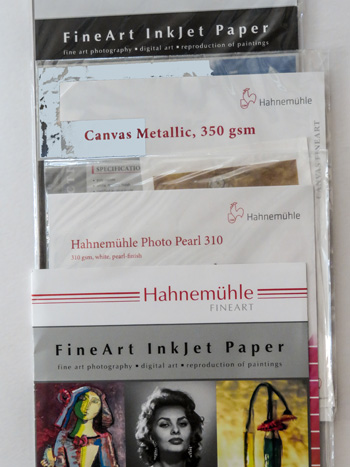
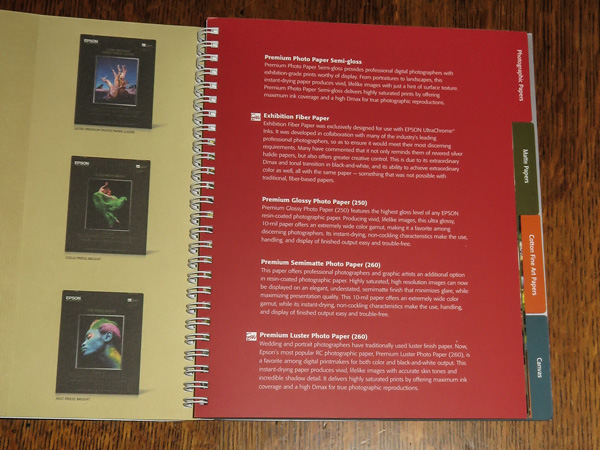
| Epson is probably best known as a manufacturer of printers. They also are a large producer of high quality printing papers.
My visit to Epson is to find out more about their printing papers and luckily I am handed a “Print Sample Guide” to take with me. It has their complete line of papers with printed samples: photographic, matte, cotton fine art and canvas. Before I depart the representative shows me their new software Epson Print Layout. This app is for users of Epson professional printers and provides a convenient and elegant way to organize, set up and print your images. If you’re a user of a high end Epson printer, you can download a copy of the Epson software from here. For more information about their papers, please visit Epson. |
 |
 |
 |
|
|
|
| Paperwise, I’m 3 for 3. I walked away with samples from three different manufacturers. So with samples in hand, I am prepared to make my paper choices. Now I’m ready to fire up that printer that has been sitting idle waiting for me. | |
Written by: Arnie lee
A Simple Photo Gallery
25th May 2014
Showing Off Your Photographs
Digital gives us the opportunity to take hundreds and hundreds of photos for almost no cost at all. This is an amazing turnaround compared to the price of using film cameras that had a processing charge saddled to each roll of film that we shot.
So what are we doing with all of these “free” photos? Are they sitting on the SD memory card or cell phone? I’m sure that my friends and relatives are impressed as I flick through the tiny screen to show them my recent vacation shot – NOT!
Well, to be frank, my fingers are tired of flicking the screen. And my friends and relatives typically avoid asking to see pictures of my travels. So I decided to print – yes you heard it correctly – print some of the photos.
|
|
||
 |
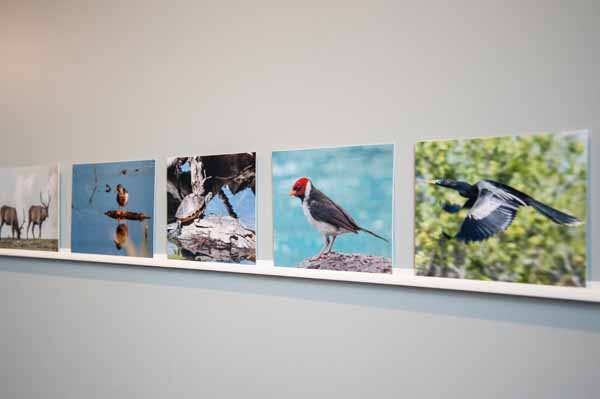
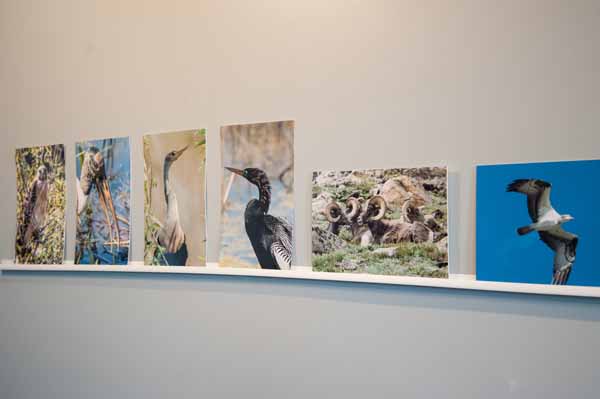
One afternoon I collected a set of my favorite nature shots and sent them to the photofinisher. A few days later received back a short stack of 8″ x 10″s and 8″ x 12″s Now the issue is how do I present them? I didn’t really want to arrange them in a conventional album that would sit on the top of a coffee table. No, I longed for a different way to display them. I decided that I’d show them off by making a small gallery in an unused room. The room is well suited for this purpose with a large, uncluttered wall painted white. |
|
|
|
||
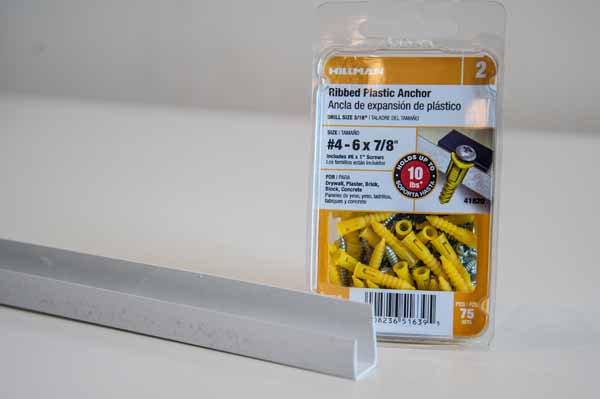
Rather than “hanging” the photos, I decided to make a very miniature shelf system. I bought a few 10-foot lengths of “J-TRIM” used to install vinyl house siding. These strips are lightweight and inexpensive. Use scissors to cut to desired length. |
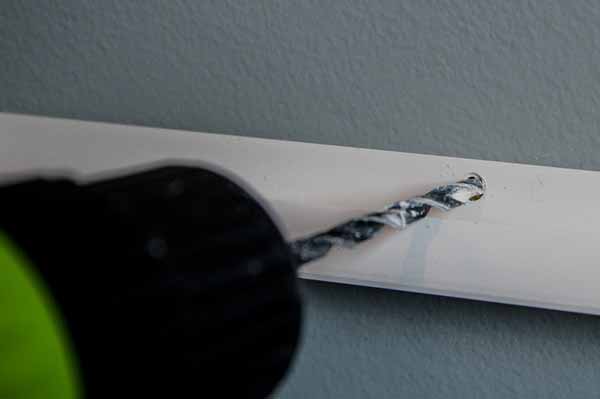
Use a tape measure to mount the J-TRIM level about 54″ above the floor. I used these ribbed plastic anchors (3/16″ size). Here I’m drilling a hole through the J-TRIM into the drywall. |
|
|
|
||
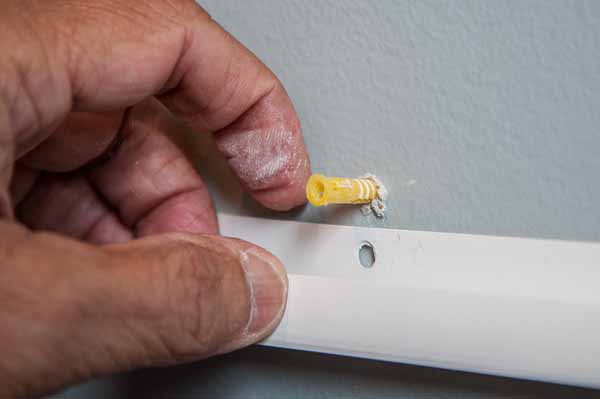
Next you push the plastic ribbed anchor into the drilled hole. |
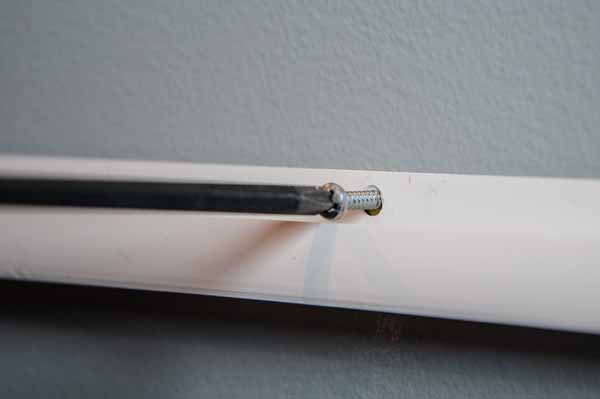
Then fasten the J-TRIM to the drywall with one of the screws. |
|
|
|
||
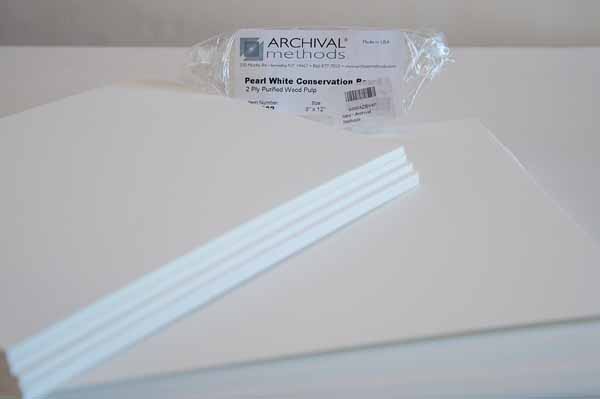
By themselves, the prints are too flimsy to stand on the miniature shelf. I purchased these sheets of mat board precut for the 8″x10″s and 8″x12″s. |

Using the 3M spray-on adhesive, I mounted the photos onto the mat board. |
|
|
|
||
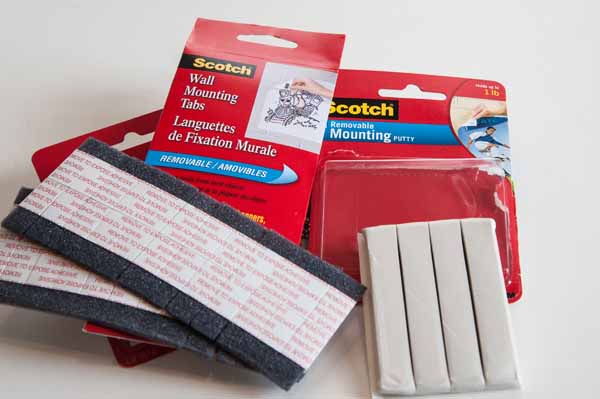
I found it necessary to use this Scotch “mounting putty” to keep the photos from falling from the miniature shelf. |
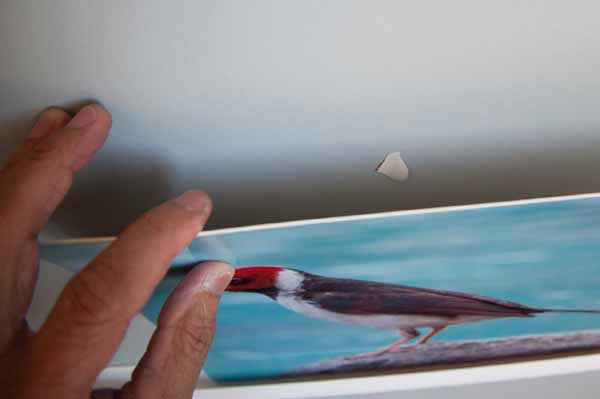
The putty is pasted between the photo mat board and the wall to keep the top of the photograph from falling. |
|
Here’s another view of the putty which hold the mat board agains the wall. |
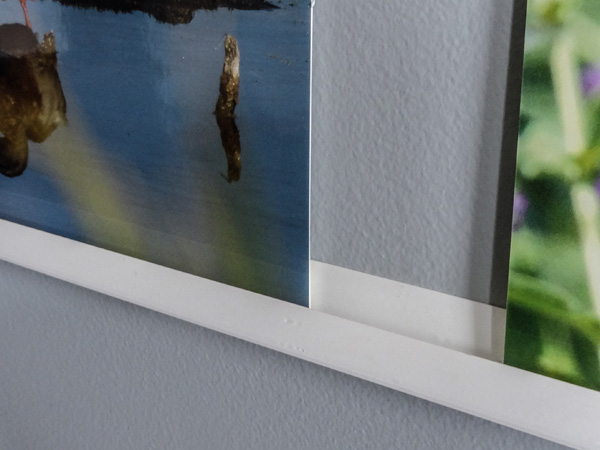
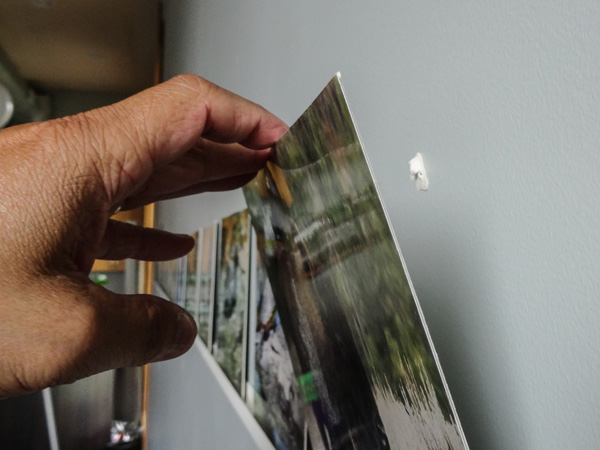
Here you can see the photo resting in the channel of the miniature shelf. |
|
|
|
||
 |
| |
|
When all is said and done, I have a small gallery of my latest travel photographs. As you might guess, when you’re tired of looking at this group of photographs, it’s very easy to change them. |
||
Material List:
2 pieces of J-Channel – 10′ Vinyl 1/2″ J_Trim @ $2.40 each (Home Depot)
1 pkg – plastic ribbed anchors #4 – 1″ @ $7.99
1 pkg – 8″ x 10″ or 8″ x 12″ mat board 25 sheets @ $12.50
1 can 3M General Purpose 45 spray mount @ $5.00
Written by: Arnie Lee