Online Magazine
Recent Posts
- Safeguard your Cellphone Photos
- Black & White to Color – Instantly
- Wearing Many Hats
- Video Roundup
- Rescuing Your Blurry Pictures
- Showing Their Age
- What is Your Angle?
- Panorama Photos
- Humorous Photos
- Close Ups
- Fisheye Pictures
- Photo Antiquities
- Printing Big
- Appreciating Scale
- Celebrity Sightings
Tags
More Places to Go
- Free "How-To" Books “How To” books for popular cameras 0
- Vist Us on Facebook keep in touch with us on Facebook 2
Archives
- July 2023 (1)
- March 2023 (2)
- February 2023 (1)
- December 2022 (1)
- October 2022 (1)
- September 2022 (8)
- August 2022 (9)
- July 2022 (1)
- June 2022 (1)
- June 2021 (1)
- May 2021 (1)
- March 2021 (5)
- February 2021 (4)
- January 2021 (2)
- April 2019 (1)
- March 2019 (1)
- February 2019 (1)
- October 2018 (2)
- April 2018 (1)
- March 2018 (4)
- February 2018 (1)
- November 2017 (1)
- August 2017 (1)
- June 2017 (1)
- April 2017 (1)
- March 2017 (5)
- February 2017 (2)
- January 2017 (1)
- October 2016 (1)
- September 2016 (1)
- August 2016 (1)
- July 2016 (1)
- May 2016 (1)
- April 2016 (1)
- March 2016 (2)
- February 2016 (1)
- January 2016 (2)
- December 2015 (1)
- November 2015 (1)
- October 2015 (3)
- April 2015 (1)
- March 2015 (5)
- February 2015 (1)
- January 2015 (4)
- December 2014 (2)
- November 2014 (5)
- October 2014 (2)
- September 2014 (1)
- August 2014 (2)
- July 2014 (1)
- May 2014 (1)
- April 2014 (5)
- March 2014 (5)
- December 2013 (2)
- November 2013 (18)
- October 2013 (1)
- September 2013 (1)
- August 2013 (1)
- July 2013 (1)
- June 2013 (3)
- May 2013 (1)
- April 2013 (2)
- March 2013 (1)
- February 2013 (1)
- January 2013 (1)
- December 2012 (1)
- November 2012 (2)
- October 2012 (2)
- September 2012 (5)
- August 2012 (2)
- July 2012 (1)
- June 2012 (1)
- May 2012 (1)
- April 2012 (4)
- March 2012 (1)
- February 2012 (1)
- January 2012 (3)
- December 2011 (1)
- November 2011 (3)
- October 2011 (1)
- September 2011 (2)
- August 2011 (2)
- June 2011 (3)
- May 2011 (4)
- April 2011 (8)
- March 2011 (8)
- February 2011 (10)
- January 2011 (6)
- December 2010 (11)
- November 2010 (14)
- October 2010 (6)
- September 2010 (12)
- August 2010 (2)
- July 2010 (4)
- June 2010 (3)
- May 2010 (1)
- April 2010 (1)
- March 2010 (2)
- February 2010 (1)
- January 2010 (1)
- December 2009 (1)
- November 2009 (2)
- October 2009 (2)
- September 2009 (1)
- August 2009 (3)
- July 2009 (2)
- June 2009 (1)
- May 2009 (2)
- April 2009 (1)
- March 2009 (2)
- February 2009 (1)
- January 2009 (3)
What to do with your Photos
29th March 2021
Using Smaller Frames
On my computer desktop, I have a folder labeled “To Be Printed”.
Every once in a while as I’m editing my photos, I’ll drop a copy of a favorite image into the folder. As the number of images within the folder grow, I feel compelled to make prints and get them up on the wall.
Years ago I realized that I didn’t have to always make huge prints. By printing smaller sizes more photos would see the light of day and keep from setting my wallet back too much.
To make best use of the limited wall space, I started to use sets of identically sized frames. They are light weight with glass or plexiglass to protect the prints and easy to hang.
A few of the favorite photographs get special treatment – they are printed in a larger size.
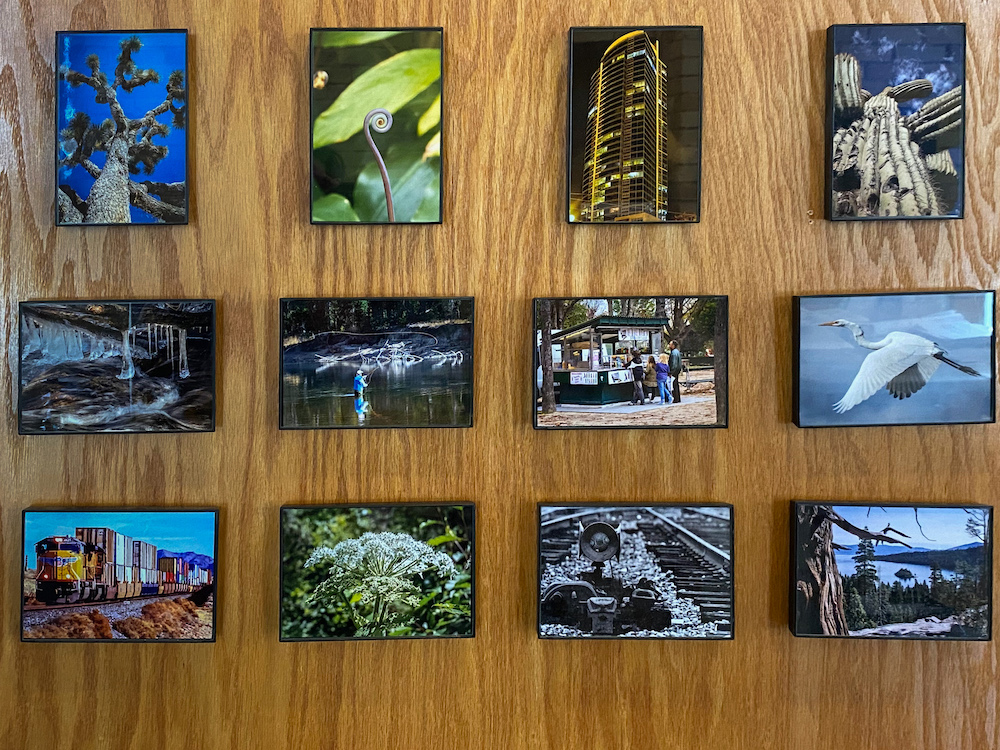
these are all 4″ x 6″ prints
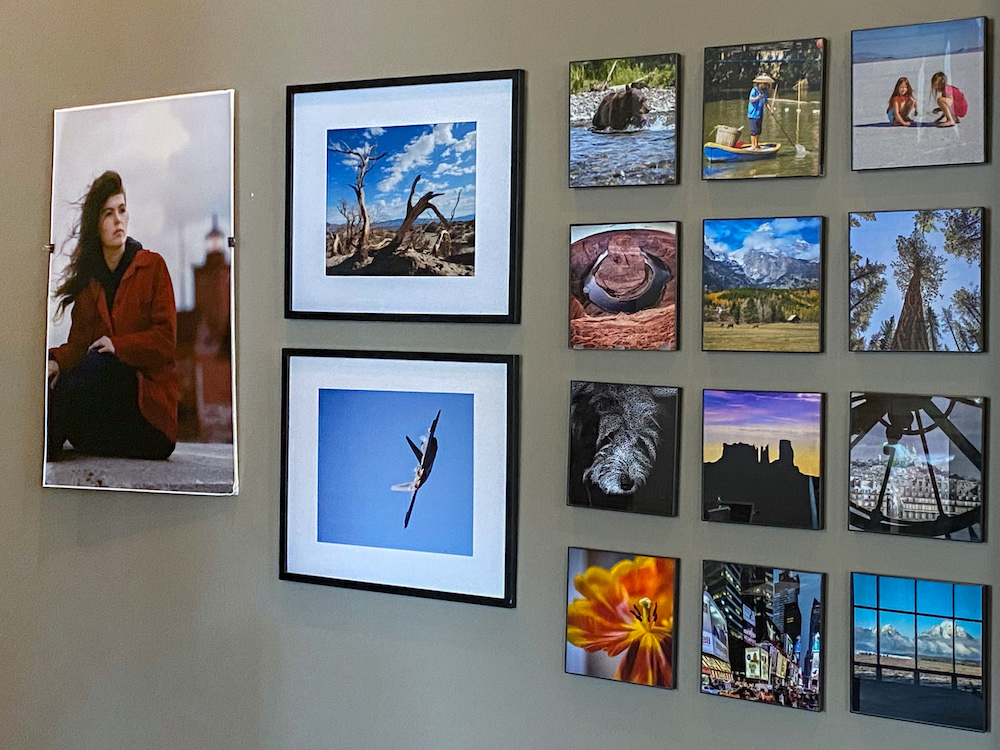
here is a small section of the wall with three different sizes
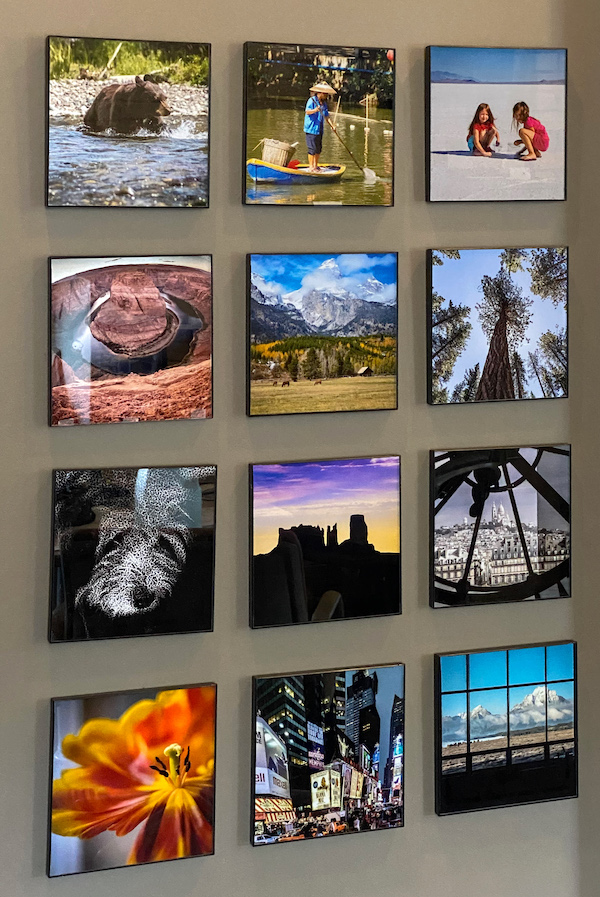
these are all 8″ x 8″ prints
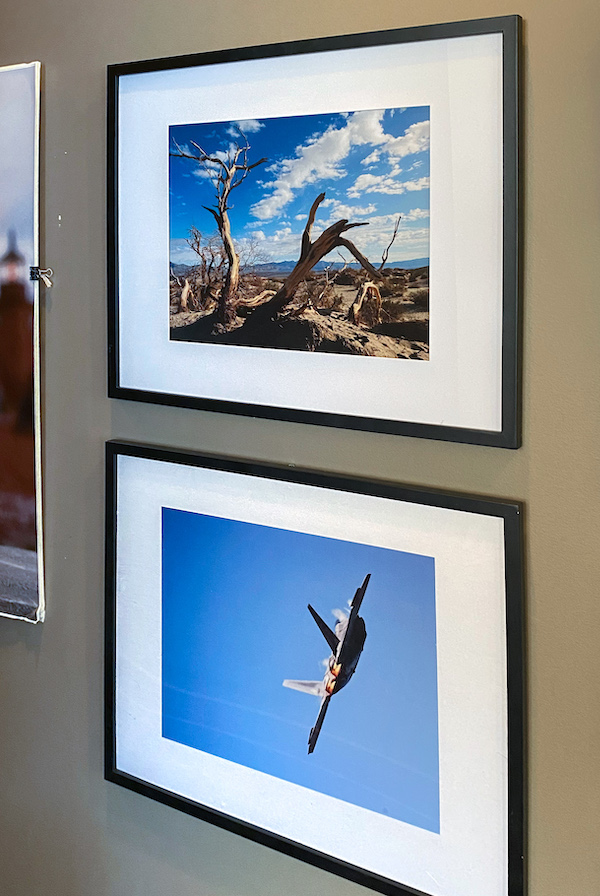
these two prints are mounted in larger 16″ x 20″ frames
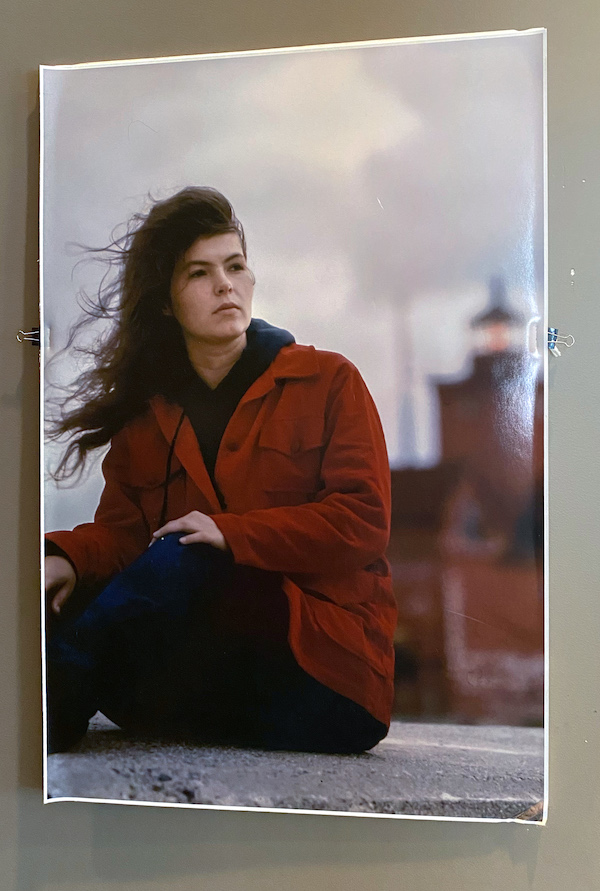
this single print is 24″ x 36″
So get those images out of your “To Be Printed” folder.
When your “To Be Printed” folder gets filled again, you can simply change the photos.
Remember that you don’t have to think big; smaller sizes make attractive displays.
UnFramed
23rd March 2021
Bringing the Feel of Paris to My Living Room
As the river Seine flows from central France to the English Channel it disects Paris the City of Light. In turn, the river is responsible for the large number of bridges that connect the two sides of the city – known as the left bank and the right bank.
By far, my favorite is the Pont Alexandre III, an elaborately decorated structure with gold colored statues at both ends, intricate sculptures arranged along the width of the arches, black elegant light posts, a generous pedestrian walkway.
|
|
 I took this photograph of Pont Alexandre III in 2008. Notice how the gold painted sculptures contribute to the bridge’s beauty. |
|
|
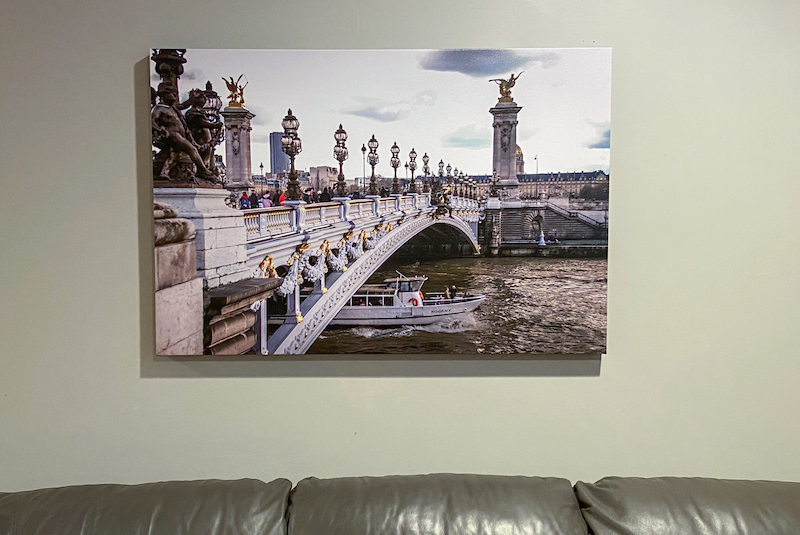 I decided to add a touch of Paris to our home and had the photograph made into a large canvas print. It is a wraparound canvas – the image edges fold over the internal wooden frame to create a simple hanging piece. The canvas print now decorates our living room. |
|
|
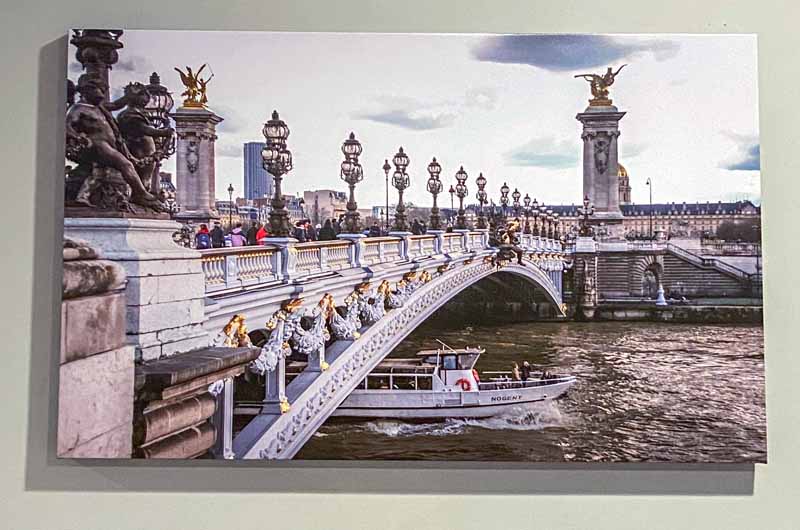 Here’s a close up of that canvas hanging. Its size is 36″ x 24″. You can see that the print closely resembles the original digital image taken in 2008. |
|
|
 Moving even closer to the canvas you can see more of the bridge detail. Despite the rough texture of the canvas print surface the detail remains quite sharp. |
|
|
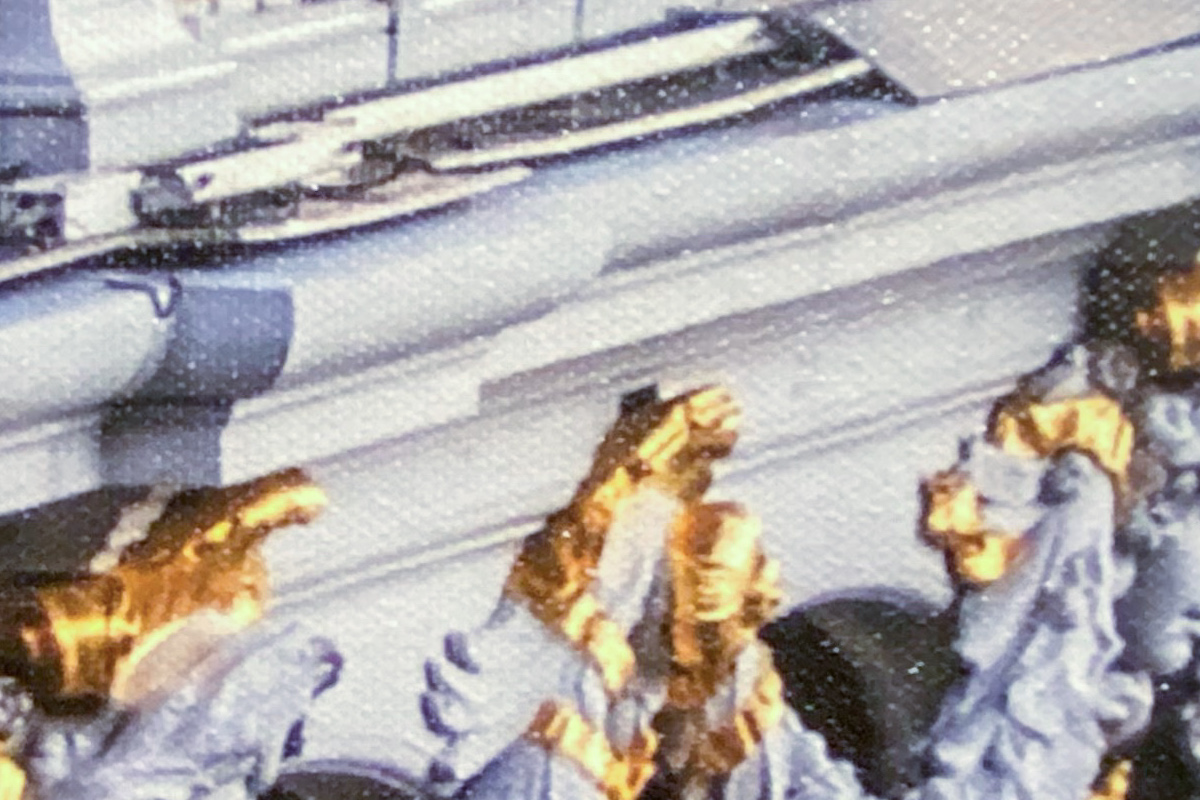
From the above photo I enlarged a small section. While you can clearly see the textured surface, you can also see how the print retains its sharp detail.
What’s your favorite vacation spot? You can easily bring your past travels into your home.
Don’t let your photos sit in a proverbial shoe box. Get them out of there and show them to the world.
A Simple Photo Gallery
25th May 2014
Showing Off Your Photographs
Digital gives us the opportunity to take hundreds and hundreds of photos for almost no cost at all. This is an amazing turnaround compared to the price of using film cameras that had a processing charge saddled to each roll of film that we shot.
So what are we doing with all of these “free” photos? Are they sitting on the SD memory card or cell phone? I’m sure that my friends and relatives are impressed as I flick through the tiny screen to show them my recent vacation shot – NOT!
Well, to be frank, my fingers are tired of flicking the screen. And my friends and relatives typically avoid asking to see pictures of my travels. So I decided to print – yes you heard it correctly – print some of the photos.
|
|
||
 |
One afternoon I collected a set of my favorite nature shots and sent them to the photofinisher. A few days later received back a short stack of 8″ x 10″s and 8″ x 12″s Now the issue is how do I present them? I didn’t really want to arrange them in a conventional album that would sit on the top of a coffee table. No, I longed for a different way to display them. I decided that I’d show them off by making a small gallery in an unused room. The room is well suited for this purpose with a large, uncluttered wall painted white. |
|
|
|
||
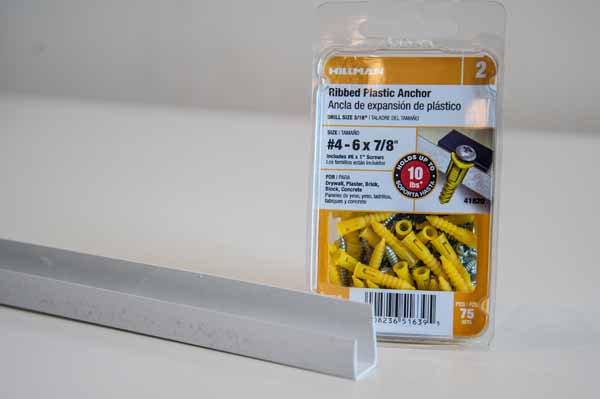
Rather than “hanging” the photos, I decided to make a very miniature shelf system. I bought a few 10-foot lengths of “J-TRIM” used to install vinyl house siding. These strips are lightweight and inexpensive. Use scissors to cut to desired length. |
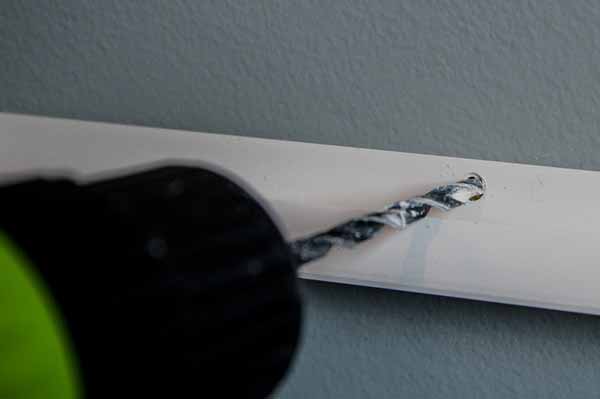
Use a tape measure to mount the J-TRIM level about 54″ above the floor. I used these ribbed plastic anchors (3/16″ size). Here I’m drilling a hole through the J-TRIM into the drywall. |
|
|
|
||
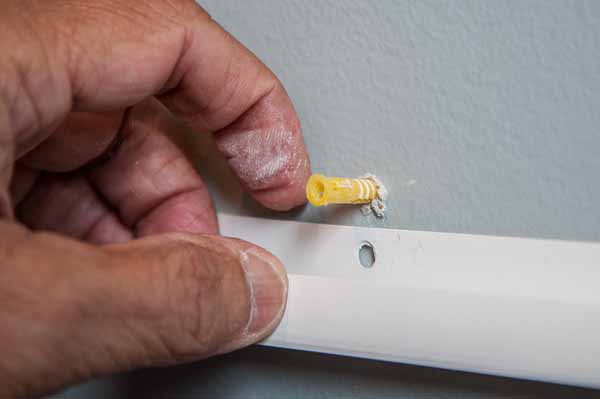
Next you push the plastic ribbed anchor into the drilled hole. |
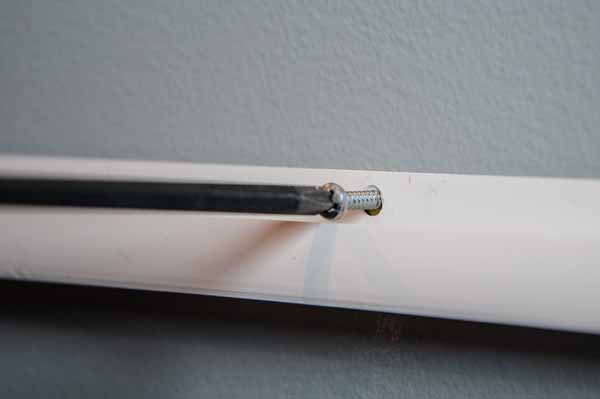
Then fasten the J-TRIM to the drywall with one of the screws. |
|
|
|
||
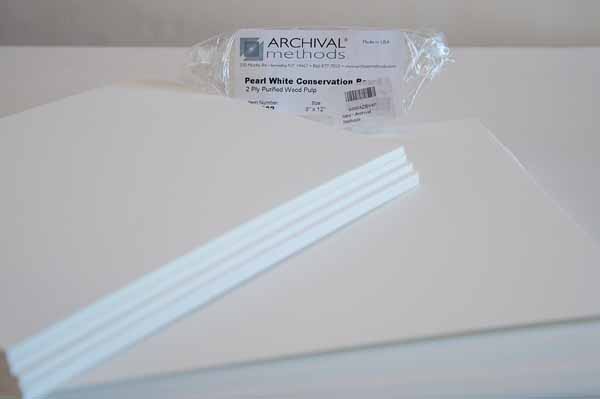
By themselves, the prints are too flimsy to stand on the miniature shelf. I purchased these sheets of mat board precut for the 8″x10″s and 8″x12″s. |

Using the 3M spray-on adhesive, I mounted the photos onto the mat board. |
|
|
|
||
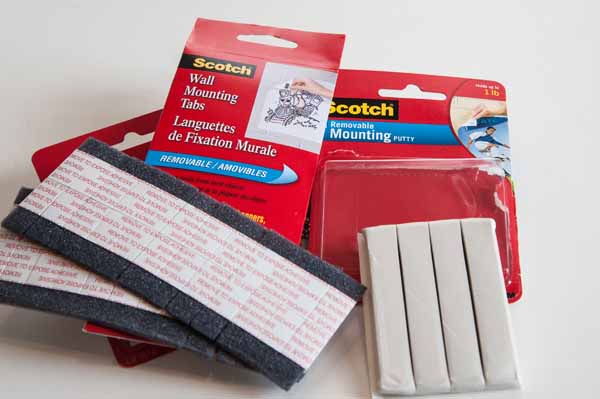
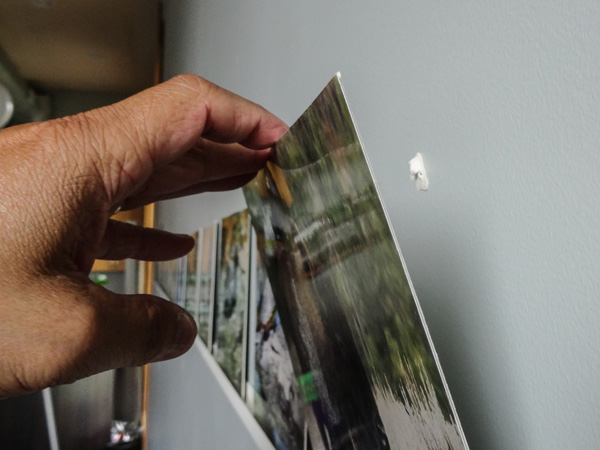
I found it necessary to use this Scotch “mounting putty” to keep the photos from falling from the miniature shelf. |
The putty is pasted between the photo mat board and the wall to keep the top of the photograph from falling. |
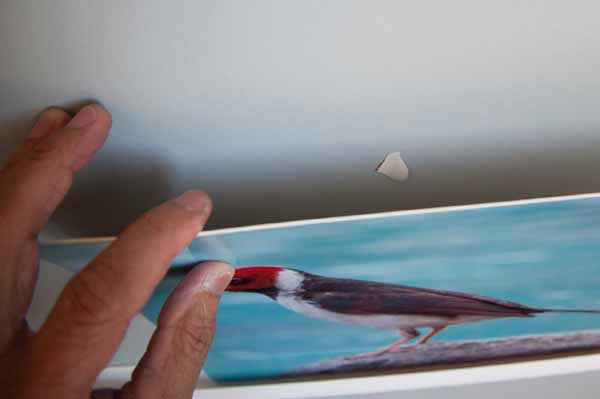
|
Here’s another view of the putty which hold the mat board agains the wall. |
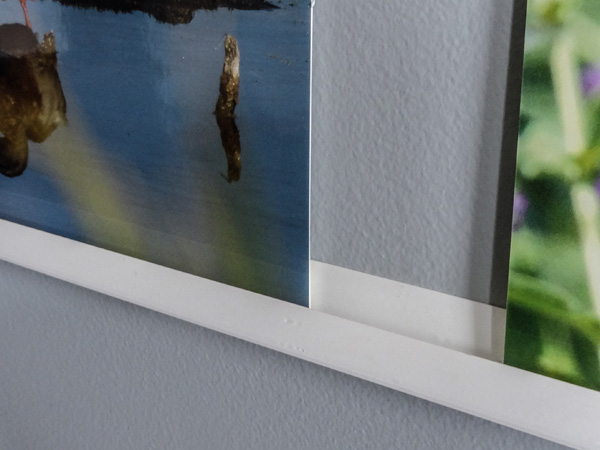
Here you can see the photo resting in the channel of the miniature shelf. |
|
|
|
||
 |
| |
|
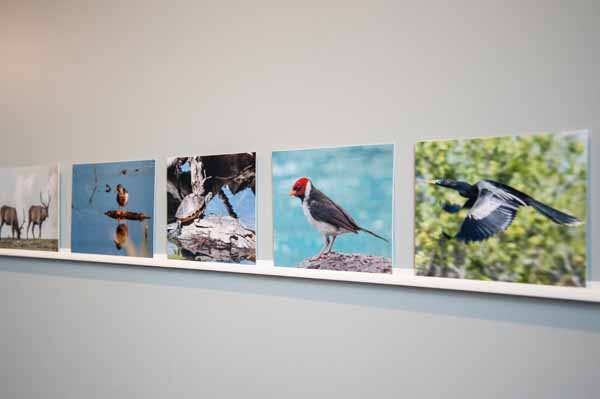
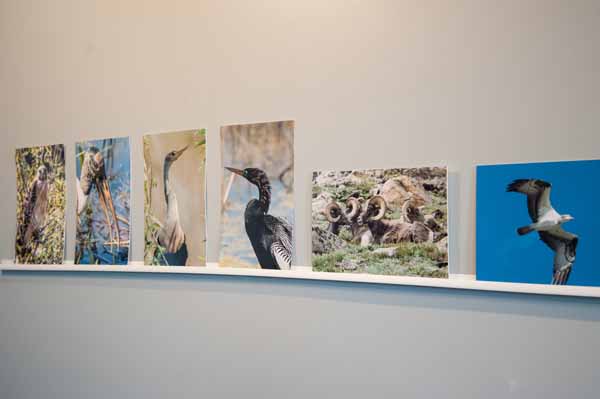
When all is said and done, I have a small gallery of my latest travel photographs. As you might guess, when you’re tired of looking at this group of photographs, it’s very easy to change them. |
||
Material List:
2 pieces of J-Channel – 10′ Vinyl 1/2″ J_Trim @ $2.40 each (Home Depot)
1 pkg – plastic ribbed anchors #4 – 1″ @ $7.99
1 pkg – 8″ x 10″ or 8″ x 12″ mat board 25 sheets @ $12.50
1 can 3M General Purpose 45 spray mount @ $5.00
Written by: Arnie Lee