Category Archives: informational

Red Star Line Museum

Emigration to America

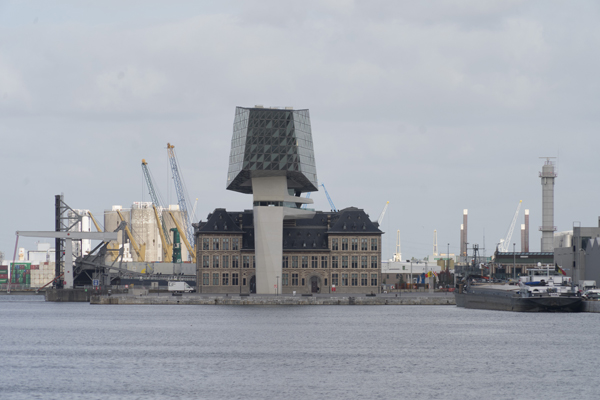
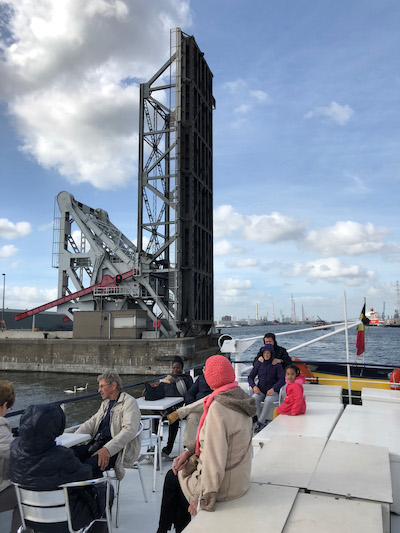
A couple of years ago while visiting friends in Belgium we drove a short distance from Brussels to the nearby port city of Antwerp.

Antwerp is Belgium’s second largest city. It’s situated along the Schedt River which empties into the North Sea which is turn connects to the Atlantic Ocean.


One of the world’s biggest ports, Antwerp handles more cargo than any other port in Europe except nearby Rotterdam. Seeing the inviting waterfront surrounding us, we took a very pleasant sightseeing boat ride on the Sheldt.


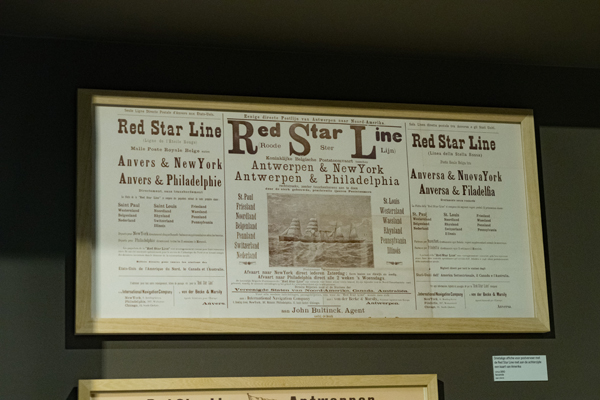
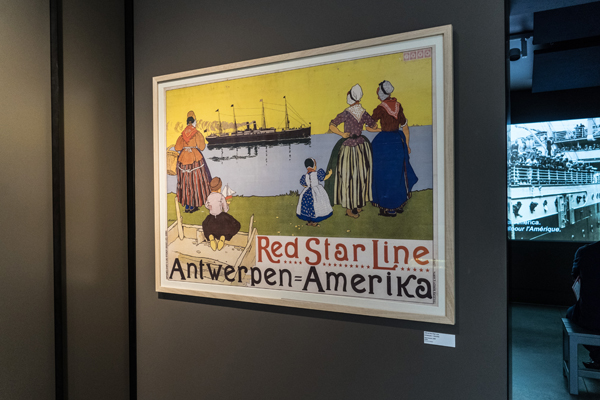
After our sightseeing excursion, we explored the streets of Antwerp and stumbled upon the Red Star Line Museum.

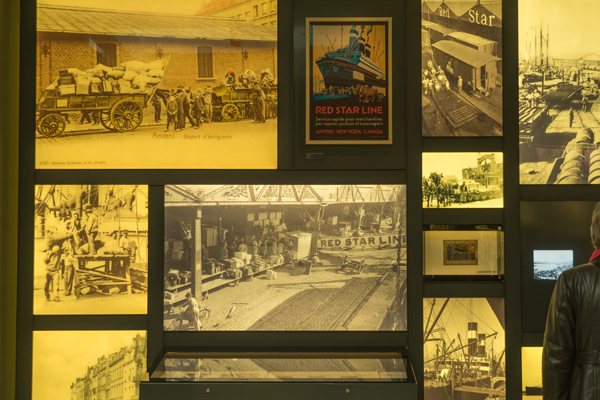
The Red Star Line was a shipping company that operated between Antwerp and the eastern seaboard of the USA and Canada. Throughout Europe they advertised their routes and from 1873 to 1934 – sixty years – Antwerp was a center for emigration from the continent. Emigrants from Switzerland, Germany, Poland, Netherlands, France, Italy and other countries traveled to Antwerp to board the ships bound for North America.


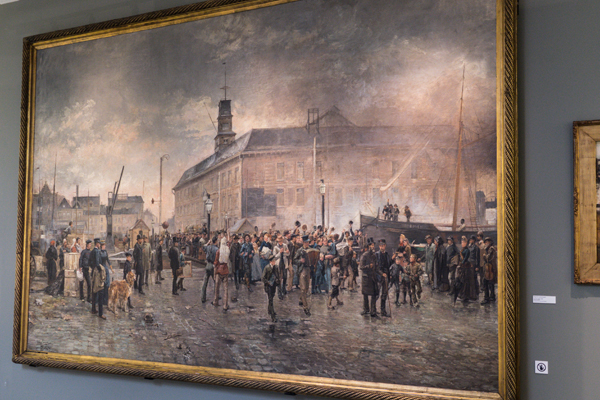
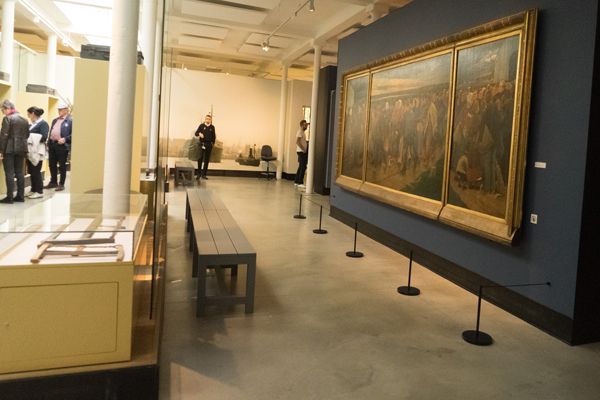
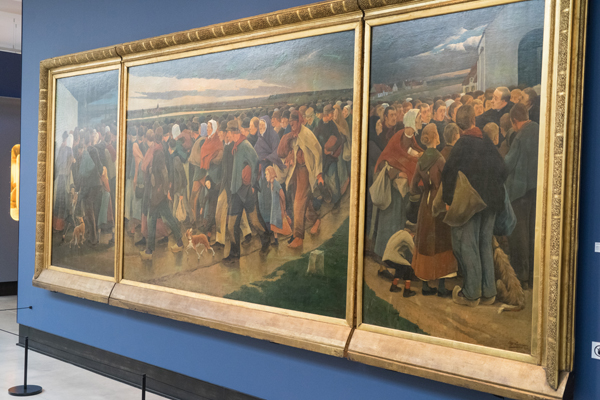
More than two million Europeans were passengers on the Red Star Line steamships from Antwerp to America’s large metropolitan centers – New York, Philadelphia, Boston. Paintings and displays in the museum depict the many travelers in Antwerp’s streets preparing for the long and challenging journey across the ocean to a destination that promised them a new, brighter future.


On display are curated personal belongings – clothing, suitcases, diaries, photographs, jewelry, toys – that punctuate the stories of individuals and families who decided to leave their homeland hoping for a better life.

For me, the Red Star Line Museum highlighted the overwhelming struggle that millions of individuals experienced reaching for a better future by having to brave the unknowns of emigrating to America.


If you’re interested in learning more, here’s the link to the Red Star Line Museum in Antwerp.

How Dye Transfer Works

A Simplified Expanation

If you got here by accident, you can read about my experience with dye transfer by going here.

NOTE: One of the overriding requirement for making a dye transfer print is to keep the three component colors (sometimes four if you add black for deep saturation) in perfect alignment. This is referred to as “registration”.

Color Separations Depending on the size of the transparency we use a 4″x5″ enlarger such as the one to the right or a larger 8″x10″ model. The original transparency is placed into the enlarger and projected through a red filter to make a negative on the monochrome film. Next the image is projected through a green filter to make a second negative and finally through a blue filter to make a third negative. Between exposures the enlarger is held totally immovable to maintain registration. Ahead of time the film is “punched” (similar to a paper punch) and placed onto an immoveable film holder so that all three exposures are in exact alignment. The three negatives are developed using conventional black and white chemicals.
To adjust the brilliance of the print a set of highlight negatives are similarly made. Here the exposures are quite short to produce a faint mask of only the brightest areas of the image – one each for the red, green and blue spectrum of the original. As its name suggests, this mask reduces the amount of exposure to the the image highlights.

A transparency has a very wide range of light values (brightness to shadow). Since it’s not possible to reproduce such a wide range, we have to make a set of contrast reducing negatives – again through red, green and blue filters.

The next step is to expose the gelatin coated mats. The thickness of the gelatin depends on the amount of exposure it receives. Each color negative is sandwiched with the corresponding contrast reducing and highlight masks and projected onto the mat material. Three mats are exposed one using the red filter negative, one using the green filter negative and the third using the blue filter negative. The mats are developed in a special tanning developer and when washed in hot water leaves a dye-absorbing gelatin surface.

The red filter mat is soaked in a cyan dye, the green filter mat in a magenta dye and the blue filter mat in a yellow dye. The amount of dye each mat absorbs depends on the thickness (and therefore exposure) of the gelatin. The mats are successively rolled onto the white photo surface using familiar registration techniques with the cyan, magenta and yellow dyes. The result is the dye transfer image.

You’ll find more detailed information about the dye transfer process than I am able to provide by clicking here.


Dye Transfer

Highest Quality Photos from an Earlier Era

As a youngster I caught the photobug early. I took loads of pictures and used my modest allowance and money gifts to buy darkroom supplies and equipment.

In high school I was thrilled when Mom helped me find a part time job working for a local photographer (a schoolmate of Mom from her earlier years). John taught me the ins and outs of the photography profession and later helped me land several jobs at high end photo labs in the Park Ave area of New York City where many large ad agencies were based.

In the 1960s these large ad agencies and their clients were requiring top notch photographs for their advertisements in the colorful gloss magazines and newspapers. Many of them insisted on dye transfer prints. These were photographs that had “exacting” contrast and coloring to make them pop on the publication pages.

The process to make a dye transfer print is quite involved. The original transparency is dissected into the three component colors and photographically transferred to dye-absorbent matrices – often referred to as a “mat”. The mats are bathed in three different color dyes and deposited one at a time onto white photo paper. The resulting print is a high quality reproduction of the original transparency. The intensity and brightness of the scene can be precisely adjusted at each step of the process allowing for the extremely fine quality prints demanded by the clients.

For those techies who are interested in the dye transfer process, you’ll find a short description here.

Below are a couple of sample dye transfer prints used in the advertising industry from the 1960s that I helped to produce. Both of these prints are approximately 20″ x 24″ in size.


a dye transfer made for an airline circa 1969

a dye transfer print made for a cigarette company circa 1968

The popularity of this form of photography especially in the advertising industry stems from the extensive precision the user has in controlling the individual colors, saturation, shading, contrasts, etc. This precision was not possible with any other process at the time.

However the arrival of digital photography changed the print processing landscape and dye transfer lost many of its advantages. By the early 1990s Eastman Kodak decided to stop making the dye transfer chemicals which portended the end of its run as the high quality king of prints.

While dye transfer is no longer a viable way to produce high quality prints, I thoroughly benefited and enjoyed learning in-depth photography from my several jobs making these photographic relics.

Written by: Arnie Lee