Online Magazine
Recent Posts
- Safeguard your Cellphone Photos
- Black & White to Color – Instantly
- Wearing Many Hats
- Video Roundup
- Rescuing Your Blurry Pictures
- Showing Their Age
- What is Your Angle?
- Panorama Photos
- Humorous Photos
- Close Ups
- Fisheye Pictures
- Photo Antiquities
- Printing Big
- Appreciating Scale
- Celebrity Sightings
Tags
More Places to Go
- Free "How-To" Books “How To” books for popular cameras 0
- Vist Us on Facebook keep in touch with us on Facebook 2
Archives
- July 2023 (1)
- March 2023 (2)
- February 2023 (1)
- December 2022 (1)
- October 2022 (1)
- September 2022 (8)
- August 2022 (9)
- July 2022 (1)
- June 2022 (1)
- June 2021 (1)
- May 2021 (1)
- March 2021 (5)
- February 2021 (4)
- January 2021 (2)
- April 2019 (1)
- March 2019 (1)
- February 2019 (1)
- October 2018 (2)
- April 2018 (1)
- March 2018 (4)
- February 2018 (1)
- November 2017 (1)
- August 2017 (1)
- June 2017 (1)
- April 2017 (1)
- March 2017 (5)
- February 2017 (2)
- January 2017 (1)
- October 2016 (1)
- September 2016 (1)
- August 2016 (1)
- July 2016 (1)
- May 2016 (1)
- April 2016 (1)
- March 2016 (2)
- February 2016 (1)
- January 2016 (2)
- December 2015 (1)
- November 2015 (1)
- October 2015 (3)
- April 2015 (1)
- March 2015 (5)
- February 2015 (1)
- January 2015 (4)
- December 2014 (2)
- November 2014 (5)
- October 2014 (2)
- September 2014 (1)
- August 2014 (2)
- July 2014 (1)
- May 2014 (1)
- April 2014 (5)
- March 2014 (5)
- December 2013 (2)
- November 2013 (18)
- October 2013 (1)
- September 2013 (1)
- August 2013 (1)
- July 2013 (1)
- June 2013 (3)
- May 2013 (1)
- April 2013 (2)
- March 2013 (1)
- February 2013 (1)
- January 2013 (1)
- December 2012 (1)
- November 2012 (2)
- October 2012 (2)
- September 2012 (5)
- August 2012 (2)
- July 2012 (1)
- June 2012 (1)
- May 2012 (1)
- April 2012 (4)
- March 2012 (1)
- February 2012 (1)
- January 2012 (3)
- December 2011 (1)
- November 2011 (3)
- October 2011 (1)
- September 2011 (2)
- August 2011 (2)
- June 2011 (3)
- May 2011 (4)
- April 2011 (8)
- March 2011 (8)
- February 2011 (10)
- January 2011 (6)
- December 2010 (11)
- November 2010 (14)
- October 2010 (6)
- September 2010 (12)
- August 2010 (2)
- July 2010 (4)
- June 2010 (3)
- May 2010 (1)
- April 2010 (1)
- March 2010 (2)
- February 2010 (1)
- January 2010 (1)
- December 2009 (1)
- November 2009 (2)
- October 2009 (2)
- September 2009 (1)
- August 2009 (3)
- July 2009 (2)
- June 2009 (1)
- May 2009 (2)
- April 2009 (1)
- March 2009 (2)
- February 2009 (1)
- January 2009 (3)
Protective Filters For Your Lens
14th March 2011
To protect it from scratches and help keep it clean, consider using a clear protective filter on your camera lens.
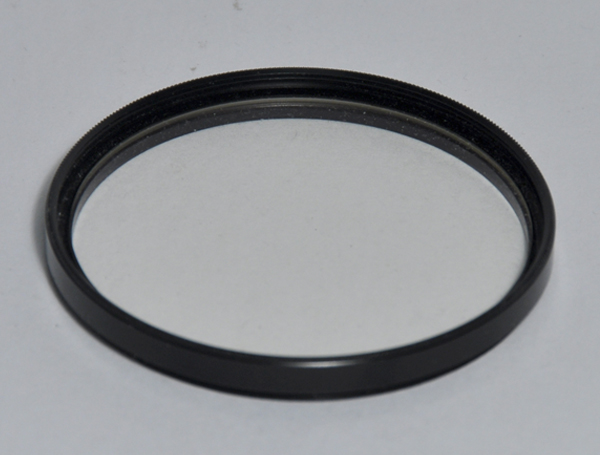 |
They’re an inexpensive (prices start around $13 depending on lens size) way to protect your lens.
A filter also helps keep the lens clean from dust, smudges and the elements when you’re shooting in bad weather. A filter can help prevent damage caused by wind-blown debris, sand or salt spray such as when you’re shooting outdoors at the beach. Furthermore, it’s easier to clean the filter instead of cleaning the lens itself. It’s also less expensive to replace the filter when it’s damaged than a lens. |
Now you might be thinking “isn’t that the purpose of a lens cap?” and you’d be correct. The problem with a lens cap, however, is that it’s so easy to lose or misplace it. A filter, unlike the lens cap, is actually attached to the lens so it cannot fall off or become lost. Also, you won’t lose an opportunity of snaping a once in a lifetime photo by fumbling with the camera to remove the lens cap.
Keep in mind as you consider using a filter that if you ask ten photographers whether they use filters, five may say yes and five may say never. In other words, there are many opinions on the value of protective filters. Some believe that a filter is unnecessary and therefore they rarely, if ever, use a protective filter. They may prefer using lens caps, lens hoods or simply handling their cameras very carefully.
Some photographers believe that lenses made today are already protected with special coatings against scratches and dust and, therefore, don’t need any protection from the environment in most normal photography conditions.
Other photographers keep a filter on each lens they use, perhaps taking the filter off during certain types of photography.
You’ll have to decide whether a quality clear filter is best for your shooting situations.
Note: instead of a clear filter, you may also consider an UV filter. It serves the same purpose as a clear protective filter but may be easier to find at your local camera dealer.
Written by Scott Slaughter
Smile for your own camera
07th March 2011
Extending your Arm
You see it all of the time – an excited picture-taker is pointing her camera at herself with an extended arm. She’s taking her own photo.
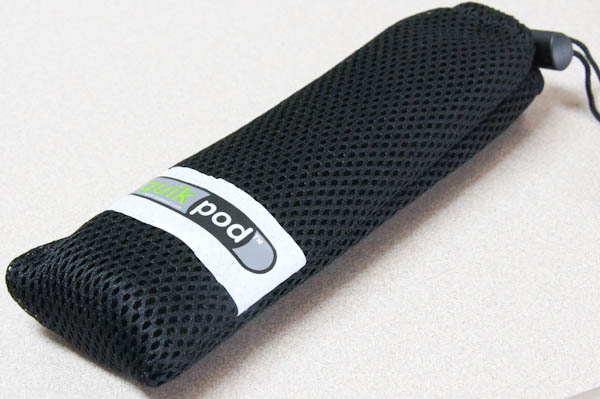
She could have used a QuikPod. I first saw a demo of the QuikPod at the Consumer Electronics Show in early January and recently ordered one through Amazon.
| The people at QuikPod designed a neat device that helps these photographers take better self-portraits. The QuikPod is small and is packaged in a lightweight net carrying case that fits in a coat pocket or purse. |
 |
A very portable “tripod”
28th February 2011
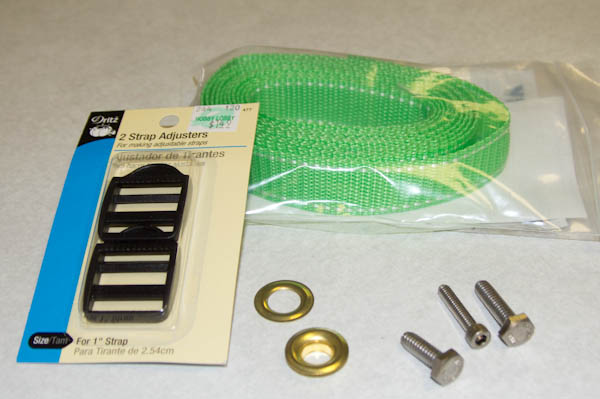
Make yourself a simple “strap tripod”
Owing to various photo assignments, I seem to spend a considerable of time in the field. But I’ll have to admit that I’m not a big fan of lugging around a tripod. My “excuse” is that with all of the shuttling back and forth, a tripod is not the easiest item to carry-on when traveling by airplane.
There are many times however, that I could use the rock-steady support of a tripod. For these occasions, I make do with a substitute accessory that easily stores in my pocket or backpack.
As you’ll see, this accessory is not very sophisticated, but it does an adequate job of squeezing two or three additional stops of exposure from my camera when the light is fading.
These are the few simple materials that I used for this project:
Another benefit of using this strap tripod is that it’s dirt cheap to make – about $3. |
 |