Online Magazine
Recent Posts
- Safeguard your Cellphone Photos
- Black & White to Color – Instantly
- Wearing Many Hats
- Video Roundup
- Rescuing Your Blurry Pictures
- Showing Their Age
- What is Your Angle?
- Panorama Photos
- Humorous Photos
- Close Ups
- Fisheye Pictures
- Photo Antiquities
- Printing Big
- Appreciating Scale
- Celebrity Sightings
Tags
More Places to Go
- Free "How-To" Books “How To” books for popular cameras 0
- Vist Us on Facebook keep in touch with us on Facebook 2
Archives
- July 2023 (1)
- March 2023 (2)
- February 2023 (1)
- December 2022 (1)
- October 2022 (1)
- September 2022 (8)
- August 2022 (9)
- July 2022 (1)
- June 2022 (1)
- June 2021 (1)
- May 2021 (1)
- March 2021 (5)
- February 2021 (4)
- January 2021 (2)
- April 2019 (1)
- March 2019 (1)
- February 2019 (1)
- October 2018 (2)
- April 2018 (1)
- March 2018 (4)
- February 2018 (1)
- November 2017 (1)
- August 2017 (1)
- June 2017 (1)
- April 2017 (1)
- March 2017 (5)
- February 2017 (2)
- January 2017 (1)
- October 2016 (1)
- September 2016 (1)
- August 2016 (1)
- July 2016 (1)
- May 2016 (1)
- April 2016 (1)
- March 2016 (2)
- February 2016 (1)
- January 2016 (2)
- December 2015 (1)
- November 2015 (1)
- October 2015 (3)
- April 2015 (1)
- March 2015 (5)
- February 2015 (1)
- January 2015 (4)
- December 2014 (2)
- November 2014 (5)
- October 2014 (2)
- September 2014 (1)
- August 2014 (2)
- July 2014 (1)
- May 2014 (1)
- April 2014 (5)
- March 2014 (5)
- December 2013 (2)
- November 2013 (18)
- October 2013 (1)
- September 2013 (1)
- August 2013 (1)
- July 2013 (1)
- June 2013 (3)
- May 2013 (1)
- April 2013 (2)
- March 2013 (1)
- February 2013 (1)
- January 2013 (1)
- December 2012 (1)
- November 2012 (2)
- October 2012 (2)
- September 2012 (5)
- August 2012 (2)
- July 2012 (1)
- June 2012 (1)
- May 2012 (1)
- April 2012 (4)
- March 2012 (1)
- February 2012 (1)
- January 2012 (3)
- December 2011 (1)
- November 2011 (3)
- October 2011 (1)
- September 2011 (2)
- August 2011 (2)
- June 2011 (3)
- May 2011 (4)
- April 2011 (8)
- March 2011 (8)
- February 2011 (10)
- January 2011 (6)
- December 2010 (11)
- November 2010 (14)
- October 2010 (6)
- September 2010 (12)
- August 2010 (2)
- July 2010 (4)
- June 2010 (3)
- May 2010 (1)
- April 2010 (1)
- March 2010 (2)
- February 2010 (1)
- January 2010 (1)
- December 2009 (1)
- November 2009 (2)
- October 2009 (2)
- September 2009 (1)
- August 2009 (3)
- July 2009 (2)
- June 2009 (1)
- May 2009 (2)
- April 2009 (1)
- March 2009 (2)
- February 2009 (1)
- January 2009 (3)
PhotoPlus Expo – Redsnap
19th November 2013
High Speed Photography and More
As I was walking the aisles of the PhotoPlus Expo, an impressive photo caught my attention. It was a stop action of a glass bottle as it was shattering into hundreds of small pieces.
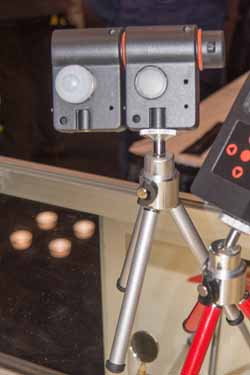
I was at the booth of a company named Triggertrap and they were showing off its Redsnap trigger. This device is unique in that you can use one of several sensors to trigger your camera or flash.
|
This is the Redsnap. It accepts interchangeable sensors: laser, sound, infrared and lightning. It has three outputs to connect up to three cameras or flashes. A sensor snap into the top of the unit. In this photo, the sound sensor is attached which was used to trigger to sample photo of the breaking bottle. |
 |
 |
|
These are a pair of laser sensors. A laser sensor can trigger a camera when the laser beam is broken. The Redsnap can also be set to take timelapse photographs. |
 |
|
The good news is that this looks like a promising product.
The bad news is that the Redsnap is not yet available. Triggertap has been raising money to build and distribute the Redsnap through a Kickstarter campaign. The goal was to raise £50,000 but they surprisingly raised £290,000.
I learned that the electronics and enclosures for the Redsnap are now being finalized. Small production batches will be available for Kickstarter contributors beginning in December and January and full production is scheduled to begin about May of next year.
Retail prices have yet to be determined. For more information go to the Triggertrap site.
It looks like an interesting accessory. I hope to review one when they become available.
Written by: Arnie Lee
About this Photo – Tetons
18th November 2013
“Easy” Scenery
This article is the another in a series of articles that I’ve called “About this photo” to draw attention to a few of those memorable photos that may be hiding in a shoebox or on your hard drive.
Sometimes it seems like you have to really work hard to capture the photograph that’s been bouncing around your head for a long, long time.
Then, there are other times when you hardly have to work at all.
For my two selected scenes below, I think that anyone with a camera couldn’t miss capturing great photographs of these two gorgeous places.
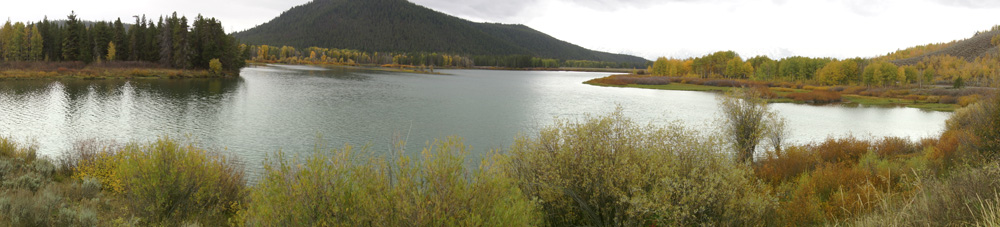
Both were taken in the Grand Teton National Park area this past October. The first was taken at the Jackson Lake Overlook and the second at Oxbow Bend.
|
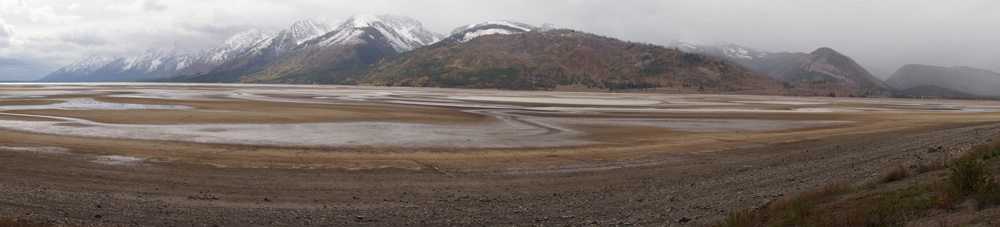
This panorama shows you an overview of the area at the Jackson Lake Overlook. You’re looking at a pretty dry Jackson Lake in the foreground. Ordinarily, it’s covered with water but at this time of the year it’s quite depleted in this part of the lake as water has been released during the Spring and Summer months into the Snake River for irrigation of farms in adjoining Idaho.
|
|
|
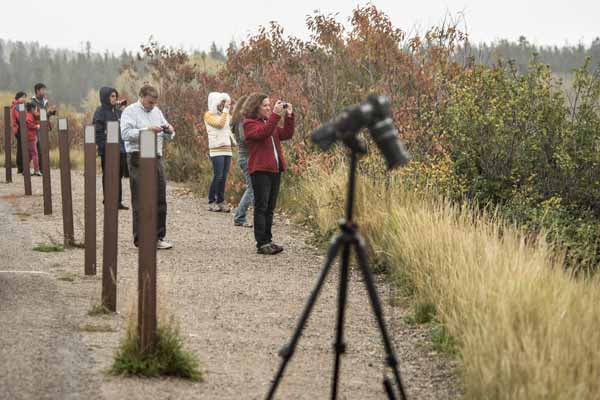
Most of the scenic areas in the Tetons are well known to all of the visitors. So when I arrived at the overlook there were already a group of photographers in various stages of picturetaking. |
 |
|
This day was quite overcast which added a dramatic feel to the Tetons. I didn’t have to do any hiking, climbing or setting up here. I walked ahead about 100 feet towards the edge of the lake (dried at this point) and calmly admired the majestic view, waited a few minutes for the clouds to position themselves in front of the distant peaks and clicked. No muss, no fuss to get this photo. I’m sure that these other visitors had as easy a time as I did capturing this scene. |
 |
|
This panorama shows you the view at Oxbow Bend. Here the Snake River makes an abrupt turn creating a pretty water foreground view with the Tetons in the distant background.
|
|
|
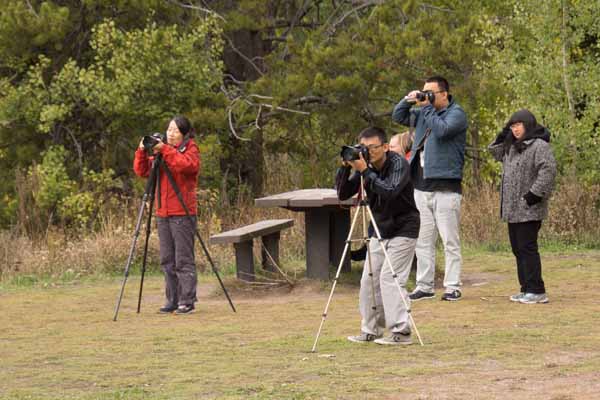
Yes, this too is a popular place. It’s one of the busiest places in the park and on this day there were dozens of visitors with loads of photographic equipment just itching to get their keepers. These photographers are standing along the shoulder of the highway that runs though the park. |
 |
|
For this photograph, I walked about 25 yards down from the highway to a place closer to the level of the river. But that was about all the work that I had to do here. On this Fall day, the sun was shining over the river and brilliant trees making everything sparkle. The thick, billowy clouds were perfectly positioned behind the Tetons. All I had to do was click-click. The scene was “picture perfect” – perfect for anyone to record the beauty. |
 |
It’s not always necessary to hike five miles uphill in 100-degree heat to capture that iconic gallery wrap. There are plenty of places that lend themselves to “easy” scenery. And easy doesn’t have to mean a “me too” photograph, a little patience and variation can help you set your photos apart.
Written by: Arnie Lee
PhotoPlus Expo – Hufa Holder
14th November 2013
Stop Lens Cap Loss
Honestly, I’m not a big fan of lens caps. In the field, I don’t want to remove the cap, put it in a pocket for safe keeping and then be get prepared to shoot. Nor do I want to dig it out of my pocket and put it back onto the lens.
Instead I’ve made it a habit of buying a good quality UV filter for each of my lenses. The filter is to protects the lens front surface from dirt, grime and scratches. I feel a lot more comfortable cleaning the surface of the filter repeatedly rather than the surface of the lens itself. To be fair, this is my preferred way of shooting and I know that not everyone subscribes to this way of working.
|
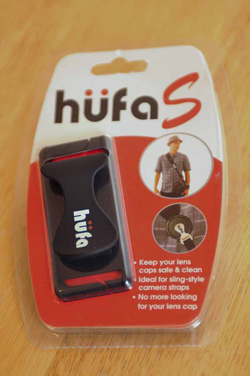
So how did we get into this round-about discussion about lens caps? At the PhotoPlus Expo last month as part of my reporting I received a Press Kit from show management. Inside were a few sample accessories courtesy of the exhibitors. One was these gifts was the Hufa S, a lens cap holder. Last week I took a few minutes to look at this product. |
 |
|
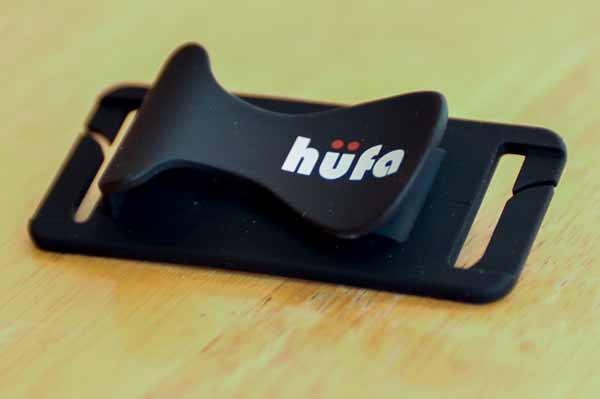
This small and clever accessory is made of hard plastic that’s fully covered with a soft rubberized material. The Hufa easily attaches to your camera strap without having to disassemble the entire setup. Instead the strap slips through the slots and is ready to use in seconds. WHen you remove your cap from the lens, you simply slip it beneath the large clip. The clip places enough pressure to hold the cap regardless of its size. |
 |
|
Here you can see how the Hufa S attaches to the camera strap. You can adjust the position of the Hufa S further up or down along the strap so that it won’t interfere with your handling of the camera. |
 |
There are actually two models: the Hufa and the Hufa S. The Hufa attaches to wide camera straps that are often found on camera bags. The “S” model shown here is for the narrower camera straps. Each model is available in three different colors: black, red and white. They are affordably priced at $10 each.
If you’re interested in buying one, please visit Hufa Holder.
Written by: Arnie Lee
« Older Posts — Newer Posts »