Online Magazine
Recent Posts
- Safeguard your Cellphone Photos
- Black & White to Color – Instantly
- Wearing Many Hats
- Video Roundup
- Rescuing Your Blurry Pictures
- Showing Their Age
- What is Your Angle?
- Panorama Photos
- Humorous Photos
- Close Ups
- Fisheye Pictures
- Photo Antiquities
- Printing Big
- Appreciating Scale
- Celebrity Sightings
Tags
More Places to Go
- Free "How-To" Books “How To” books for popular cameras 0
- Vist Us on Facebook keep in touch with us on Facebook 2
Archives
- July 2023 (1)
- March 2023 (2)
- February 2023 (1)
- December 2022 (1)
- October 2022 (1)
- September 2022 (8)
- August 2022 (9)
- July 2022 (1)
- June 2022 (1)
- June 2021 (1)
- May 2021 (1)
- March 2021 (5)
- February 2021 (4)
- January 2021 (2)
- April 2019 (1)
- March 2019 (1)
- February 2019 (1)
- October 2018 (2)
- April 2018 (1)
- March 2018 (4)
- February 2018 (1)
- November 2017 (1)
- August 2017 (1)
- June 2017 (1)
- April 2017 (1)
- March 2017 (5)
- February 2017 (2)
- January 2017 (1)
- October 2016 (1)
- September 2016 (1)
- August 2016 (1)
- July 2016 (1)
- May 2016 (1)
- April 2016 (1)
- March 2016 (2)
- February 2016 (1)
- January 2016 (2)
- December 2015 (1)
- November 2015 (1)
- October 2015 (3)
- April 2015 (1)
- March 2015 (5)
- February 2015 (1)
- January 2015 (4)
- December 2014 (2)
- November 2014 (5)
- October 2014 (2)
- September 2014 (1)
- August 2014 (2)
- July 2014 (1)
- May 2014 (1)
- April 2014 (5)
- March 2014 (5)
- December 2013 (2)
- November 2013 (18)
- October 2013 (1)
- September 2013 (1)
- August 2013 (1)
- July 2013 (1)
- June 2013 (3)
- May 2013 (1)
- April 2013 (2)
- March 2013 (1)
- February 2013 (1)
- January 2013 (1)
- December 2012 (1)
- November 2012 (2)
- October 2012 (2)
- September 2012 (5)
- August 2012 (2)
- July 2012 (1)
- June 2012 (1)
- May 2012 (1)
- April 2012 (4)
- March 2012 (1)
- February 2012 (1)
- January 2012 (3)
- December 2011 (1)
- November 2011 (3)
- October 2011 (1)
- September 2011 (2)
- August 2011 (2)
- June 2011 (3)
- May 2011 (4)
- April 2011 (8)
- March 2011 (8)
- February 2011 (10)
- January 2011 (6)
- December 2010 (11)
- November 2010 (14)
- October 2010 (6)
- September 2010 (12)
- August 2010 (2)
- July 2010 (4)
- June 2010 (3)
- May 2010 (1)
- April 2010 (1)
- March 2010 (2)
- February 2010 (1)
- January 2010 (1)
- December 2009 (1)
- November 2009 (2)
- October 2009 (2)
- September 2009 (1)
- August 2009 (3)
- July 2009 (2)
- June 2009 (1)
- May 2009 (2)
- April 2009 (1)
- March 2009 (2)
- February 2009 (1)
- January 2009 (3)
Wild Misdirection
16th March 2013
Making Wildlife Appear Even More Wild
I consider myself pretty honest and straight-forward – both in business life and in personal life.
So you may wonder why I am writing an article about deception. Maybe this is too harsh a word – let’s just call it misdirection.
Let me explain. Often photographs tell only part of the story. If I am clever, I can photograph a tiger in a zoo by carefully orchestrating the background, lighting, angle and surroundings to make it feel that it was taken in the heart of the Bengal jungle. I might lead you to believe that I shoot for National Geographic.
Following are a few examples of how you might creatively use point of view (POV) to enhance your wildlife photography skills and put you in line for work at the nature magazines.
|
|
|
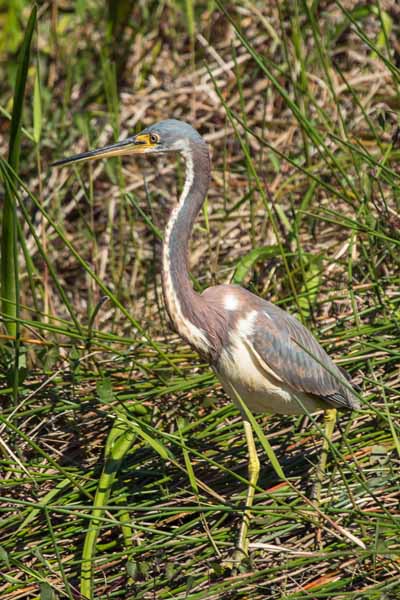 |
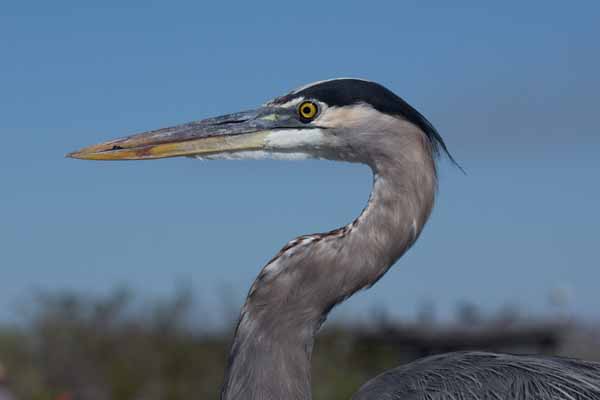
The blue heron on the left was standing across a shallow ravine about 50 feet from me. At that distance it was easy to capture him among his surrounding. By kneeling down and zooming the lens, I was able to isolate his head and avoid the cluttered background in the above photo. |
|
|
|
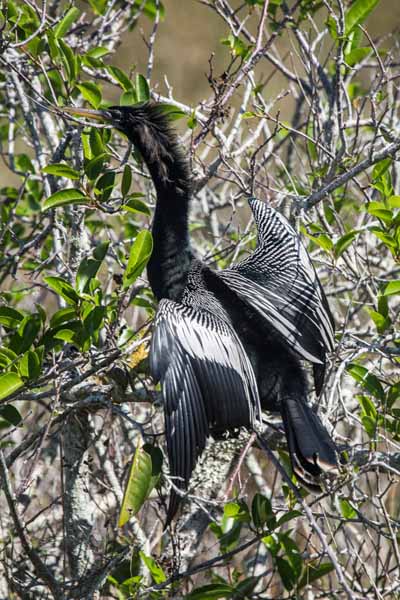 |
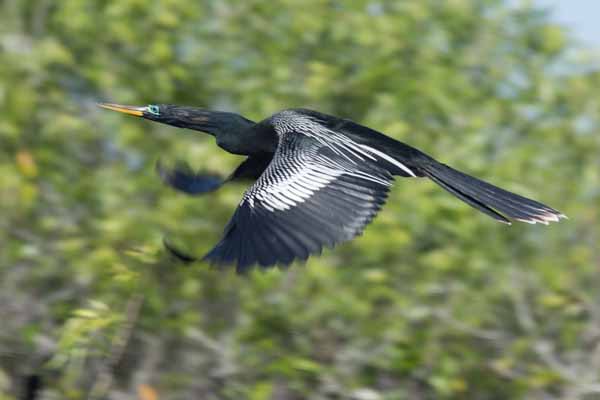
The lovely anhinga on the left was drying his wings on a nearby branch. Again the presence of the branches detract from the fine detail of the bird. A few minutes of patience paid off. I was perfectly positioned to capture this bird as he became airborne. The trees in the background are blurred by the shallow depth of field. Overall, this photo gives me a better sense of wildness. |
|
|
|
 |
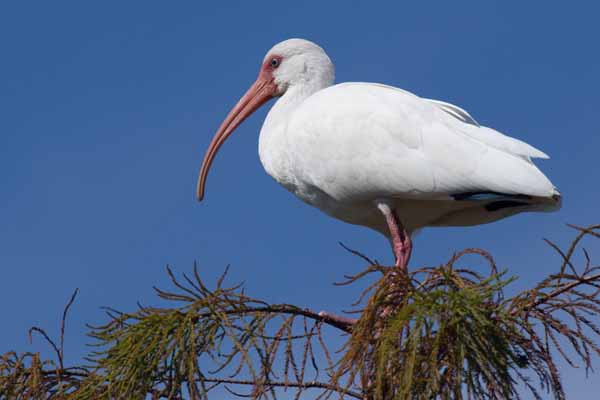 |
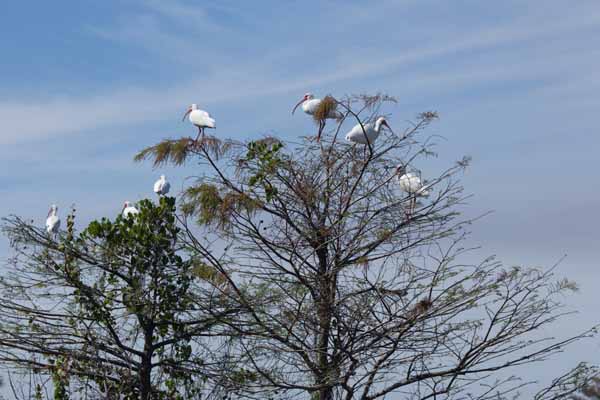
| These wood storks in the left photo were very fond of the tree. But somehow photographing a flock of birds in the tree wasn’t the feeling I was seeking. By isolating a single bird using a longer focal length, I was able to maintain more of a sense of wildness.
|
|
 |
 |
 |
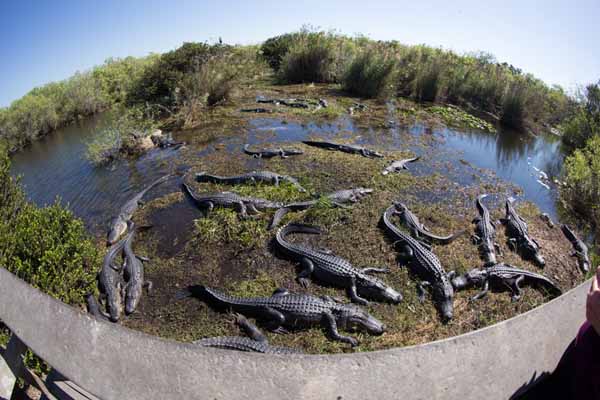
Here’s a series of photos that show that these vicious looking alligators were actually in a tame part of the Everglades. The wood deck protects the visitors from all of these alligators.
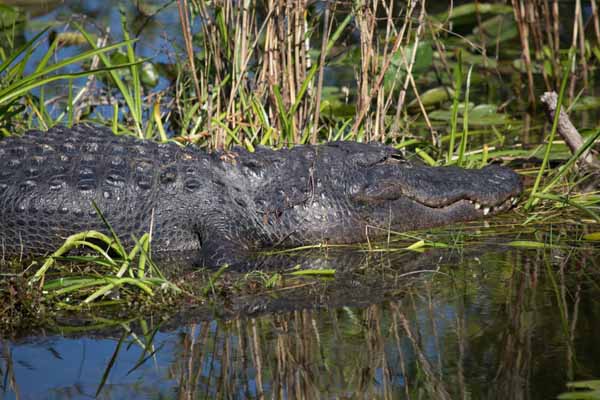
Above, without the onlookers, the group of alligators appear in a more “wild” environment except for the inclusion of the wood railing in the foreground. Left, I’ve again isolated the creature from the human elements. I think this method enhances the wildness factor. |
Those of you who have already used photographic misdirection, please raise your hands!
Of course, creative point of view can be used for any kind of photography, not just wildlife. So get out there and change your point of view around.
Written by Arnie Lee
Can we change your Point Of View?
07th September 2012
Everyone has a point of view
But hold on!
For this discussion, I’m not talking about your opinion. Rather, I’m referring to your visual point of view.
Your view of the real world is determined by the physical specs of your eyes. When standing, the average person’s eyes sit between 5 and 6 feet off of the ground. Looking straight ahead, the eyes can take in about 45-degrees of a scene. Historically, the “normal” lens on a camera was designed to duplicate this angle – thus a 50mm lens on a 35mm camera has this same view.
In today’s photo-frenzied world, we’re taking hundreds of million of photos daily. And aren’t most of these photos taken from the average person’s viewpoint? Probably.
My contention is that changing your point of view slightly results in more interesting (and less boring, me-too) pictures.
How do you do this?
Zoom
If your camera has a zoom lens – change the zoom factor. Zoom in to get a closer (and more shallow) view of your subject. Zoom out to include a smaller view of your subject. If you’re having a hard time picking out a face that’s far too tiny to see, zooming in can help it magically reappear in your photo. The plate of appetizers below has better appeal up close than at a distance. Unfortunately, some of our commonly used picture-taking devices lack a zoom feature. For example, the popular iPhone 4S has a fixed lens of about 35mm (equivalent on a 35mm camera) so you’ll have to resort to one of the other methods.
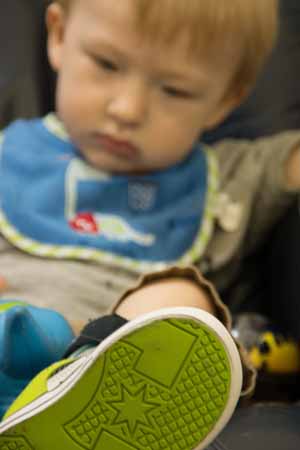
Dance a Little
Another way to zoom in is to move closer to your subject. Conversely, zoom out by moving farther away from your subject. This sounds almost silly until you realize that not very many picture-takers use this method. It’s almost as if their feet are cemented to the earth. Dancing with your camera can actually produce interesting views when compared to the immovable object school of photograph. You’ll notice that I danced a little to get closer to the green soles on the young boy’s feet.
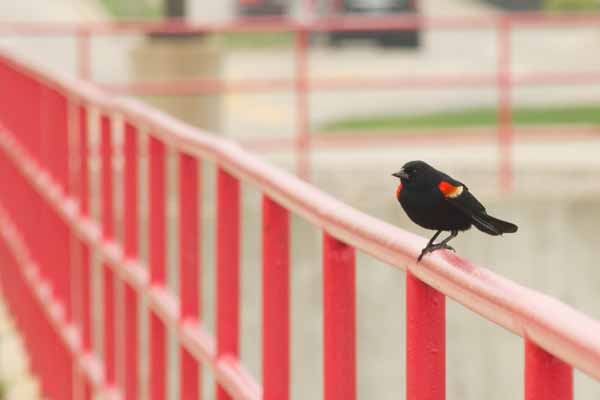
Do the Slide
If you see a light post coming out of Betty’s head, move yourself to the right. If you want to see the gentleman’s cellphone instead of the back of his shirt, slide to the left. It’s perfectly reasonable to change the direction from which you snap your photograph. You’ll most likely end up choosing a direction which others don’t often see such as moving closer to the fence to capture the blackbird.
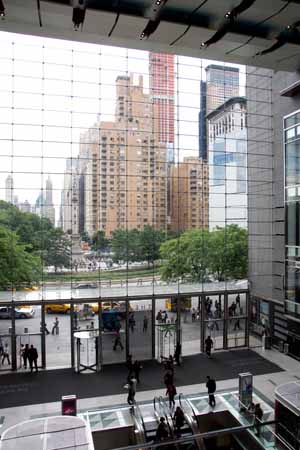
Get a Pair of Stilts
Another way to achieve photos with impact is to shoot down on your subjects. Standing on a stable chair can add two feet to your eye level. Or a set of nearby stairs can also give you a needed boost such as the overhead shot of the table and chairs. Whatever method you use to get up there will make your pictures stand out from the norm.
Things are Looking Up
It’s a bird, it’s a plane, it’s … You get the idea. Thankfully, our heads are hinged and move upward and downward. Taking a photo of a kid climbing on the monkey bars and seeing his face up close from beneath is very different from the usual playground photo taken from 20 feet away.
Do Deep Knee Bends
If most of your pictures look like they’ve been taken from 5 to 6 feet off of the ground, you may need to do more calisthenics. Lowering your body slightly by bending or kneeling can produce a dramatic effect in your photos. Instead of capturing the top of the young girl’s hair, I was in the right position to photograph her face.
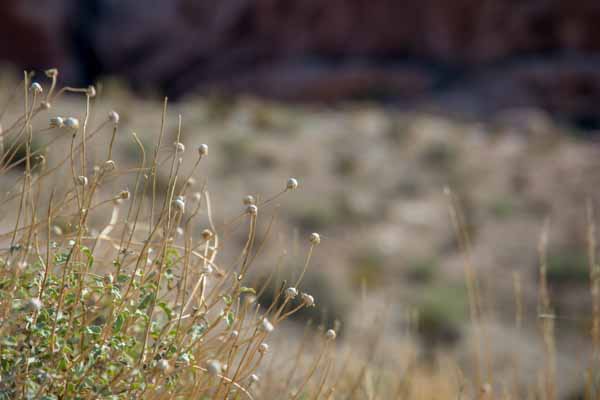
Down and Dirty
If you have the strength and fortitude, you can shoot by laying flat on your stomach and crawling around. I often use this technique to photograph flowers and the like. This changes my normal perspective to that of a bug and usually results in some interesting shots. However, it usually takes me a bit longer to get myself upright afterwards.
Enough talk. The following are a few photographs that I’ve taken using one one of more of these suggestions.
 |
 |
|
|
|
 |
 |
|
|
|
 |
 |
|
|
|
 |
 |
|
|
|
 |
 |
|
|
|
 |
 |
|
|
|
My last suggestion, is one that you’ve already seen in some of the above photos and that is to:
Mix It Up
Use the above suggestions in combination with one another. For example, zooming out and bending at the knees gives you a wider angle and lower view of your subject. Hopefully, the physical requirements to do this won’t impair your health.
In photography, it’s fine to take a different point of view and go against the masses. Sometimes, it’s like that in life too.
Written by: Arnie Lee
Filling the frame
07th June 2011
Sometimes it pays to move in close
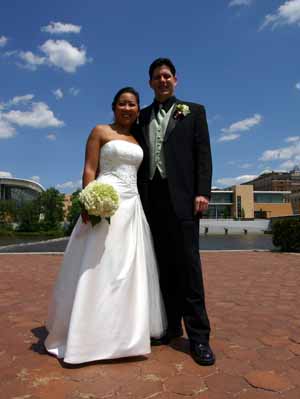
For portraits, conventional composition has you surrounding your main subject with a “border” – space around the face
For a more intimate look at your subject, throw away the rulebook!
 In this photo, the young girl’s face has an interesting look but the background is slightly distracting. |
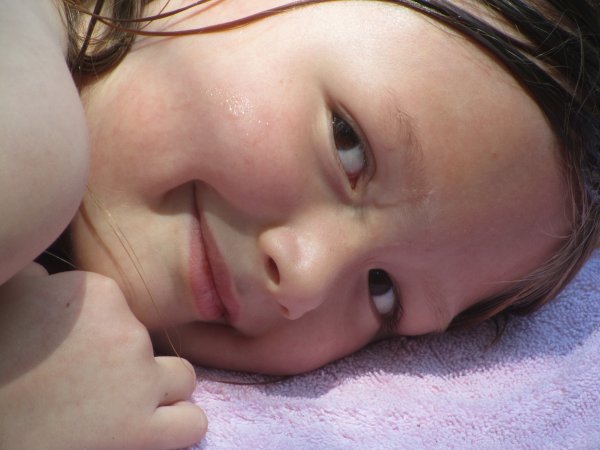 Here we’ve moved closer to subject, eliminated the background and keyed in on her eyes and her giant smile. |
 By including the yard in this photo, we’ve caught this young lady in action but lost the emphasis of her face. |
 Again, by moving in close (or zooming in) we’ve changed the feel from an action shot to a portrait. |
By simply minimizing or eliminating the border, you’ll key in on the all important eyes and face of your subject. The next time you’re shooting faces, try filling the frame.
Written by Arnie Lee
« Older Posts — Newer Posts »