Online Magazine
Recent Posts
- Safeguard your Cellphone Photos
- Black & White to Color – Instantly
- Wearing Many Hats
- Video Roundup
- Rescuing Your Blurry Pictures
- Showing Their Age
- What is Your Angle?
- Panorama Photos
- Humorous Photos
- Close Ups
- Fisheye Pictures
- Photo Antiquities
- Printing Big
- Appreciating Scale
- Celebrity Sightings
Tags
More Places to Go
- Free "How-To" Books “How To” books for popular cameras 0
- Vist Us on Facebook keep in touch with us on Facebook 2
Archives
- July 2023 (1)
- March 2023 (2)
- February 2023 (1)
- December 2022 (1)
- October 2022 (1)
- September 2022 (8)
- August 2022 (9)
- July 2022 (1)
- June 2022 (1)
- June 2021 (1)
- May 2021 (1)
- March 2021 (5)
- February 2021 (4)
- January 2021 (2)
- April 2019 (1)
- March 2019 (1)
- February 2019 (1)
- October 2018 (2)
- April 2018 (1)
- March 2018 (4)
- February 2018 (1)
- November 2017 (1)
- August 2017 (1)
- June 2017 (1)
- April 2017 (1)
- March 2017 (5)
- February 2017 (2)
- January 2017 (1)
- October 2016 (1)
- September 2016 (1)
- August 2016 (1)
- July 2016 (1)
- May 2016 (1)
- April 2016 (1)
- March 2016 (2)
- February 2016 (1)
- January 2016 (2)
- December 2015 (1)
- November 2015 (1)
- October 2015 (3)
- April 2015 (1)
- March 2015 (5)
- February 2015 (1)
- January 2015 (4)
- December 2014 (2)
- November 2014 (5)
- October 2014 (2)
- September 2014 (1)
- August 2014 (2)
- July 2014 (1)
- May 2014 (1)
- April 2014 (5)
- March 2014 (5)
- December 2013 (2)
- November 2013 (18)
- October 2013 (1)
- September 2013 (1)
- August 2013 (1)
- July 2013 (1)
- June 2013 (3)
- May 2013 (1)
- April 2013 (2)
- March 2013 (1)
- February 2013 (1)
- January 2013 (1)
- December 2012 (1)
- November 2012 (2)
- October 2012 (2)
- September 2012 (5)
- August 2012 (2)
- July 2012 (1)
- June 2012 (1)
- May 2012 (1)
- April 2012 (4)
- March 2012 (1)
- February 2012 (1)
- January 2012 (3)
- December 2011 (1)
- November 2011 (3)
- October 2011 (1)
- September 2011 (2)
- August 2011 (2)
- June 2011 (3)
- May 2011 (4)
- April 2011 (8)
- March 2011 (8)
- February 2011 (10)
- January 2011 (6)
- December 2010 (11)
- November 2010 (14)
- October 2010 (6)
- September 2010 (12)
- August 2010 (2)
- July 2010 (4)
- June 2010 (3)
- May 2010 (1)
- April 2010 (1)
- March 2010 (2)
- February 2010 (1)
- January 2010 (1)
- December 2009 (1)
- November 2009 (2)
- October 2009 (2)
- September 2009 (1)
- August 2009 (3)
- July 2009 (2)
- June 2009 (1)
- May 2009 (2)
- April 2009 (1)
- March 2009 (2)
- February 2009 (1)
- January 2009 (3)
About This Photo – Summer 1970
02nd August 2022
I’ve thoroughly enjoyed photography since I was a youngster. This in turn is the reason that my picture taking has spanned more than five decades.
I categorize the photos that I take into one of two “camps” – the snapshots and the memorable photos.
This article is the another in a series of articles that I’ve called “About this photo” to draw attention to a few of those memorable photos that may be hiding in a shoebox or on your hard drive.
Unlike some people who have photographic memories, I instead have memories about certain photographs.
Most of these special photographs were taken long, long ago. They are indelible and remain riveted in my mind. And so, in this “About this photo” series, I’d like to key in on one of these unforgettable photographs to bring you back to the time and circumstances under which it was taken.
|
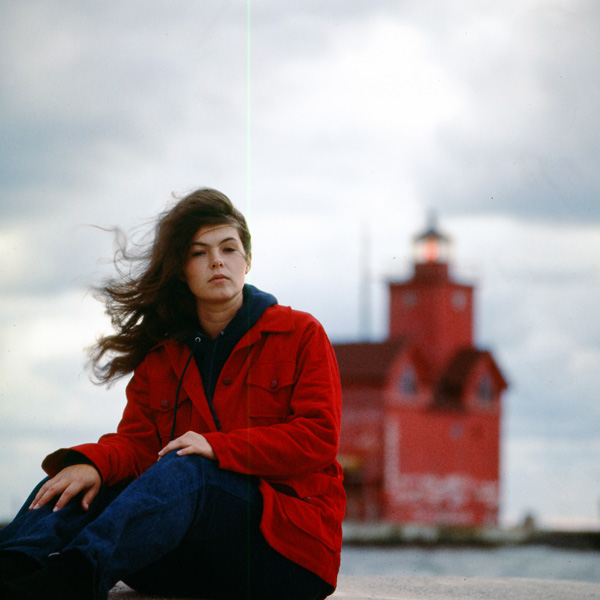
Taken late summer 1970, this is a photo of my girlfriend along Lake Michigan. We spent many weekends at this beach that summer. Usually the beach was very crowded, but on this cloudy and windy day, we had the run of the sand and shore to ourselves. The red lighthouse was a familiar site to anyone who knows this area and remains a key attraction to the beach today. It’s a lucky coincidence that my girlfriend’s jacket was about the same shade of red as the lighthouse. The reason that this photo is etched in my mind is that I’ve been married to this lovely lady for 50 years now. |
 |
|
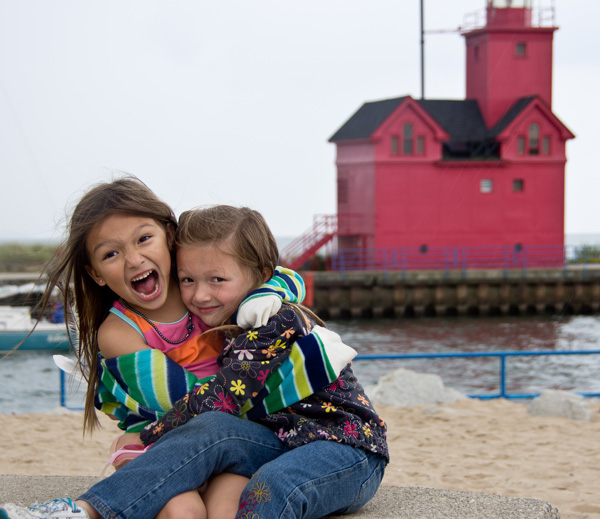
Now let’s skip forward some 40+ years. This photo was taken a few summers ago. Here we have two young girls having fun at the same location on Lake Michigan. You can see the same red lighthouse along the water albeit at a slightly different angle. These are two of our young grandchildren. As we were walking along the beach I was reminded of the 1970 photograph when we approached the red lighthouse. I asked the two girls to pose on the bench in the foreground. This photo captures the familiar feelings of warmth and affection that has somehow remained with me for more than 50 years. |
 |
Along the way, I’ve taken a huge number of snapshots. However, the number of memorable photos that I’ve taken is far smaller. Yet it’s the memorable ones that have a magical ability to steer emotions, feelings and pleasure into our minds, even years later. Simply amazing.
Written by Arnie Lee
Giving Your Prints a Backbone
01st August 2022
After You Finally Print That Cellphone Photo
The overwhelming number of photos these days reside on cellphones. It’s common see friends staring at a screen as one of them swipes to show you that funny picture that they captured a few days ago.
Once in a while you may have want to get that image off of your screen and into someone’s hand. You can send the digital copy to your home printer or email it to your local Walgreen (or other local printer) to have it turned into a “real” photograph.
When it’s finally printed you can clip it to your refrigerator door with a magnet, scotch tape it to a nearby wall or mail it to your grandma to show her your graduation gown and diploma. But you may want to print a treasured photo and turn it into a proud presentation.
Here’s a few ways that I’ve done this over the years.
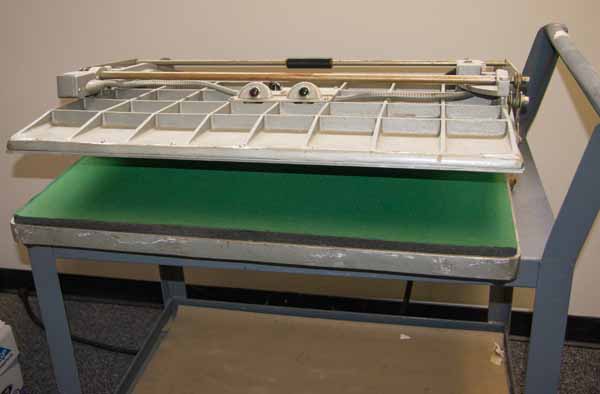
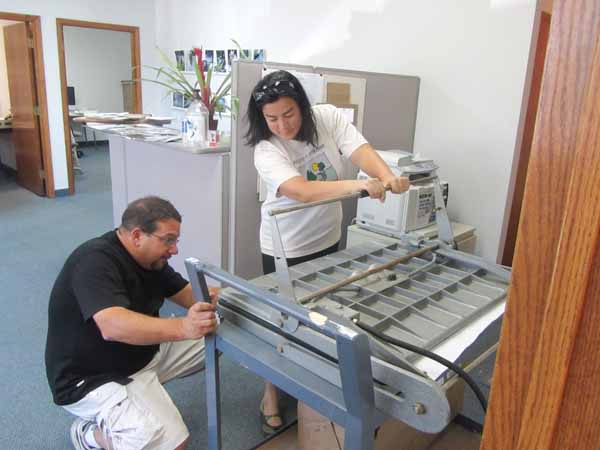
Dry Mounting |
|
 |
 |
|
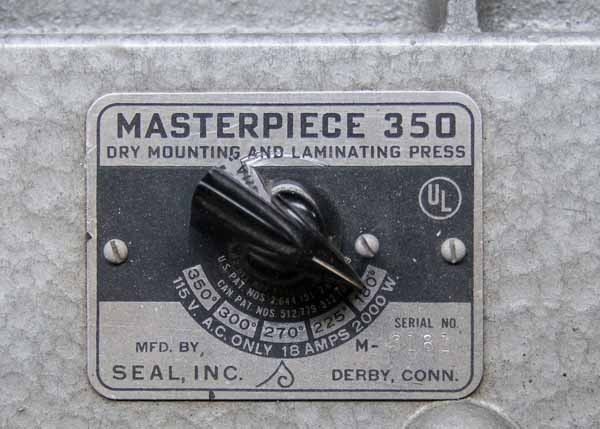
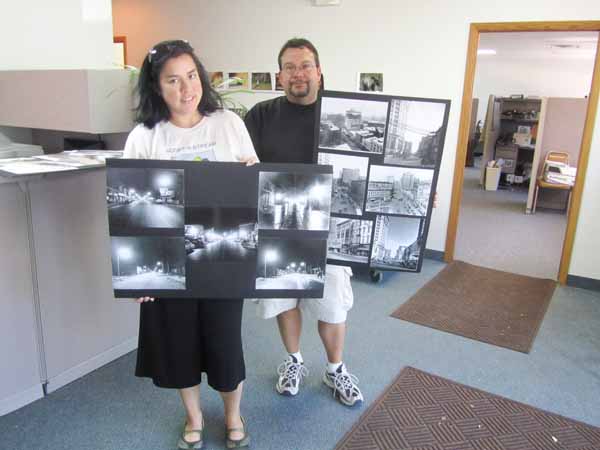
This large piece of equipment is called a dry mount press. A thin sheet of specially prepared paper is sandwiched between a mounting board and the back of the photograph. The heated press squeezes the sandwich for a short time leaving the photograph “pasted” to the board.
|
|
|
|
|
 |
 |
|
This press can handle photographs enlargement up to 20″ x 24″. Other dry mounting presses are available in smaller sizes.
|
|
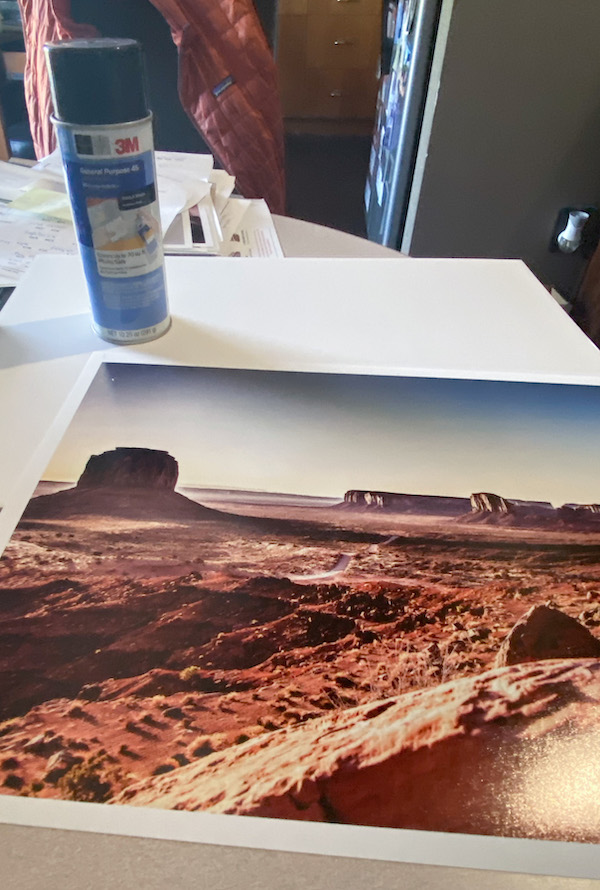
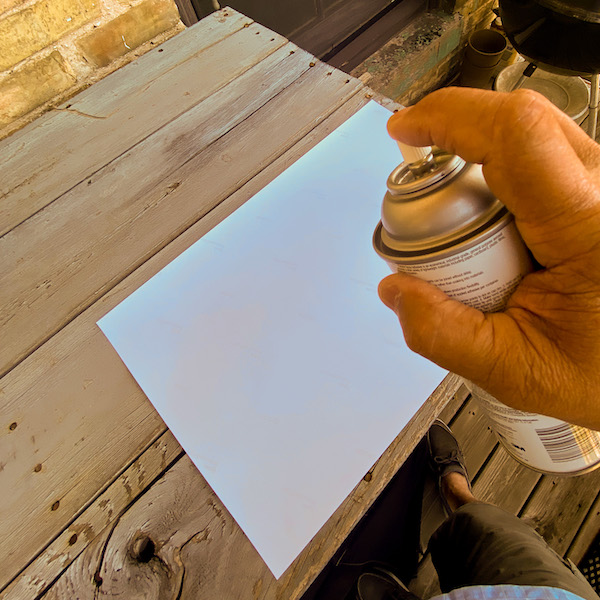
Spray Adhesive Mounting |
|
 |
 |
|
For smaller prints I sometimes use this adhesive spray. This one is made by 3M but other similar products are also available.
|
|
|
|
|
|
|
|
 |
 |
|
The adhesive is evenly sprayed on the back of the photograph. Place the photograph on a larger piece of paper or corrugate since the adhesive will “overspray”. You’ll want to do this is a non-enclosed space so that you don’t inhale the fumes. Carefully apply the photograph to the mounting board.
|
|
|
|
|
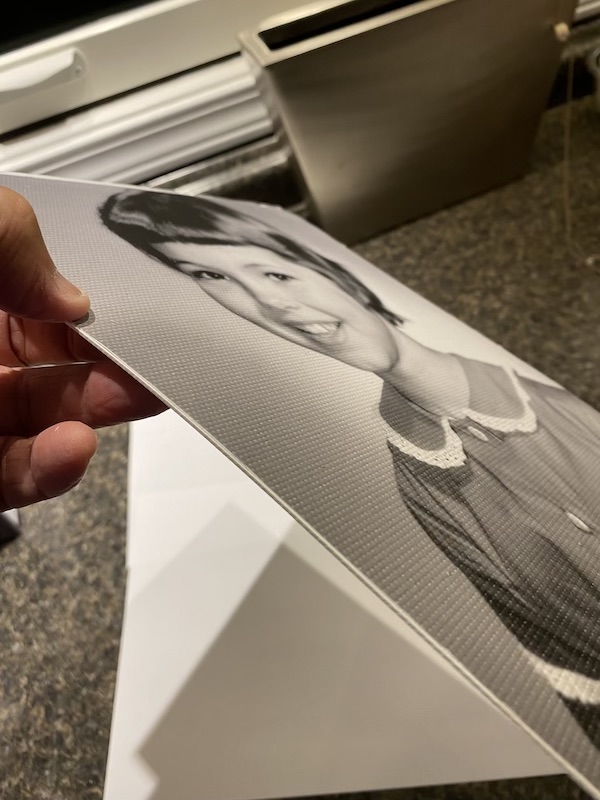
Ultra Board Mounting |
|
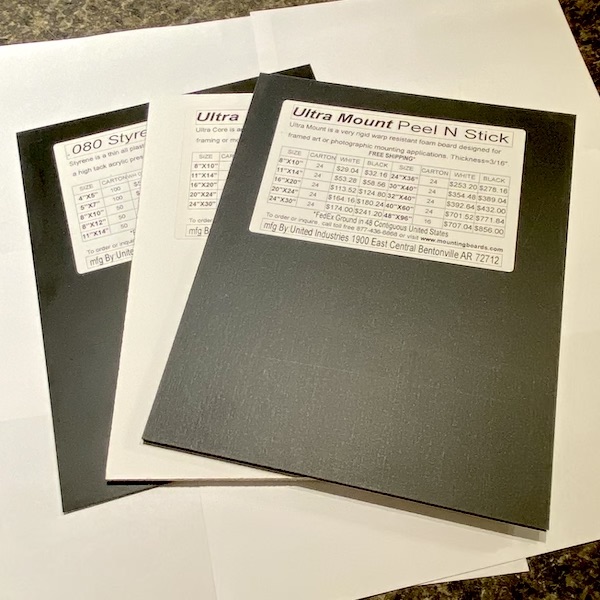 I discovered a very convenient product for presenting photographs called “UltraBoard”. These products are available in various sizes and thicknesses from United Industries |
 |
|
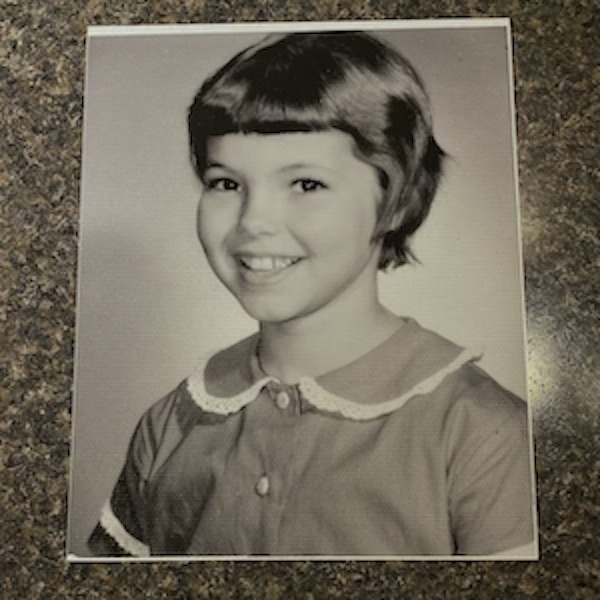
Using an UltraBoard is simple. Unpeal the protective backing from the board and carefully position your photograph onto the surface.
|
|
|
|
|
 |
 |
|
The photograph is securely mounted to the flexible board and ready for presentation.
|
|
When you finally get those images off of your cellphone you now have few ways of making a presentation quality photo.
Why not show off your favorites without swiping your cellphone screen?
Written by: Arnie Lee
Lens Settings and the Background
26th June 2022
How Size Matters
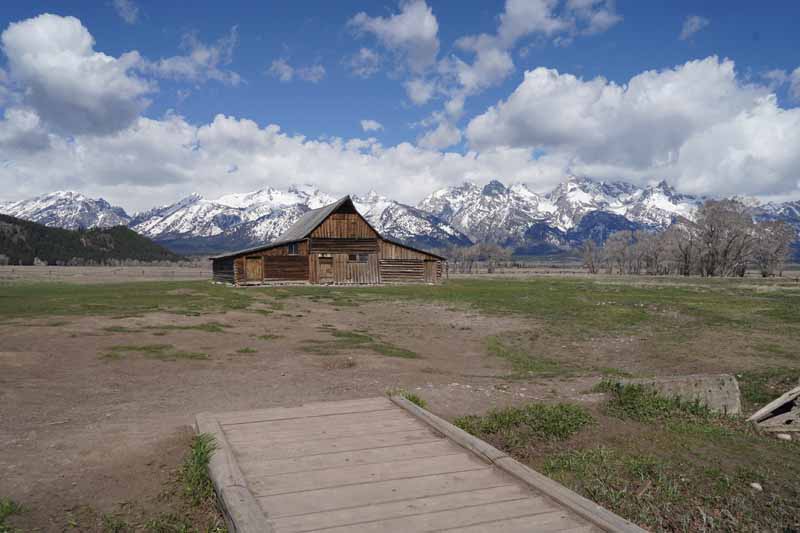
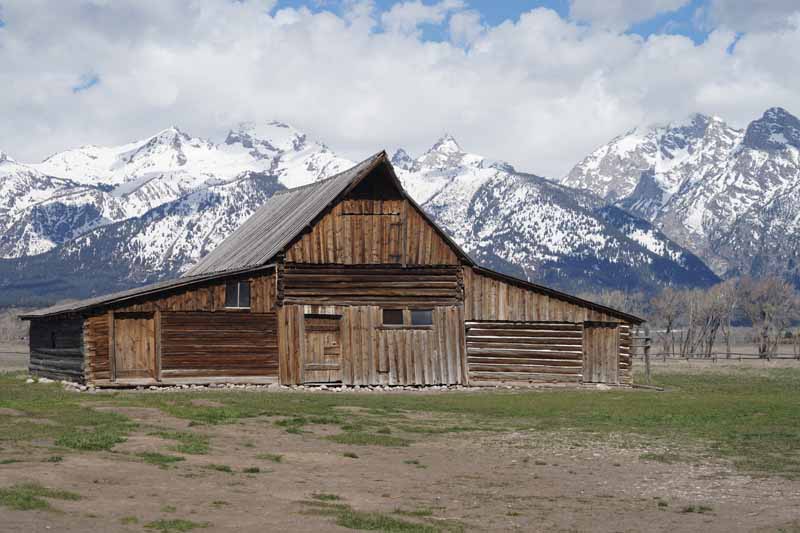
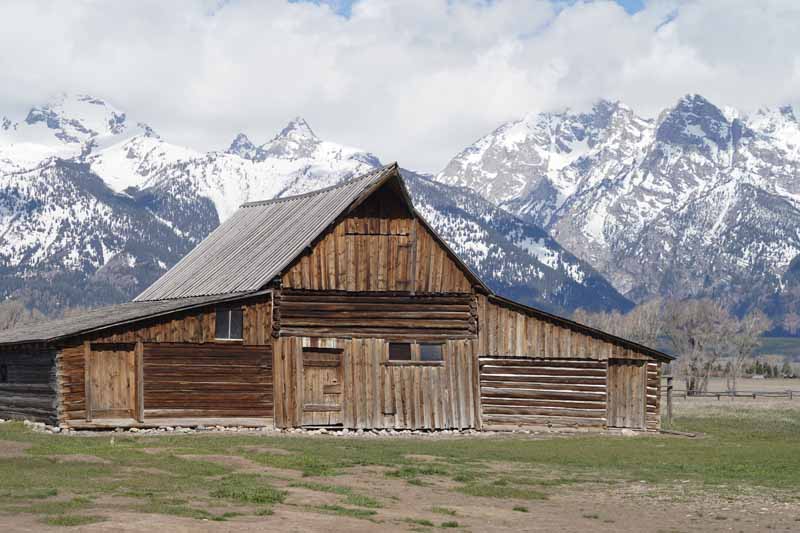
When picturetaking, most often I’m concerned about the subject that is closest to me. I’ll pick the length of the lens that emphasizes the subject.
But there are often times that I’ll want the subject to fit in nicely with the background. By using a zoom lens, I can compose the subject in the viewfinder by varying the lens length setting.
While taking these photographs, I stood in the same place at the same distance from the foreground subject. I changed only the length of the lens (using a 24 to 240mm zoom lens).
As I’m not verbally astute enough to give you a proper explanation, I’ll show you visually how changing the lens length interacts with the perspective of the background.
My favorite is the last photo taken with the longest lens setting which emphasizes the mountains in the background.
For those that are interested, the foreground subject is the Moulton barn along Mormon Row in Grand Teton National Park. The background are some of the iconic mountains of the Teton Range.

For reference this is a photo taken with an iPhone at 4.5mm (equivalent to 26mm lens)
full frame camera with lens set at 27mm

full frame camera with lens set a 37mm

full frame camera with lens set at 53mm
full frame camera with lens set at 66mm
full frame camera with lens set at 83mm