Online Magazine
Recent Posts
- Safeguard your Cellphone Photos
- Black & White to Color – Instantly
- Wearing Many Hats
- Video Roundup
- Rescuing Your Blurry Pictures
- Showing Their Age
- What is Your Angle?
- Panorama Photos
- Humorous Photos
- Close Ups
- Fisheye Pictures
- Photo Antiquities
- Printing Big
- Appreciating Scale
- Celebrity Sightings
Tags
More Places to Go
- Free "How-To" Books “How To” books for popular cameras 0
- Vist Us on Facebook keep in touch with us on Facebook 2
Archives
- July 2023 (1)
- March 2023 (2)
- February 2023 (1)
- December 2022 (1)
- October 2022 (1)
- September 2022 (8)
- August 2022 (9)
- July 2022 (1)
- June 2022 (1)
- June 2021 (1)
- May 2021 (1)
- March 2021 (5)
- February 2021 (4)
- January 2021 (2)
- April 2019 (1)
- March 2019 (1)
- February 2019 (1)
- October 2018 (2)
- April 2018 (1)
- March 2018 (4)
- February 2018 (1)
- November 2017 (1)
- August 2017 (1)
- June 2017 (1)
- April 2017 (1)
- March 2017 (5)
- February 2017 (2)
- January 2017 (1)
- October 2016 (1)
- September 2016 (1)
- August 2016 (1)
- July 2016 (1)
- May 2016 (1)
- April 2016 (1)
- March 2016 (2)
- February 2016 (1)
- January 2016 (2)
- December 2015 (1)
- November 2015 (1)
- October 2015 (3)
- April 2015 (1)
- March 2015 (5)
- February 2015 (1)
- January 2015 (4)
- December 2014 (2)
- November 2014 (5)
- October 2014 (2)
- September 2014 (1)
- August 2014 (2)
- July 2014 (1)
- May 2014 (1)
- April 2014 (5)
- March 2014 (5)
- December 2013 (2)
- November 2013 (18)
- October 2013 (1)
- September 2013 (1)
- August 2013 (1)
- July 2013 (1)
- June 2013 (3)
- May 2013 (1)
- April 2013 (2)
- March 2013 (1)
- February 2013 (1)
- January 2013 (1)
- December 2012 (1)
- November 2012 (2)
- October 2012 (2)
- September 2012 (5)
- August 2012 (2)
- July 2012 (1)
- June 2012 (1)
- May 2012 (1)
- April 2012 (4)
- March 2012 (1)
- February 2012 (1)
- January 2012 (3)
- December 2011 (1)
- November 2011 (3)
- October 2011 (1)
- September 2011 (2)
- August 2011 (2)
- June 2011 (3)
- May 2011 (4)
- April 2011 (8)
- March 2011 (8)
- February 2011 (10)
- January 2011 (6)
- December 2010 (11)
- November 2010 (14)
- October 2010 (6)
- September 2010 (12)
- August 2010 (2)
- July 2010 (4)
- June 2010 (3)
- May 2010 (1)
- April 2010 (1)
- March 2010 (2)
- February 2010 (1)
- January 2010 (1)
- December 2009 (1)
- November 2009 (2)
- October 2009 (2)
- September 2009 (1)
- August 2009 (3)
- July 2009 (2)
- June 2009 (1)
- May 2009 (2)
- April 2009 (1)
- March 2009 (2)
- February 2009 (1)
- January 2009 (3)
A Little Help from a Steady Hand
01st November 2013
The Case For a Tripod
I’ve never been a big user of tripods. I have nothing against using them and in fact I own several of them. I use a tripod mostly around the studio when shooting still life and products. But when I’m shooting out of the studio, I rarely take one along. I like the lightweight freedom and try to minimize the amount of gear that I carry. And I am not very patient trying to set up for a shot. When traveling by airplane a tripod is just not very convenient.
|
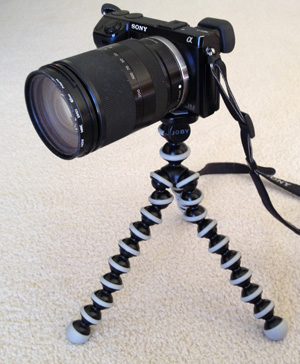
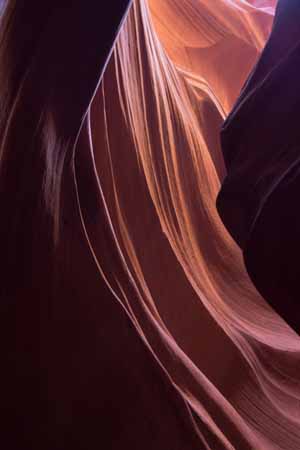
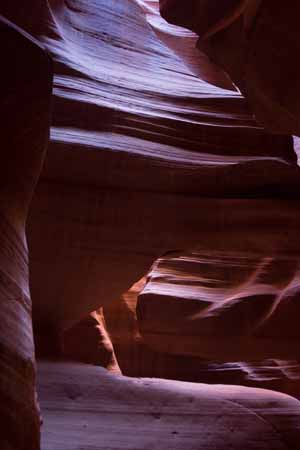
That being said, I found a tripod very helpful on my most recent outing. To be completely truthful, I didn’t use a conventional tripod. Instead I carried a Joby Gorillapod. The Gorillapod is a very lightweight flexible stand. It has a 1/4″x20 screw for mounting to your camera’s tripod socket. Its legs are jointed and bendable to provide a stable platform even when rested on uneven surfaces. I carried a Gorillapod with me while exploring Antelope Canyon in northern Arizona. These are slot canyons formed from sandstone and carved by wind and water over millions of years. What is thrilling about these formations is that light filters it way from above through narrow passages creating amazingly colorful visuals as you hike through the passageways. |
 |
During daylight, the canyon is dimly lit yet remains easily and comfortably walkable. Photographically, there is enough light in some areas to shoot handheld. However to capture images of some of the more dimly lit rock faces, you’ll need to use longer exposure times e.g. 1/2 second or longer. Not many of us can handhold at these slower shutter speeds.
Knowing this ahead of time, I mounted one of my cameras on the Gorillapod. As you can see from its short legs, when placed on the ground it’s not convenient to use unless you’re kneeling down. In the canyon, the rocks are the perfect surface on which to rest this mini tripod.
For much of the tour, I’m looking upwards towards the light entering the canyon from above. To capture a long exposure, I twisted the legs to conform with the contour of an adjacent rock surface to make a “rock steady” platform. I used this technique for exposures up to two full seconds.
 |
 |
 |
If you too are a non-tripod guy like me, you might find it useful during one of these outings to include a very portable tripod. There are several brands of portable steadying devices. You can find out more about the one I used at Joby Gorillapod
If you’re interested in visiting these amazing slot canyons located near Page, Arizona, you’ll want to book a tour with one of the five Navajo owned companies. I chose an extended photo tour 2-1/2 hours instead of the normal 1-1/2 hour tours. I booked through Antelope Canyon Tours and our tour guide Rosie was splendid in pointing out many of the colorful formations and giving us photo shooting tips.
Written by: Arnie Lee
Making your Photos Move
03rd July 2013
A case against Stop Action
The usual “rule” for photography is to choose a shutter speed fast enough to eliminate the jitter or bluriness when the subject moves.
But sometimes ignoring the rule leads to more interesting photographs.
Here’s a few examples.
|
|
|||
| This little girl is practicing to become a major league baseball player. She’s winding up, ready to let ‘er rip. By using a slower shutter speed, can’t you feel the breeze as she whips the ball towards the batter? Here the shutter speed was 1/50th second. Had I used a faster shutter speed, her left arm would have been frozen. |
 |
Here she’s enjoying the outdoor swingset. By itself, the photo shows no movement. But seeing her at the apogee (highest point) of the swing, doesn’t it conjure the feeling of motion? Recall that at the top of her swing, the velocity is zero – enabling you to use a relatively slow shutter speed to “capture” the motion. |  |
|
|
|||
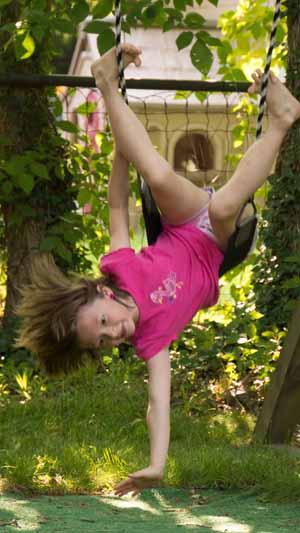
| Again we see a subject on a swingset but this time upside down. The relatively slow shutter speed of 1/100th second stops the action at the top of her swing.
In this case, the pose with her legs flailing about helps to introduce movement. And see how her hair is flying thereby adding to the feeling of action in the image. |
 |
A final example is this photo that lets me see the speed of the hoop and just about hear the air whirling around.
For this photo, I patiently waited for a moment when the young girl’s face was in a relatively fixed position while at the same time her arms were wildly gyrating within the hoop. Then CLICK. |
 |
|
|
|||
Use your camera’s shutter speed priority mode. Try setting the shutter speed to 1/100th of a second or slower – e.g. 1/25 or 1/50. If you use an even slower shutter speed, you may end up with blurry photos since you may not be able to hold the camera steady enough without introducing camera shake.
With just a little practice you can make your photos move.
Written by Arnie Lee
In Search of Nemo
11th June 2013
Underwater Photography – Blllllrrrrrpppp!
For those of us who spend their winters in the frigid cold, surrounded by ice and snow for months at a time, a visit to the tropics is a blessing. To me, the mention of the tropics brings warmth and water to mind. And that’s precisely what we were after when we booked a trip to the Big Island of Hawaii.
The weather there is predictably warm so it’s easy to pack: a couple of bathing suits, a few pairs of shorts and several shirts. And don’t forget the snorkeling equipment! As an avid picture-taker, my luggage also includes a camera or two so that I can record the events that we may encounter.
|
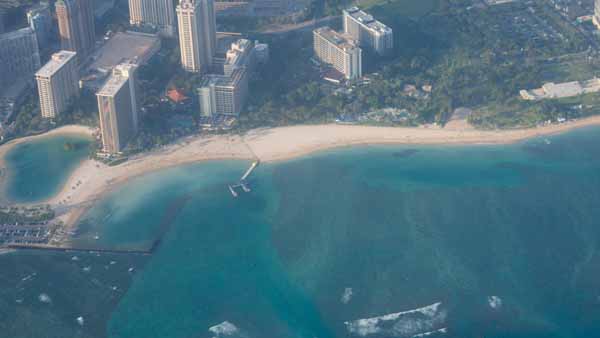
The least enjoyable part of the trip is getting there. It’s an all day affair starting with a short hop from our home in Grand Rapids to Chicago followed by a very long, 9-hour flight from Chicago to Honolulu. Clouds covered most of the flight path to the islands. These sparkling beaches of Oahu (to the right) are about the only sites that we see along the way and this only upon leaving Honolulu on a 45 minute connecting flight to Kona. And owing to a six hour time difference, we arrive in time for dinner. |
 |
|
|
|
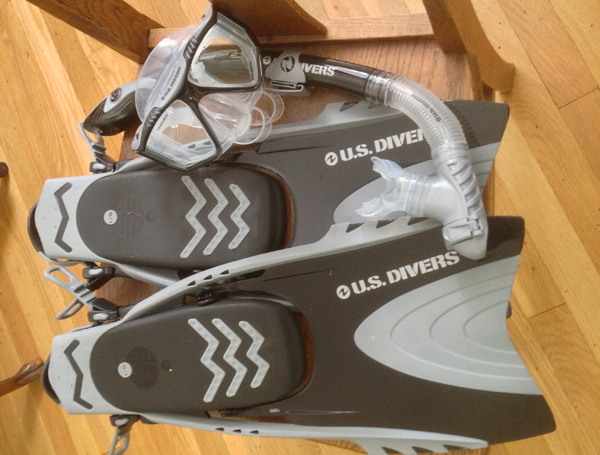
Being in the middle of the Pacific, there’s water galore everywhere. The next morning, with our snorkeling gear in tow we head down to one of the local beaches. |
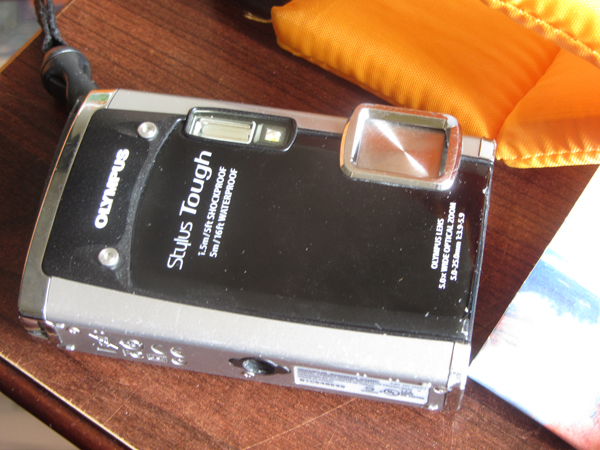
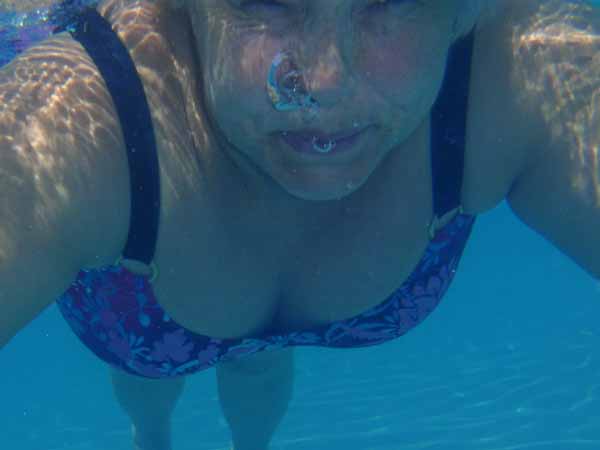
For this trip, I’ve taken a camera that can be used underwater. I’ve never invested the thousands of dollars needed for a “real” underwater outfit, but this Olympus Tough 6000 will do the trick. |
|
|
|
|
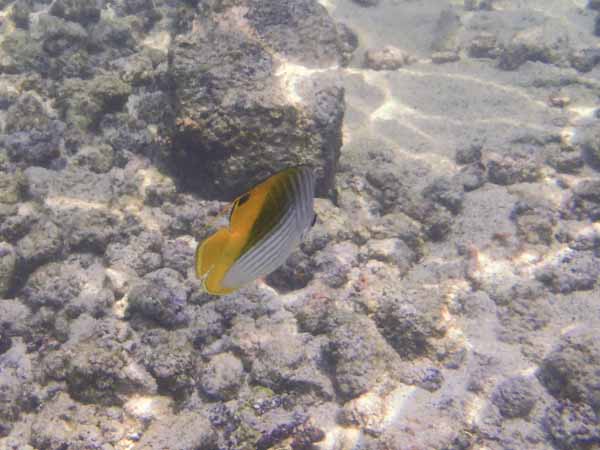
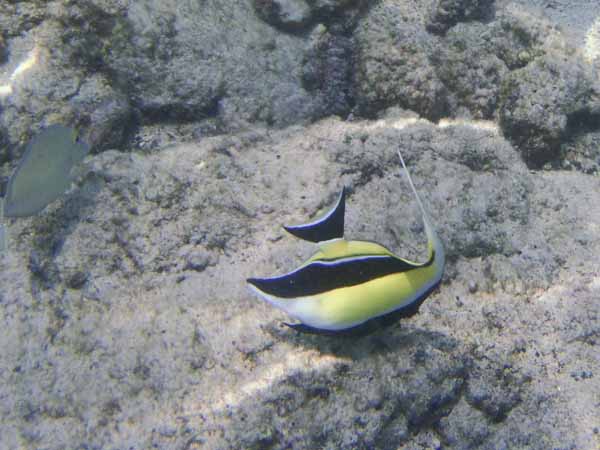
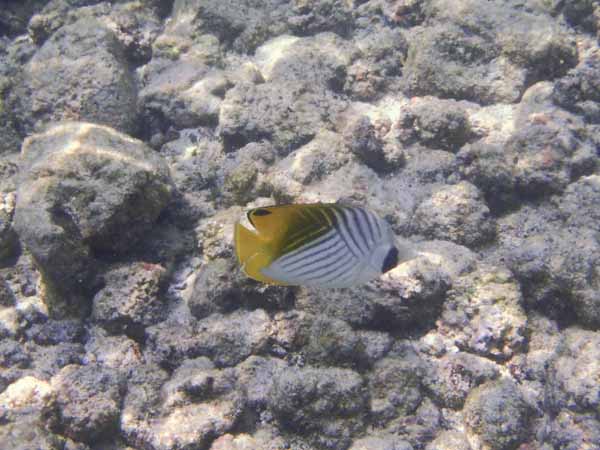
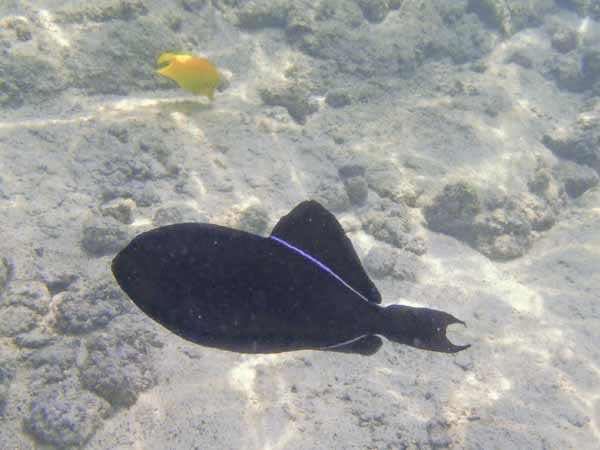
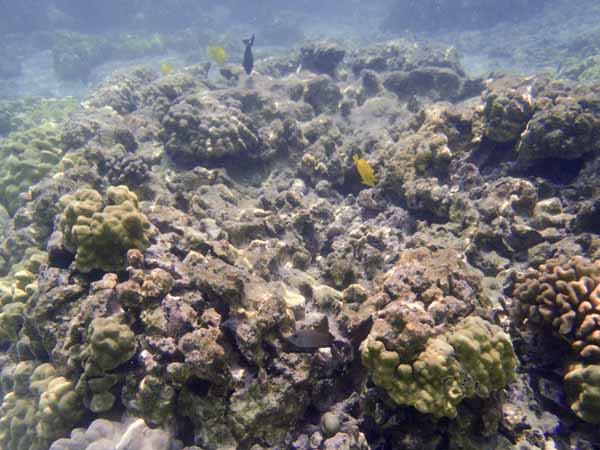
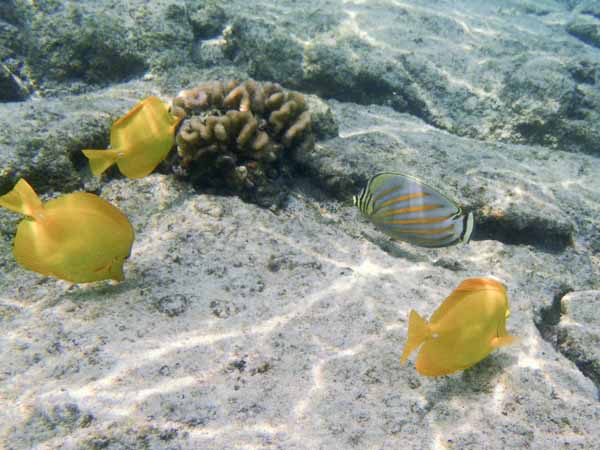
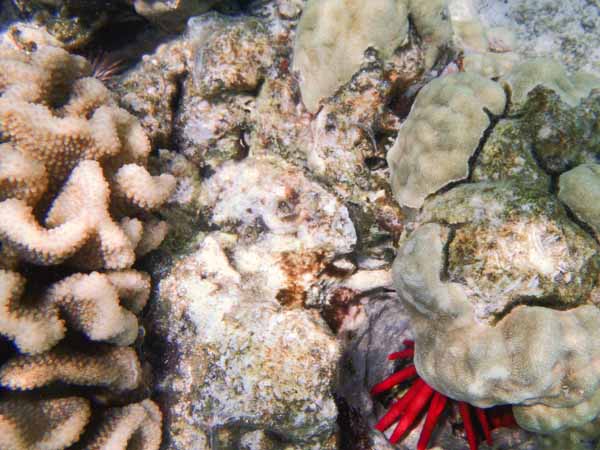
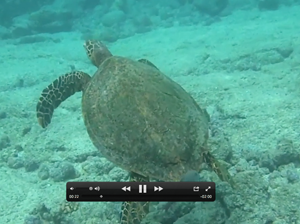
The Big Island is surrounded by shallow reefs lined with coral. Many of the popular beaches attract bathers for this exact reason. The coral is teeming with tropical fish and wildlife just a few feet below the water’s surface. Without heavy scuba equipment and expensive deep water photo gear, my small, relatively inexpensive camera makes it possible for me to record these amazing wonders of the ocean. Here’s some of my “catch” made simply by gently kicking my flippers, goggles and snorkel facing downward and camera in hand. |
|
|

|
|
|
|
|
|
|
|
|
|
 |
|
|
|

|
 |
|
|
|
|
|
|
|
|
|
|
|
|
|
So I returned home with a slight tan, a relaxed body and a nice set of photos of some spectacularly colorful fish. Of course these photos aren’t of the same quality that you’d expect from a full-blown underwater outfit. But I’m happy just the same having recorded some of nature’s gorgeous water landscapes with a very affordable camera.
Written by Arnie Lee