Online Magazine
Recent Posts
- Safeguard your Cellphone Photos
- Black & White to Color – Instantly
- Wearing Many Hats
- Video Roundup
- Rescuing Your Blurry Pictures
- Showing Their Age
- What is Your Angle?
- Panorama Photos
- Humorous Photos
- Close Ups
- Fisheye Pictures
- Photo Antiquities
- Printing Big
- Appreciating Scale
- Celebrity Sightings
Tags
More Places to Go
- Free "How-To" Books “How To” books for popular cameras 0
- Vist Us on Facebook keep in touch with us on Facebook 2
Archives
- July 2023 (1)
- March 2023 (2)
- February 2023 (1)
- December 2022 (1)
- October 2022 (1)
- September 2022 (8)
- August 2022 (9)
- July 2022 (1)
- June 2022 (1)
- June 2021 (1)
- May 2021 (1)
- March 2021 (5)
- February 2021 (4)
- January 2021 (2)
- April 2019 (1)
- March 2019 (1)
- February 2019 (1)
- October 2018 (2)
- April 2018 (1)
- March 2018 (4)
- February 2018 (1)
- November 2017 (1)
- August 2017 (1)
- June 2017 (1)
- April 2017 (1)
- March 2017 (5)
- February 2017 (2)
- January 2017 (1)
- October 2016 (1)
- September 2016 (1)
- August 2016 (1)
- July 2016 (1)
- May 2016 (1)
- April 2016 (1)
- March 2016 (2)
- February 2016 (1)
- January 2016 (2)
- December 2015 (1)
- November 2015 (1)
- October 2015 (3)
- April 2015 (1)
- March 2015 (5)
- February 2015 (1)
- January 2015 (4)
- December 2014 (2)
- November 2014 (5)
- October 2014 (2)
- September 2014 (1)
- August 2014 (2)
- July 2014 (1)
- May 2014 (1)
- April 2014 (5)
- March 2014 (5)
- December 2013 (2)
- November 2013 (18)
- October 2013 (1)
- September 2013 (1)
- August 2013 (1)
- July 2013 (1)
- June 2013 (3)
- May 2013 (1)
- April 2013 (2)
- March 2013 (1)
- February 2013 (1)
- January 2013 (1)
- December 2012 (1)
- November 2012 (2)
- October 2012 (2)
- September 2012 (5)
- August 2012 (2)
- July 2012 (1)
- June 2012 (1)
- May 2012 (1)
- April 2012 (4)
- March 2012 (1)
- February 2012 (1)
- January 2012 (3)
- December 2011 (1)
- November 2011 (3)
- October 2011 (1)
- September 2011 (2)
- August 2011 (2)
- June 2011 (3)
- May 2011 (4)
- April 2011 (8)
- March 2011 (8)
- February 2011 (10)
- January 2011 (6)
- December 2010 (11)
- November 2010 (14)
- October 2010 (6)
- September 2010 (12)
- August 2010 (2)
- July 2010 (4)
- June 2010 (3)
- May 2010 (1)
- April 2010 (1)
- March 2010 (2)
- February 2010 (1)
- January 2010 (1)
- December 2009 (1)
- November 2009 (2)
- October 2009 (2)
- September 2009 (1)
- August 2009 (3)
- July 2009 (2)
- June 2009 (1)
- May 2009 (2)
- April 2009 (1)
- March 2009 (2)
- February 2009 (1)
- January 2009 (3)
Making a Mini-Gallery
19th December 2010
Since September I’ve been taking and printing several large portrait photos. The photos are of our grandkids, so I’m particularly proud of them. Being 12″ x 18″ prints, they are relatively expensive to individually frame and require lots of wall space to display separately. Consequently, they’ve been sitting on my desk in a pile and every once in a while I pull them out to show relatives and friends. Of course this isn’t exactly the best way to show off these faces.
Well this weekend I finally decided to do something about this unwieldy stack of photos. My goal is to have a way to display a dozen or so large photos in a small space. I also want an easy way to change the photos often. I am not looking for an elegant display, just a simple way to show the faces attractively.
| Yesterday I headed off to the hardware store to round up a few inexpensive items to make my mini-gallery. To support the photos from beneath, I chose a lightweight material – vinyl siding channel used for houses. The piece that I found was 16 ft long so I had one of the clerks cut it in half. To support the photos near the top I decided to use a flat strip of metal. I chose a length of “drive cleat” which is used to connect metal heating ducts. To be able to change the photos easily, I used small magnets that hold to the metal strip. | 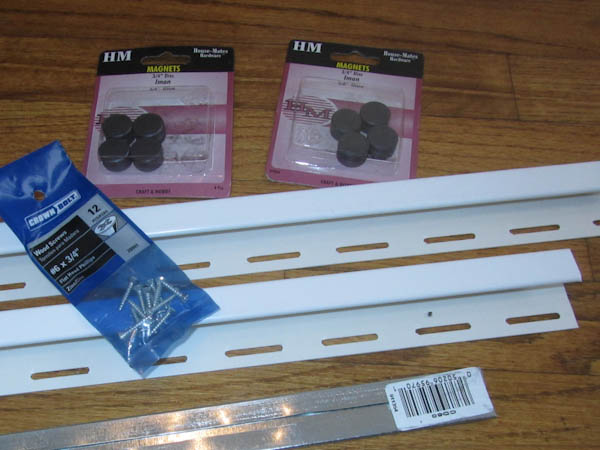 |
Here’s my parts list:
|
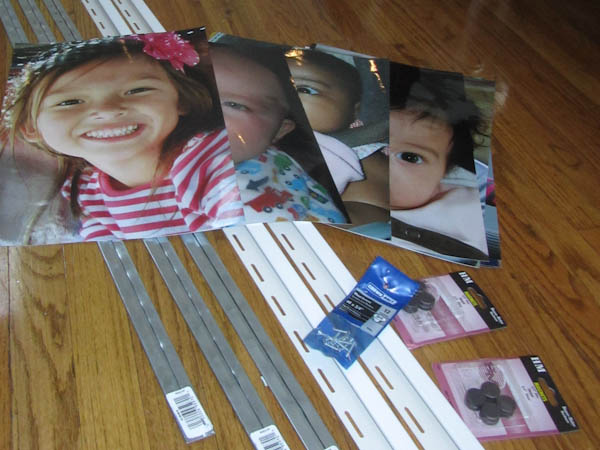 Above are all of the photos and hardware that I used for the project. |
It was very simple to mount the hardware using a few wood screws. If the surface on which you want to display your photographs is dry wall, you should use hollow wall anchors instead of the wood screws to mount the channel and cleats. Because the photographs are lightweight, they won’t require heavy duty hardware.
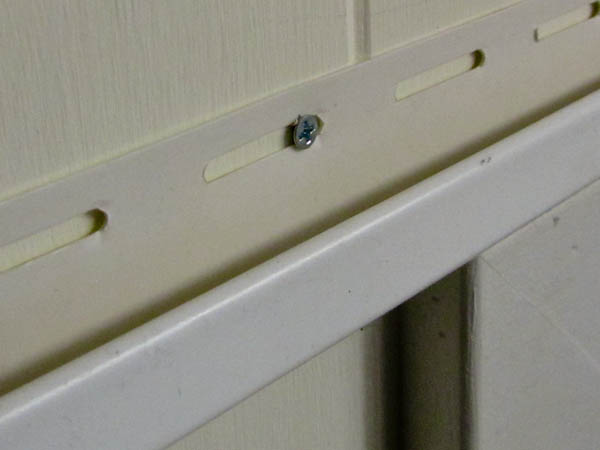 Securing the vinyl siding J-channel. The photos will sit in this channel. |
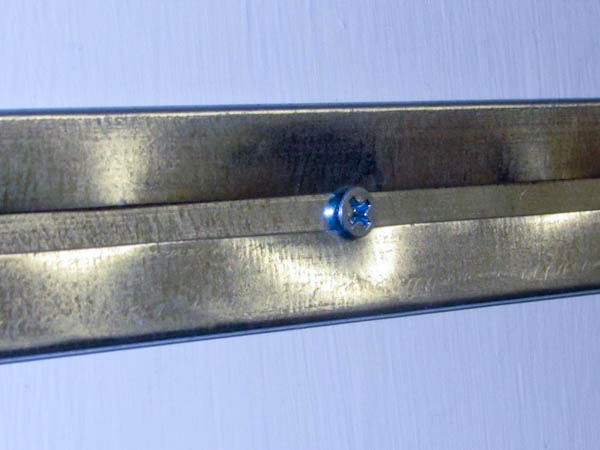 Securing the metal strip for the magnets that will hold the prints in place. |
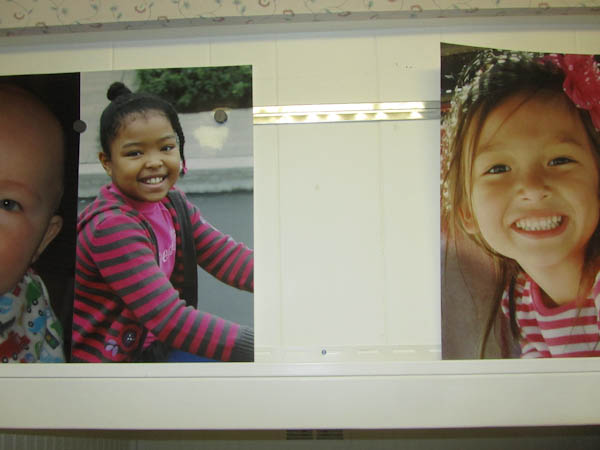 The metal strip is positioned 1/4 of photograph height. The magnets “stick” to the strip and holds the photos in place. |
 The photograph rests in the vinyl channel. Using the channel and magnets makes it very easy to change photographs at a later time. |
Here’s the before and after look of the wall space that I converted into a mini-gallery.
 Here’s the empty space that was just waiting to be used as a gallery. |
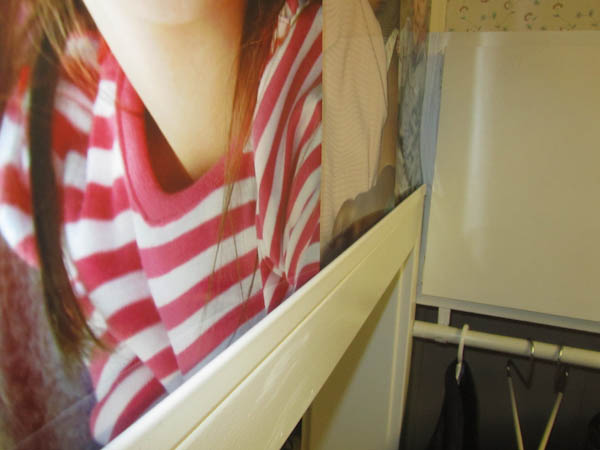
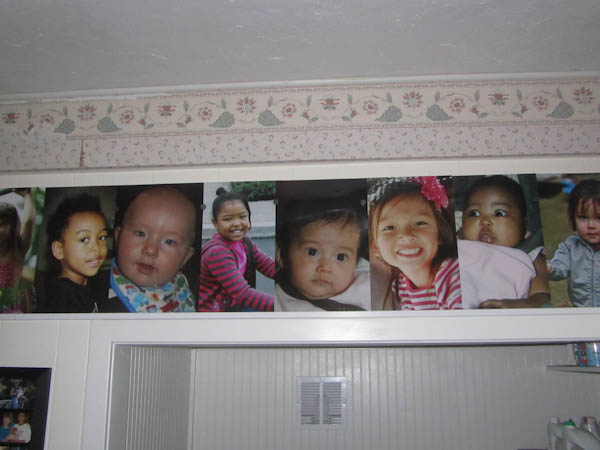 Here’s the completed mini gallery. The small magnets are holding the photos in place. |
In a matter of 30 minutes I was able to “hang” the photos. I’m pleased with how they enhance the room. And I no longer have to store the portraits in a pile.
I have one problem. And it may be a big one. I’ve run out of space and there are four more photos (for four more grandkids’ photos) that are yet to be displayed, I’ll have to find another wall area to expand the gallery.
So there you have it. This is an easy and inexpensive way to display your large photo prints.
Why not take an opportunity to show off your photos?
Written by Arnie Lee