Online Magazine
Recent Posts
- Safeguard your Cellphone Photos
- Black & White to Color – Instantly
- Wearing Many Hats
- Video Roundup
- Rescuing Your Blurry Pictures
- Showing Their Age
- What is Your Angle?
- Panorama Photos
- Humorous Photos
- Close Ups
- Fisheye Pictures
- Photo Antiquities
- Printing Big
- Appreciating Scale
- Celebrity Sightings
Tags
More Places to Go
- Free "How-To" Books “How To” books for popular cameras 0
- Vist Us on Facebook keep in touch with us on Facebook 2
Archives
- July 2023 (1)
- March 2023 (2)
- February 2023 (1)
- December 2022 (1)
- October 2022 (1)
- September 2022 (8)
- August 2022 (9)
- July 2022 (1)
- June 2022 (1)
- June 2021 (1)
- May 2021 (1)
- March 2021 (5)
- February 2021 (4)
- January 2021 (2)
- April 2019 (1)
- March 2019 (1)
- February 2019 (1)
- October 2018 (2)
- April 2018 (1)
- March 2018 (4)
- February 2018 (1)
- November 2017 (1)
- August 2017 (1)
- June 2017 (1)
- April 2017 (1)
- March 2017 (5)
- February 2017 (2)
- January 2017 (1)
- October 2016 (1)
- September 2016 (1)
- August 2016 (1)
- July 2016 (1)
- May 2016 (1)
- April 2016 (1)
- March 2016 (2)
- February 2016 (1)
- January 2016 (2)
- December 2015 (1)
- November 2015 (1)
- October 2015 (3)
- April 2015 (1)
- March 2015 (5)
- February 2015 (1)
- January 2015 (4)
- December 2014 (2)
- November 2014 (5)
- October 2014 (2)
- September 2014 (1)
- August 2014 (2)
- July 2014 (1)
- May 2014 (1)
- April 2014 (5)
- March 2014 (5)
- December 2013 (2)
- November 2013 (18)
- October 2013 (1)
- September 2013 (1)
- August 2013 (1)
- July 2013 (1)
- June 2013 (3)
- May 2013 (1)
- April 2013 (2)
- March 2013 (1)
- February 2013 (1)
- January 2013 (1)
- December 2012 (1)
- November 2012 (2)
- October 2012 (2)
- September 2012 (5)
- August 2012 (2)
- July 2012 (1)
- June 2012 (1)
- May 2012 (1)
- April 2012 (4)
- March 2012 (1)
- February 2012 (1)
- January 2012 (3)
- December 2011 (1)
- November 2011 (3)
- October 2011 (1)
- September 2011 (2)
- August 2011 (2)
- June 2011 (3)
- May 2011 (4)
- April 2011 (8)
- March 2011 (8)
- February 2011 (10)
- January 2011 (6)
- December 2010 (11)
- November 2010 (14)
- October 2010 (6)
- September 2010 (12)
- August 2010 (2)
- July 2010 (4)
- June 2010 (3)
- May 2010 (1)
- April 2010 (1)
- March 2010 (2)
- February 2010 (1)
- January 2010 (1)
- December 2009 (1)
- November 2009 (2)
- October 2009 (2)
- September 2009 (1)
- August 2009 (3)
- July 2009 (2)
- June 2009 (1)
- May 2009 (2)
- April 2009 (1)
- March 2009 (2)
- February 2009 (1)
- January 2009 (3)
Sony Alpha A55 – Review Part 3
16th March 2011
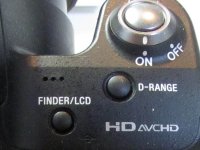
In this final Part 3, I’ll show you additional examples of some of the innovative and easy-to-use features that make the Sony Alpha A55 my recent favorite camera.
You can read about the “standard” features of the Sony Alpha A55 in Part 1 of my review. And in Part 2, I describe my experience using several of the A55’s unique features.
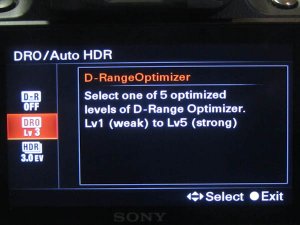
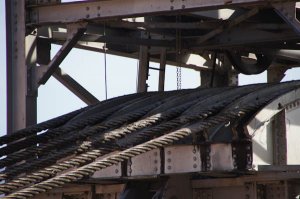
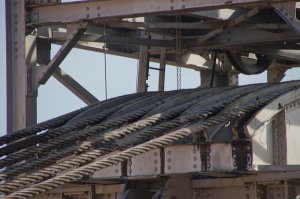
D-Range Optimization
 |
 |
 |
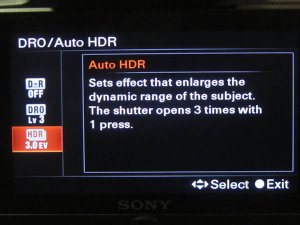
High Dynamic Range – in-camera
Multi Frame Noise Reduction – in-camera
| Multi frame noise reduction is the A55’s “stealth” feature. For some reason, it hasn’t been widely promoted by Sony. In fact, I didn’t know about multi frame noise reduction until one of the Sony reps explained its use to me at a recent trade show.
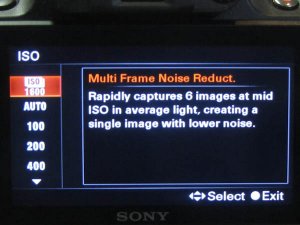
When set to use this feature, the A55 captures six successive images and merges them to produce a single image with lower noise. Once again, it’s simple to use. Press the ISO button and set the topmost item (labeled ISO) between Auto and 25600. Press the shutter release to capture the scene and a short time later after it is processed, the image is written to the SDHC card. |
 |

Right: image captured at ISO 3200 with multi frame noise reduction. Click to see an enlargement. |
to see a more detailed full size image |
| Briefly, the process works like this: the camera automatically takes 6 frames at the currently settings: shutter speed, aperture, and ISO. It combines them into a single JPEG image by carefully aligning the 6 frames during compositing while at the same time using proprietary techniques to reduce noise level equivalent to two ISO exposure levels.
Above, you can clearly see that the noise level of the rightmost image is significantly less than the leftmost image even though it was captured at a higher ISO setting. I experienced an equally reduced noise level in several other images that I shot in low lighting conditions. So I find multi frame noise reduction to be a very useful yet unexpected feature. Note that multi frame noise reduction is not available unless the A55 is set to capture JPG only images (not RAW). |
|
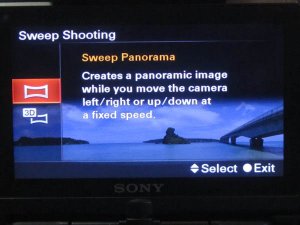
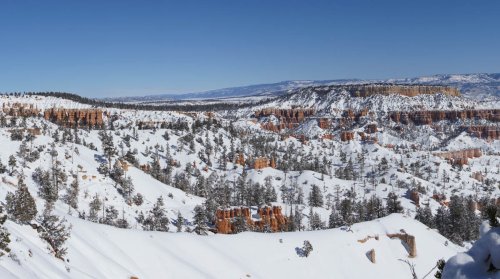
Sweep Panorama – in-camera
Earlier in the review, I mentioned that I’ve had extensive experience with a large variety of DSLRs. These range from low-priced entry to expensive professional level. I mention this so that you understand that my fondness for the Alpha A55 is not just “puppy love”.
When I first learned about the Alpha A55, I was amazed by the number of innovative features that Sony claimed to have packed into this new body. In the two months that I’ve used this camera, I remain impressed by the results that I’m seeing in the images and the ease with which I am able to capture them.
If the Alpha 55 is any indication of the kind of innovation that we might expect from Sony in coming months, I’ll be anxiously watching for more.
It looks like Sony has a winner. The Sony Alpha A55 is certainly a winner in my book.
Written by Arnie Lee
Sometimes luck trumps skill
04th March 2011
Shooting Birds
Certainly one of the reasons that I enjoy the profession so much is that there are so many types of photography to choose from: architectural, wedding, journalism, nature, portrait, fine art, and the list goes on.
And like many other photographers, I often jump from one type of photography to another when the job calls for it or when I feel the need to “escape” to a totally different subject.
Each type of photography utilizes different skills.
For example, portrait photography is most successful when the subject can comfortably relate to the photographer who then combines creative posing and technical lighting to record a likeness of that subject.
A food photographer may use many tricks to enhance the appearance of a gourmet dish – with sprays, glue or gels, perhaps. These are skills that make the food look good; you probably wouldn’t want to eat the food after the photo session.
Having participated in many of the types of photography over the past 40+ years, I have learned that some types of photography require a higher level of skill than others.
From my experience, “photography degree of difficulty” varies from snapshots and event photography at the low end to wedding photography at the high end. And somewhere near the high end is wildlife photography. For the last few years, I’ve spent a lot of time trying to improve my wildlife skill level.
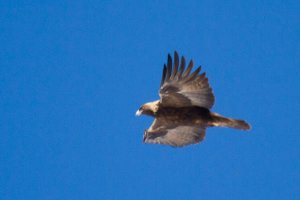
I quickly snapped a half dozen photos before the eagle was out of range. Unfortunately, I wasn’t as lucky here. The photo is blurred owing to the distance and my rushed attempt.
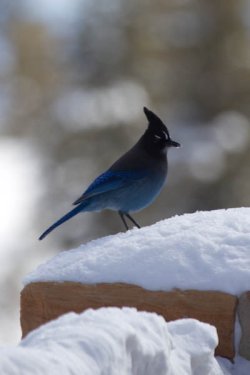
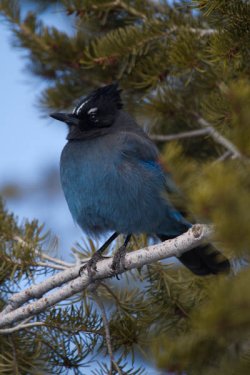
So this time out, luck played a role in my capturing the Stellar’s jay. But I wasn’t as lucky with the golden eagle.
Still, I know that unless I’m out there hiking the trails and observing my surroundings that luck won’t have a chance to take hold. Each time I’m out enjoying nature I’m hoping that for that lucky catch.
Take enough photos and luck will come your way too. It’s a promise.
Written by Arnie Lee
Descending on Las Vegas
02nd December 2010
In years gone by, November was the time to travel to Comdex, the huge COMputer DEaler eXhibition. For as long as it was alive – some 25 years, I attended the Comdex Expo in Las Vegas.
Although the last Comdex took place in 2003, I’ve continued to travel to Las Vegas to analyze and discuss the publishing business with two of my closest friends. Lest you think these trips are gambling junkets, we actually visit lots of mass merchandise, retail and book stores to gauge the products, trends and competition. And most of us don’t gamble at the tables – the publishing business is a big enough gamble.
« Older Posts — Newer Posts »