Online Magazine
Recent Posts
- Safeguard your Cellphone Photos
- Black & White to Color – Instantly
- Wearing Many Hats
- Video Roundup
- Rescuing Your Blurry Pictures
- Showing Their Age
- What is Your Angle?
- Panorama Photos
- Humorous Photos
- Close Ups
- Fisheye Pictures
- Photo Antiquities
- Printing Big
- Appreciating Scale
- Celebrity Sightings
Tags
More Places to Go
- Free "How-To" Books “How To” books for popular cameras 0
- Vist Us on Facebook keep in touch with us on Facebook 2
Archives
- July 2023 (1)
- March 2023 (2)
- February 2023 (1)
- December 2022 (1)
- October 2022 (1)
- September 2022 (8)
- August 2022 (9)
- July 2022 (1)
- June 2022 (1)
- June 2021 (1)
- May 2021 (1)
- March 2021 (5)
- February 2021 (4)
- January 2021 (2)
- April 2019 (1)
- March 2019 (1)
- February 2019 (1)
- October 2018 (2)
- April 2018 (1)
- March 2018 (4)
- February 2018 (1)
- November 2017 (1)
- August 2017 (1)
- June 2017 (1)
- April 2017 (1)
- March 2017 (5)
- February 2017 (2)
- January 2017 (1)
- October 2016 (1)
- September 2016 (1)
- August 2016 (1)
- July 2016 (1)
- May 2016 (1)
- April 2016 (1)
- March 2016 (2)
- February 2016 (1)
- January 2016 (2)
- December 2015 (1)
- November 2015 (1)
- October 2015 (3)
- April 2015 (1)
- March 2015 (5)
- February 2015 (1)
- January 2015 (4)
- December 2014 (2)
- November 2014 (5)
- October 2014 (2)
- September 2014 (1)
- August 2014 (2)
- July 2014 (1)
- May 2014 (1)
- April 2014 (5)
- March 2014 (5)
- December 2013 (2)
- November 2013 (18)
- October 2013 (1)
- September 2013 (1)
- August 2013 (1)
- July 2013 (1)
- June 2013 (3)
- May 2013 (1)
- April 2013 (2)
- March 2013 (1)
- February 2013 (1)
- January 2013 (1)
- December 2012 (1)
- November 2012 (2)
- October 2012 (2)
- September 2012 (5)
- August 2012 (2)
- July 2012 (1)
- June 2012 (1)
- May 2012 (1)
- April 2012 (4)
- March 2012 (1)
- February 2012 (1)
- January 2012 (3)
- December 2011 (1)
- November 2011 (3)
- October 2011 (1)
- September 2011 (2)
- August 2011 (2)
- June 2011 (3)
- May 2011 (4)
- April 2011 (8)
- March 2011 (8)
- February 2011 (10)
- January 2011 (6)
- December 2010 (11)
- November 2010 (14)
- October 2010 (6)
- September 2010 (12)
- August 2010 (2)
- July 2010 (4)
- June 2010 (3)
- May 2010 (1)
- April 2010 (1)
- March 2010 (2)
- February 2010 (1)
- January 2010 (1)
- December 2009 (1)
- November 2009 (2)
- October 2009 (2)
- September 2009 (1)
- August 2009 (3)
- July 2009 (2)
- June 2009 (1)
- May 2009 (2)
- April 2009 (1)
- March 2009 (2)
- February 2009 (1)
- January 2009 (3)
Printing Big
13th September 2022
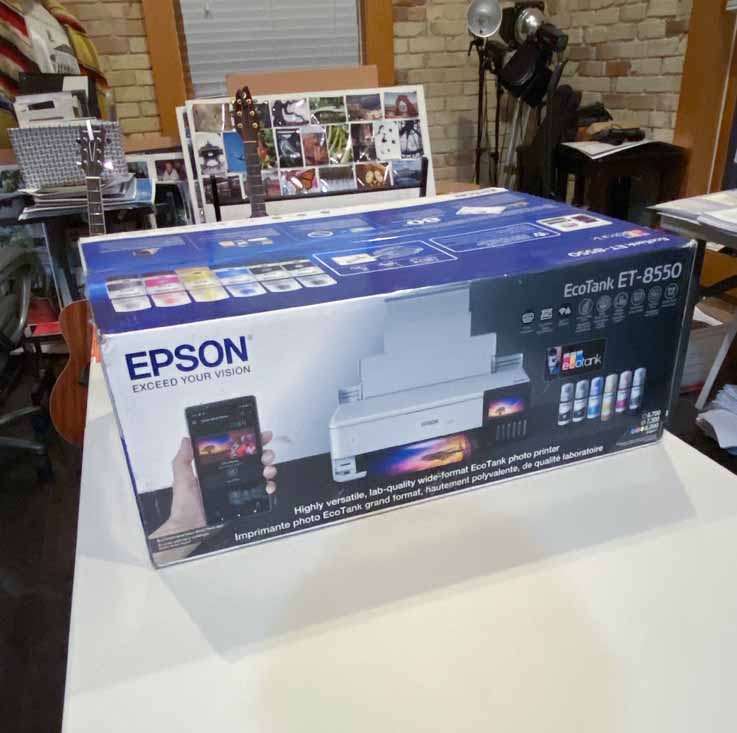
Large Size Prints Without a Large Price
Some call me “old school” but I’m not a big fan of showing pictures on the tiny screen of my cellphone.
Quite often I print some of my favorite shots onto photo paper. With my Epson ET-3750 Printer I’ve made hundreds of 4″x6″ prints and dozens of larger 8-1/2″x11″ enlargements. In the two years that I’ve had the ET-3750 printer I have never had to change an ink cartridge. The printer’s large EcoTanks are refillable making the cost of the prints very affordable.
Every so often I’ll take a picture that I’d like to show off – meaning print a bigger enlargement. Earlier this year I found out about the Epson ET-8550 EcoTank that handles paper up to 13″x19″ at an affordable $600 price.
Here’s a few short steps for setting up the printer for use.
|
|
|
 The shipping carton is about 30″ x 20″ x 10″ and weighs about 20 lbs. The shipping carton is about 30″ x 20″ x 10″ and weighs about 20 lbs. |
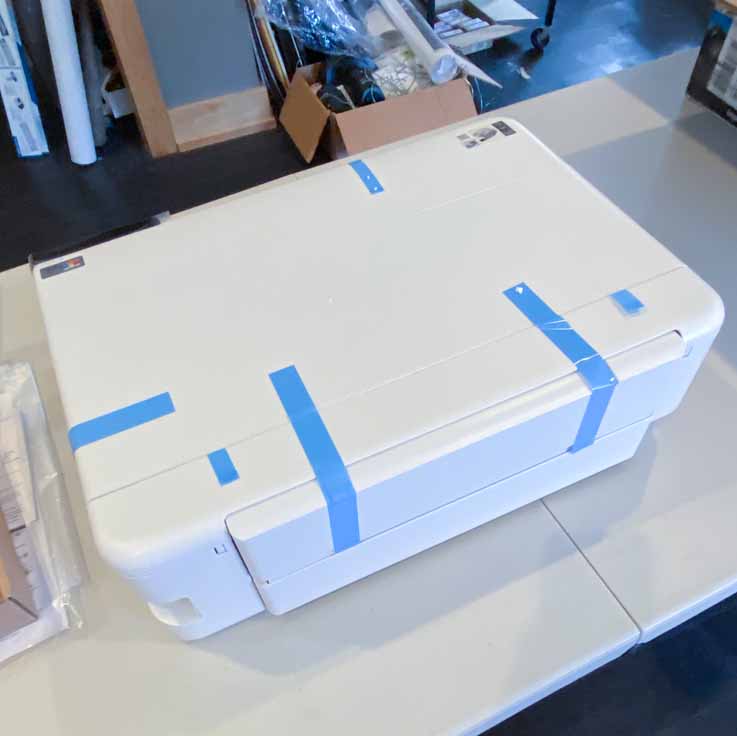 The bright blue tape secures the parts during shipment is easily removed. The bright blue tape secures the parts during shipment is easily removed. |
|
|
|
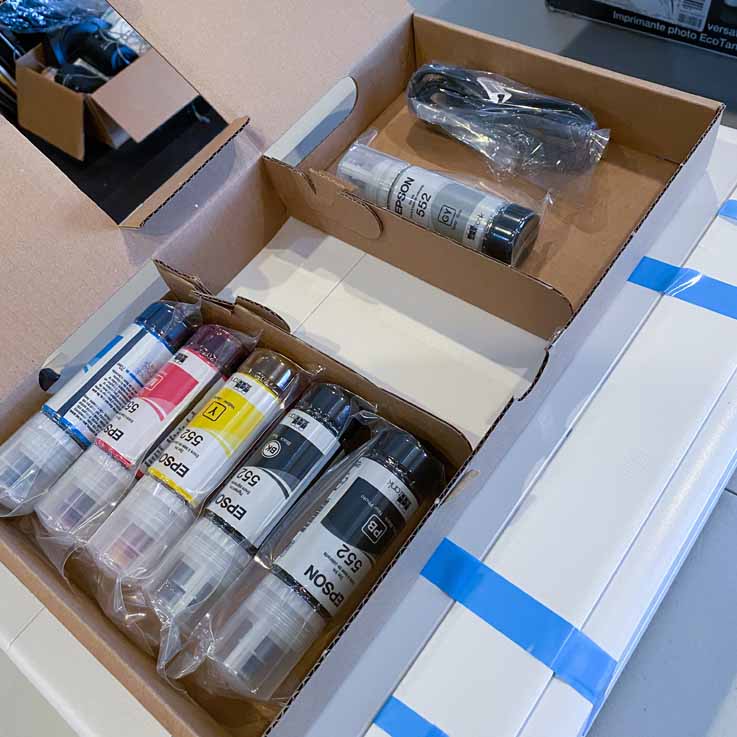 The printer uses four inks: cyan, magenta, yellow and black. The shipment includes a second bottle of black ink. The printer uses four inks: cyan, magenta, yellow and black. The shipment includes a second bottle of black ink. |
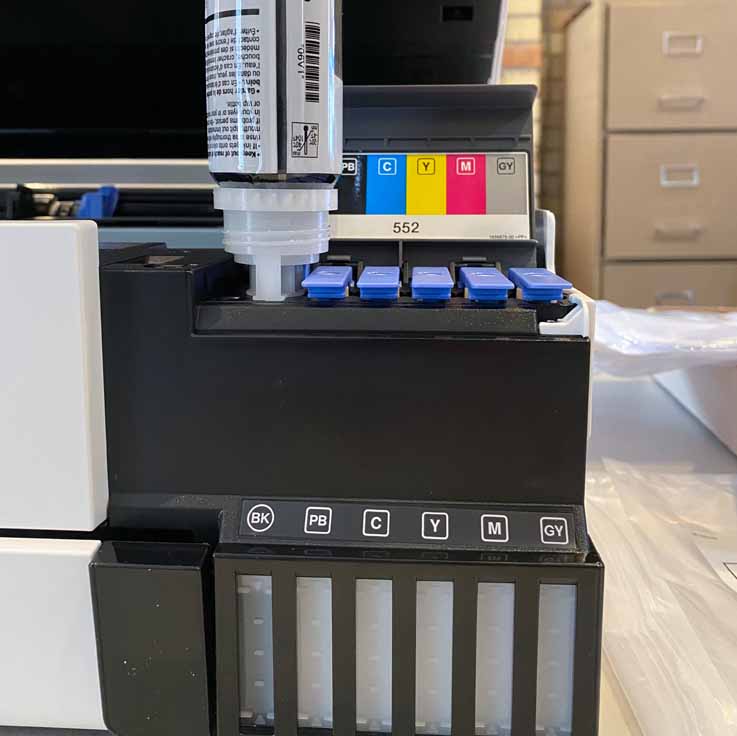 Each ink bottle fills the respective reservoir. The bottles are “coded” to prevent inadvertent filling mistakes. Each ink bottle fills the respective reservoir. The bottles are “coded” to prevent inadvertent filling mistakes. |
|
|
|
 You can visually view the level of each ink reservoir. The ink supply will yield about 2400 4″x6″ prints for about 4 cents each. You can visually view the level of each ink reservoir. The ink supply will yield about 2400 4″x6″ prints for about 4 cents each. |
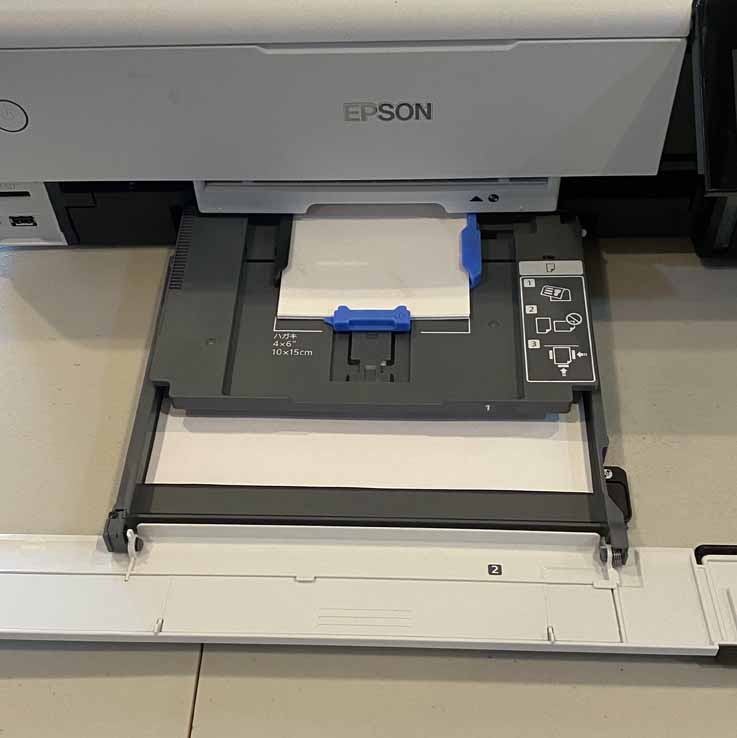 The bottom tray holds smaller paper (e.g. 4″x6″) and larger (8-1/2″x11″). The rear paper feeder holds larger paper up to 13″x19″. The bottom tray holds smaller paper (e.g. 4″x6″) and larger (8-1/2″x11″). The rear paper feeder holds larger paper up to 13″x19″. |
|
|
|
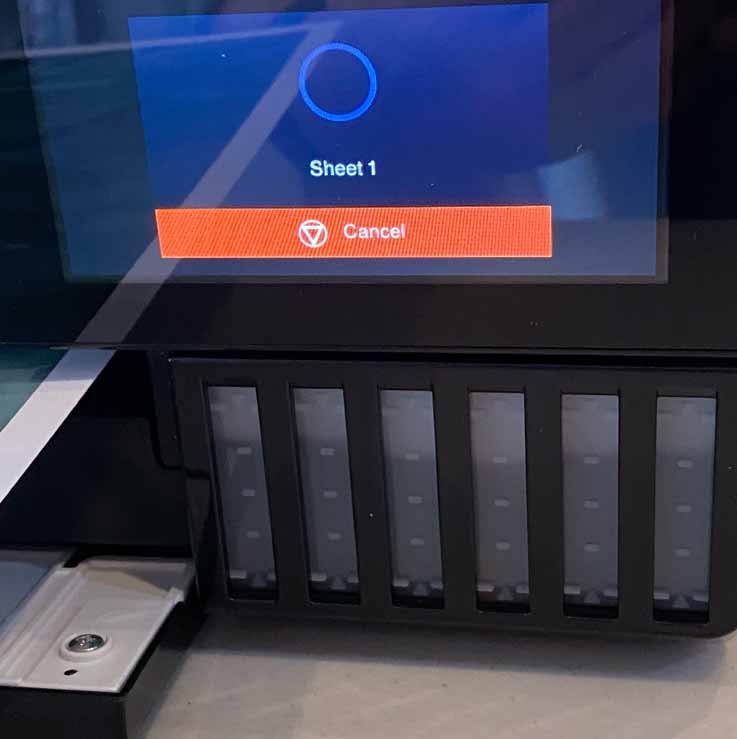
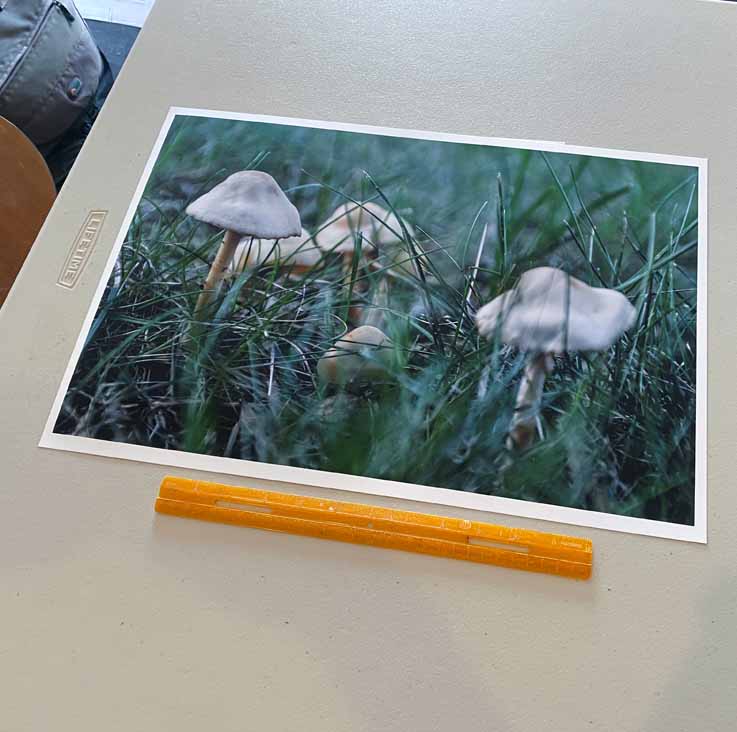
 Here is a completed 13″x19″ print. You can see the rear paper feeder. Here is a completed 13″x19″ print. You can see the rear paper feeder. |
 |
|
|
|
This timelapse is just an example of it’s operation making a 13″x19″ print.The printer doesn’t actually work this quickly.
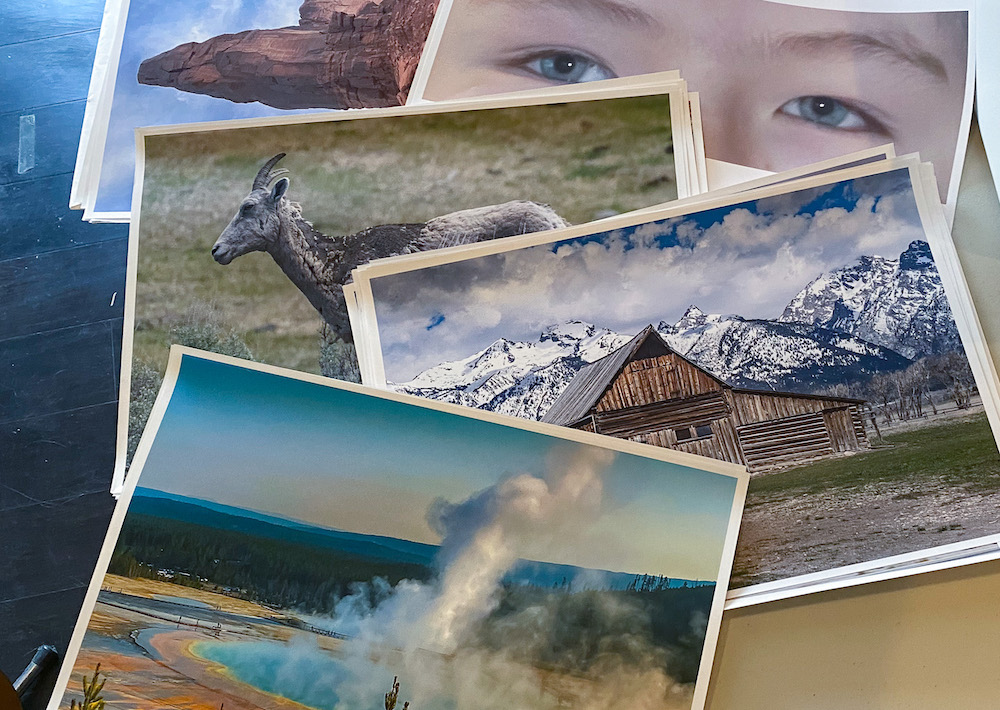
As you can see I’ve been able to make a bunch of big enlargements – at a reasonable price.
The ET-8550 has other features other than its large print capability.
-
Wireless connection to your Mac or Windows PC
Two-sided printing
High resolution document scanning and copying up to 8-1/2″ x 14″
Handles variety of papers including glossy, matte, texture, cardstock
For those of you who like to print big – this is an affordable and capable printer.
Appreciating Scale
10th September 2022
We’re Mere Specks on Earth
I grew up in the New York metropolitan area and didn’t get to travel to the more remote areas of our country until later in life. To me, the skyscrapers of New York City were about the tallest or largest scenery to which I was accustomed. That changed after college when I visited my first national park – Yosemite. Since then, I’ve made been lucky enough to visit many more.
One thing that I encountered early on and continues to amaze me to this day is the extensive amount of our country’s tracts of land. Look as far as your eye can see and there’s plenty more beyond. From a distance, gaze at a geologic feature or land mass and you may not comprehend its size until you draw closer. In short, it’s the scale of these features that are astonishing.
As individuals, our size is insignificant compared to the earth’s magnificent landforms.
Below are a few photographs that try to illustrate scale.
|
|
|
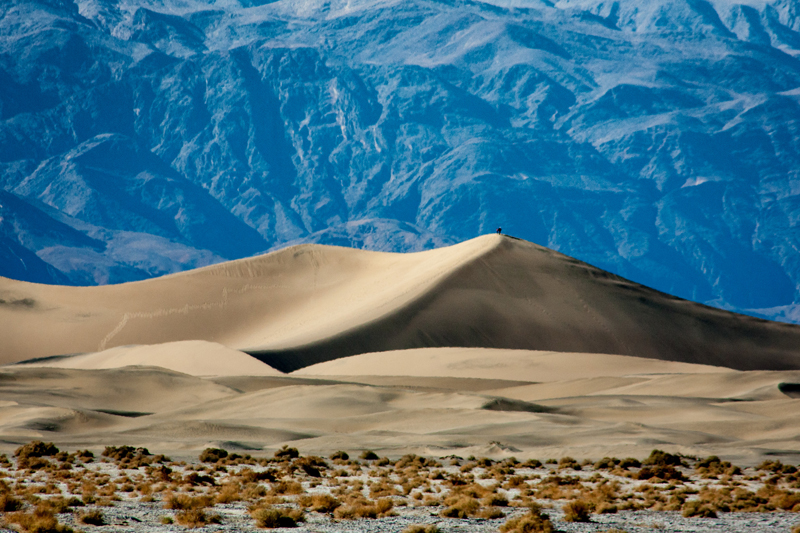 A couple hiking at Death Valley’s Mesquite Dunes look miniscule. |
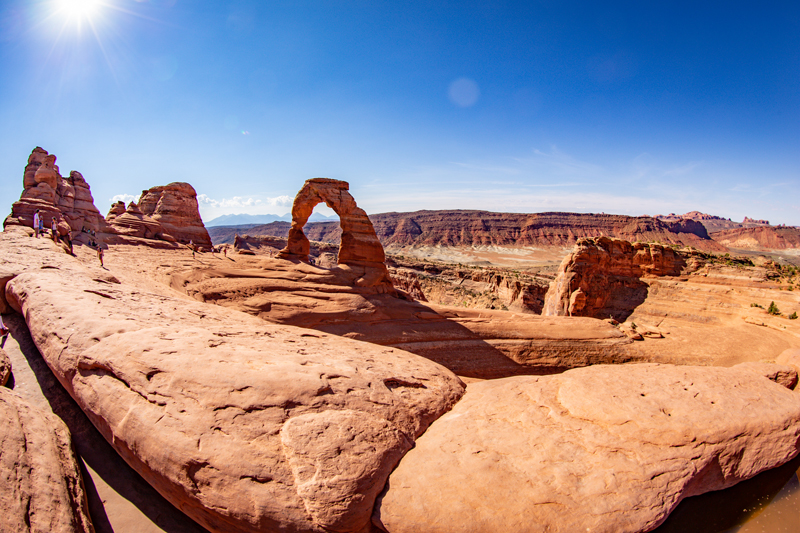 You can barely see the dozens of visitors congregating around Delicate Arch in Arches National Park. You can barely see the dozens of visitors congregating around Delicate Arch in Arches National Park. |
|
|
|
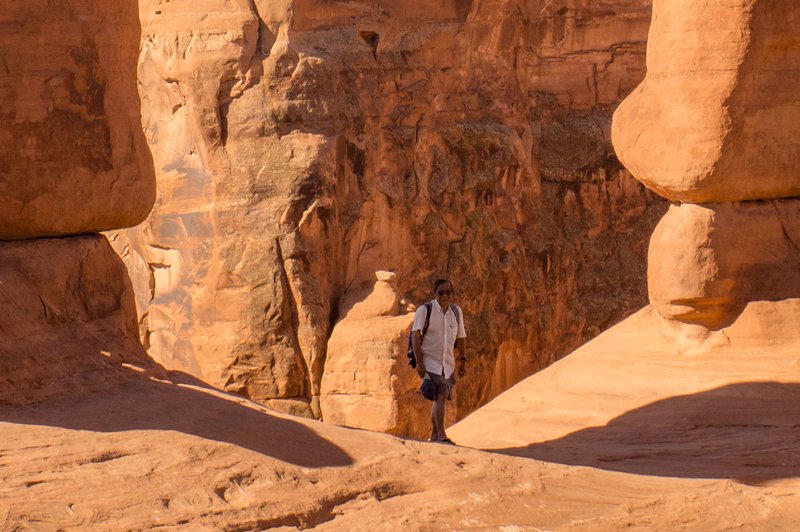 Here’s a visitor enjoying the shade of Delicate Arch. Here’s a visitor enjoying the shade of Delicate Arch. |
 This is the same photograph at full size. You can see how the size of Delicate Arch towers over the visitor. This is the same photograph at full size. You can see how the size of Delicate Arch towers over the visitor. |
|
|
|
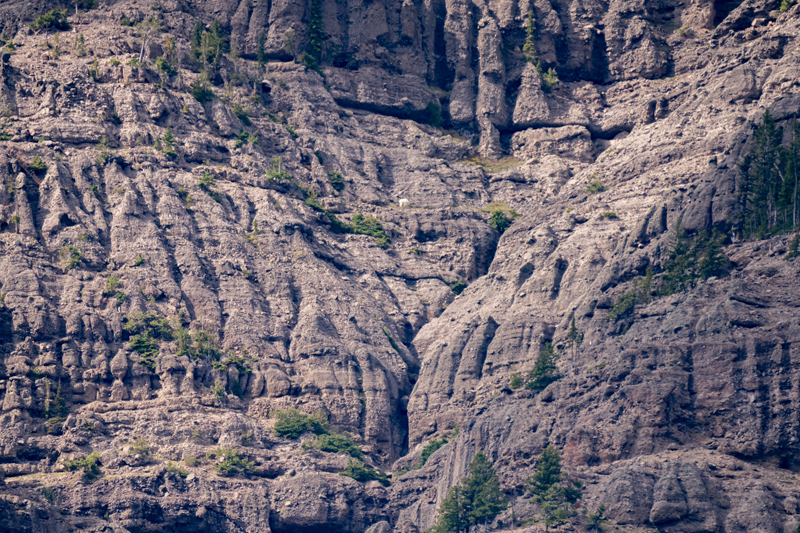 These craggy mountains in the northeast portion of Yellowstone National Park are home to mountain goat families. These craggy mountains in the northeast portion of Yellowstone National Park are home to mountain goat families. |
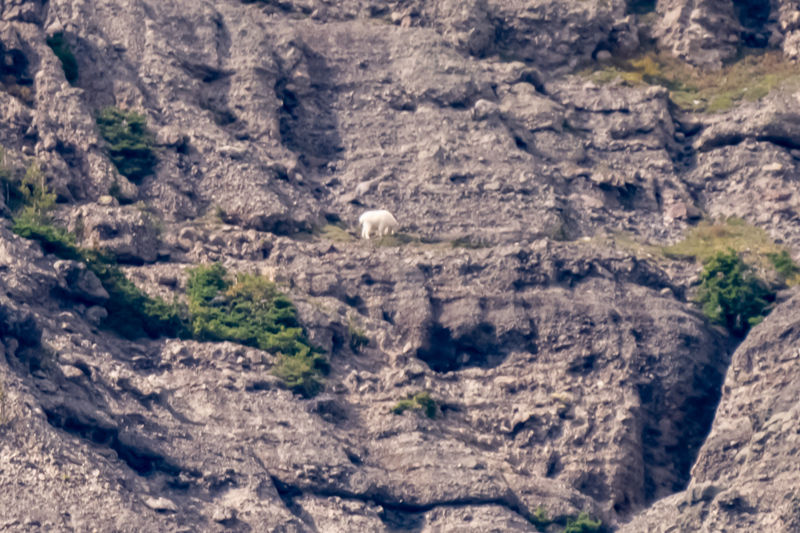 We’ve enlarged the photo on the left so you can pick out the animal on the ledge high off of the surrounding terrain. We’ve enlarged the photo on the left so you can pick out the animal on the ledge high off of the surrounding terrain. |
|
|
|
 This young girl is having fun exploring the rocks in Monument Valley. |
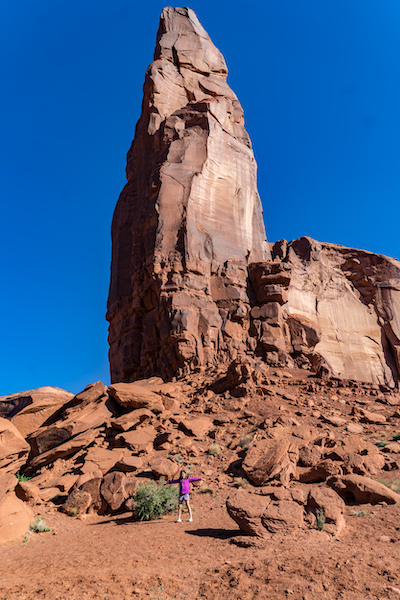 In the full size photo you can see her standing in front of a huge monument. |
|
|
|
 This young girl sits at the entrance to the Tunnel Tree in Yosemite. |
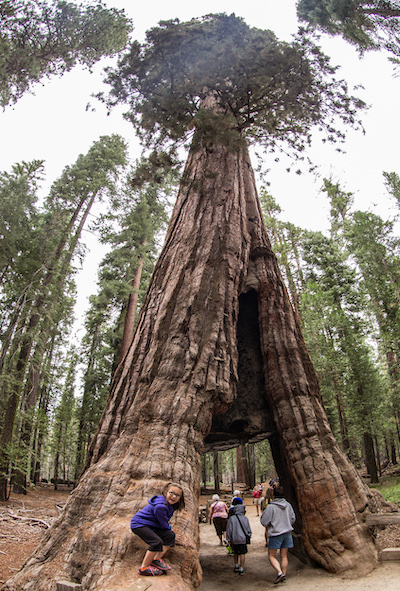 My fisheye lens captures the entirety of the Tunnel Tree which rises 225 feet above the ground. |
|
|
|
The scale of many of nature’s wonders is so humbling to me and affords me the chance to record them on film (so to speak).
Written by:
Arnie Lee
An Unexpected Image
03rd August 2022
A Miscue Turns a Photo Into a Favorite
During the 60’s my favorite pastime was photography.
Having only an after school part time job, I used used many techniques to make an expensive hobby more affordable.
I remember buying 100-foot long “bulk film” to reload 35mm cartridges into shorter five foot 36-exposure lengths. This was enough for 18 cartridges of film – enough for the summer season for about the same cost as buying 6 individual rolls of Kodak or Ansco film.
Next I learned how to develop my own film. I constructed a small darkroom in my parents’ basement where I would hang the still-wet film on a clothesline to dry. Not long after I earned enough to buy an enlarger. Wow, I was in photo heaven. The enlarger let me make my own prints and I would patiently watch the image slowly appear (under a safelight) in the developing solution. I was having all of this fun for a fraction of the cost of sending the spent film to my local photofinisher.
Mine was a hobby was like that of many others where you just seem to keep spending your earning for the latest gadgets – easel for holding photographic paper, new developing trays for bigger enlargements, paper dryers for drying prints, color drum for making color prints, etc.
Perhaps you can now see that my association with photography goes back a very long time.
From all of those years spent in the darkroom in the 60s and 70’s there is one event that I remember well. It was a darkroom miscue that had a happy result.
But first a quick intro to how to develop a roll of 35mm black and white film:
In a dark, lightproof room, you remove the exposed film from its cartridge and slide it onto a metal reel. The reel is placed into a stainless steel tank with a specially designed top which lets you complete the development in normal room light. Pour the developer solution into the tank for a designated time – usually 6 to 8 minutes and then pour the developer solution out of the tank . Next pour plain water into the tank for one minute to halt the film development and discard the water. Then pour in the final solution called fixer for 5 minutes. This desensitizes the film from light and makes the image permanent. Now it’s safe to remove the film from the tank and give it a final rinse wash in water for ten minutes.
These operations are done with all of the liquids – developer, water and fixer – at a temperature of 68 degrees F. On one occasion, I inadvertently washed a developed roll at a colder temperature. I wasn’t paying attention and unknown to me at the time the final rinse water must have been a lot colder.
I removed the film from the reel and hung it on a line to dry. But when I finally looked, several of the frames looked very weird.
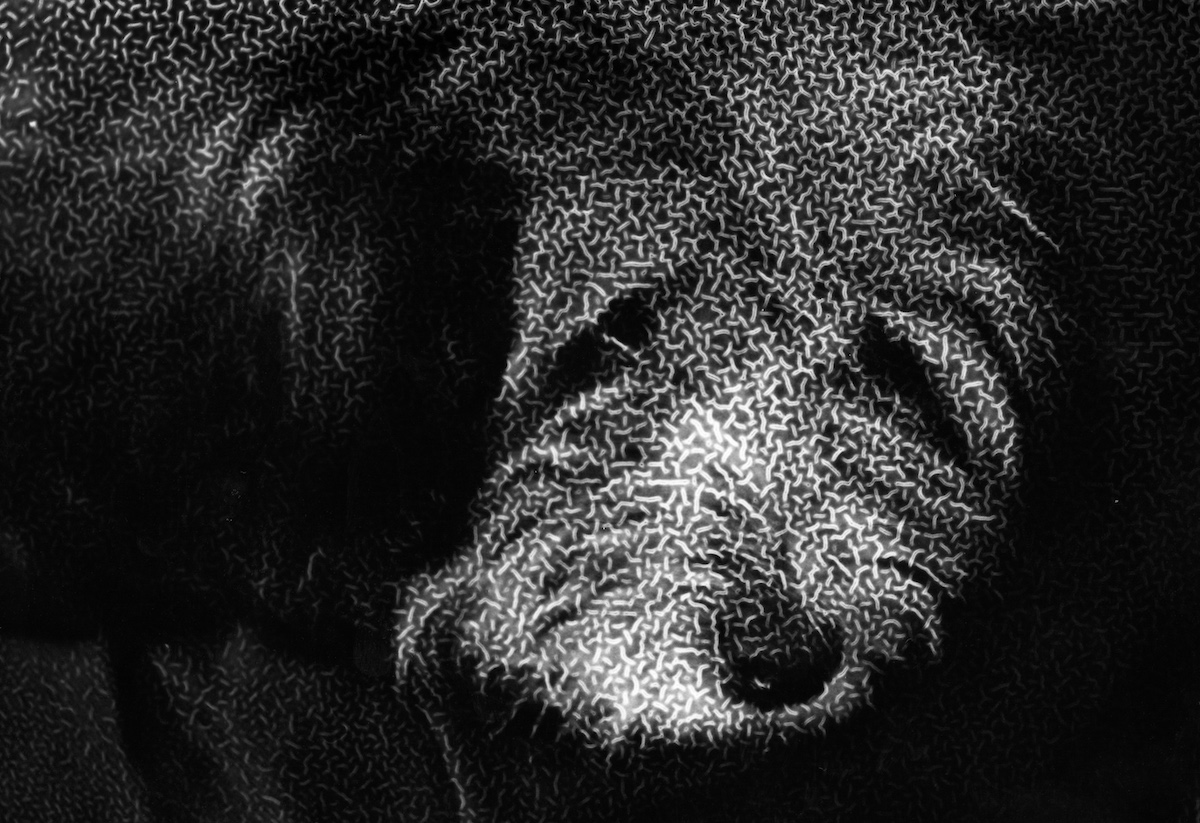
Sometimes a mistake turns into a favorite.
Written by: Arnie Lee
« Older Posts — Newer Posts »