Online Magazine
Recent Posts
- Safeguard your Cellphone Photos
- Black & White to Color – Instantly
- Wearing Many Hats
- Video Roundup
- Rescuing Your Blurry Pictures
- Showing Their Age
- What is Your Angle?
- Panorama Photos
- Humorous Photos
- Close Ups
- Fisheye Pictures
- Photo Antiquities
- Printing Big
- Appreciating Scale
- Celebrity Sightings
Tags
More Places to Go
- Free "How-To" Books “How To” books for popular cameras 0
- Vist Us on Facebook keep in touch with us on Facebook 2
Archives
- July 2023 (1)
- March 2023 (2)
- February 2023 (1)
- December 2022 (1)
- October 2022 (1)
- September 2022 (8)
- August 2022 (9)
- July 2022 (1)
- June 2022 (1)
- June 2021 (1)
- May 2021 (1)
- March 2021 (5)
- February 2021 (4)
- January 2021 (2)
- April 2019 (1)
- March 2019 (1)
- February 2019 (1)
- October 2018 (2)
- April 2018 (1)
- March 2018 (4)
- February 2018 (1)
- November 2017 (1)
- August 2017 (1)
- June 2017 (1)
- April 2017 (1)
- March 2017 (5)
- February 2017 (2)
- January 2017 (1)
- October 2016 (1)
- September 2016 (1)
- August 2016 (1)
- July 2016 (1)
- May 2016 (1)
- April 2016 (1)
- March 2016 (2)
- February 2016 (1)
- January 2016 (2)
- December 2015 (1)
- November 2015 (1)
- October 2015 (3)
- April 2015 (1)
- March 2015 (5)
- February 2015 (1)
- January 2015 (4)
- December 2014 (2)
- November 2014 (5)
- October 2014 (2)
- September 2014 (1)
- August 2014 (2)
- July 2014 (1)
- May 2014 (1)
- April 2014 (5)
- March 2014 (5)
- December 2013 (2)
- November 2013 (18)
- October 2013 (1)
- September 2013 (1)
- August 2013 (1)
- July 2013 (1)
- June 2013 (3)
- May 2013 (1)
- April 2013 (2)
- March 2013 (1)
- February 2013 (1)
- January 2013 (1)
- December 2012 (1)
- November 2012 (2)
- October 2012 (2)
- September 2012 (5)
- August 2012 (2)
- July 2012 (1)
- June 2012 (1)
- May 2012 (1)
- April 2012 (4)
- March 2012 (1)
- February 2012 (1)
- January 2012 (3)
- December 2011 (1)
- November 2011 (3)
- October 2011 (1)
- September 2011 (2)
- August 2011 (2)
- June 2011 (3)
- May 2011 (4)
- April 2011 (8)
- March 2011 (8)
- February 2011 (10)
- January 2011 (6)
- December 2010 (11)
- November 2010 (14)
- October 2010 (6)
- September 2010 (12)
- August 2010 (2)
- July 2010 (4)
- June 2010 (3)
- May 2010 (1)
- April 2010 (1)
- March 2010 (2)
- February 2010 (1)
- January 2010 (1)
- December 2009 (1)
- November 2009 (2)
- October 2009 (2)
- September 2009 (1)
- August 2009 (3)
- July 2009 (2)
- June 2009 (1)
- May 2009 (2)
- April 2009 (1)
- March 2009 (2)
- February 2009 (1)
- January 2009 (3)
In Search of Nemo
11th June 2013
Underwater Photography – Blllllrrrrrpppp!
For those of us who spend their winters in the frigid cold, surrounded by ice and snow for months at a time, a visit to the tropics is a blessing. To me, the mention of the tropics brings warmth and water to mind. And that’s precisely what we were after when we booked a trip to the Big Island of Hawaii.
The weather there is predictably warm so it’s easy to pack: a couple of bathing suits, a few pairs of shorts and several shirts. And don’t forget the snorkeling equipment! As an avid picture-taker, my luggage also includes a camera or two so that I can record the events that we may encounter.
|
The least enjoyable part of the trip is getting there. It’s an all day affair starting with a short hop from our home in Grand Rapids to Chicago followed by a very long, 9-hour flight from Chicago to Honolulu. Clouds covered most of the flight path to the islands. These sparkling beaches of Oahu (to the right) are about the only sites that we see along the way and this only upon leaving Honolulu on a 45 minute connecting flight to Kona. And owing to a six hour time difference, we arrive in time for dinner. |
 |
|
|
|

Being in the middle of the Pacific, there’s water galore everywhere. The next morning, with our snorkeling gear in tow we head down to one of the local beaches. |
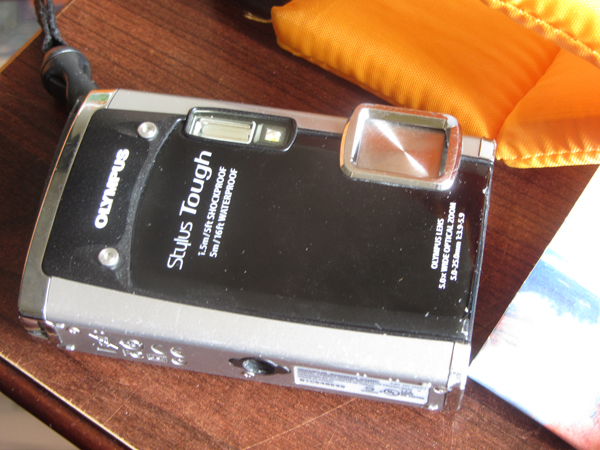
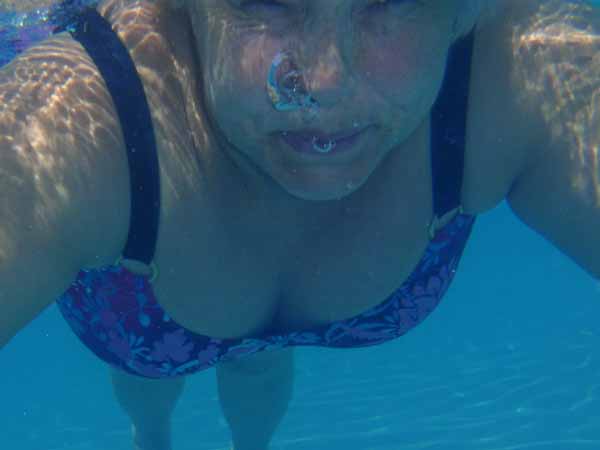
For this trip, I’ve taken a camera that can be used underwater. I’ve never invested the thousands of dollars needed for a “real” underwater outfit, but this Olympus Tough 6000 will do the trick. |
|
|
|
|
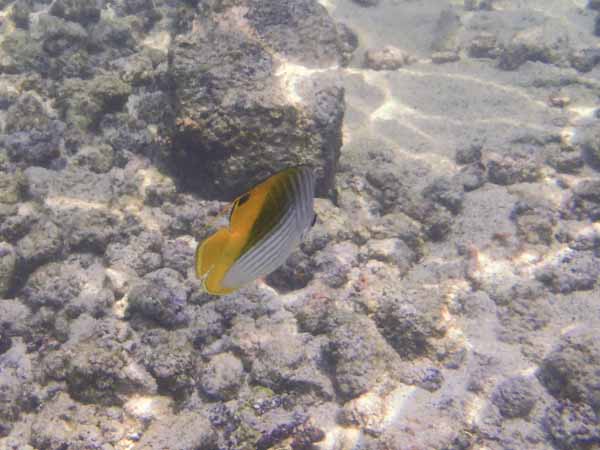
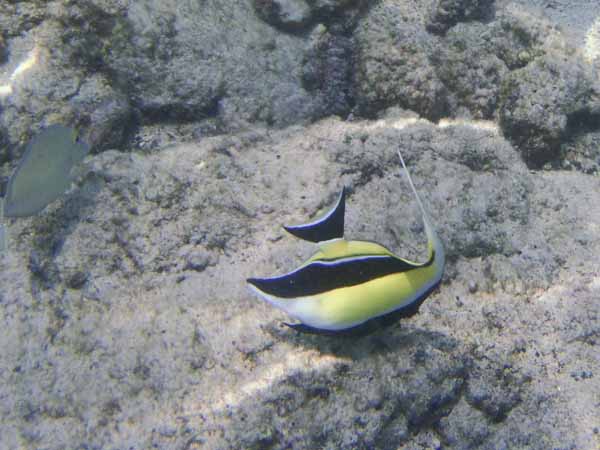
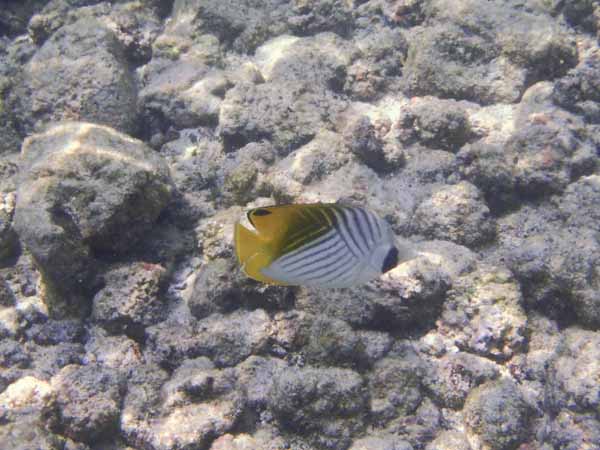
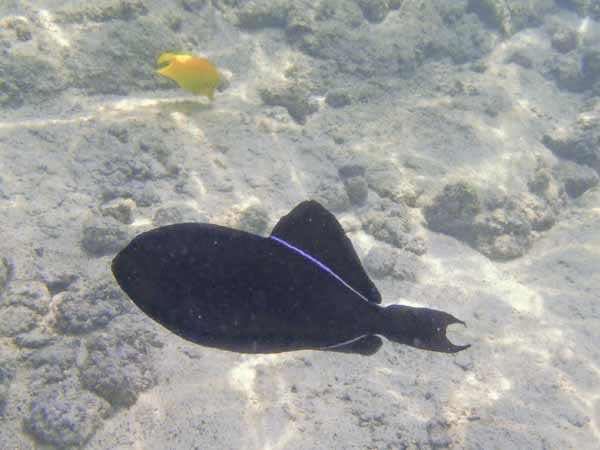
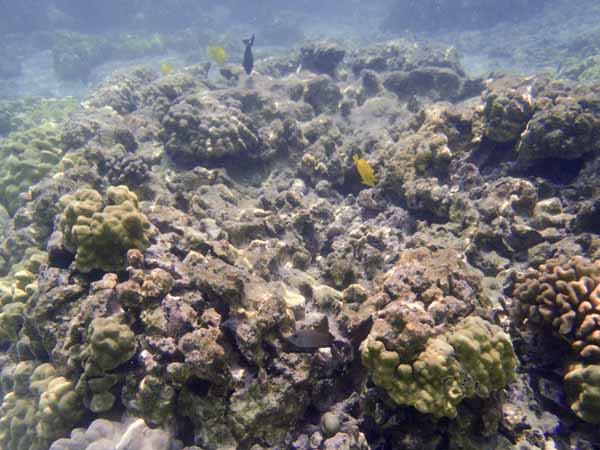
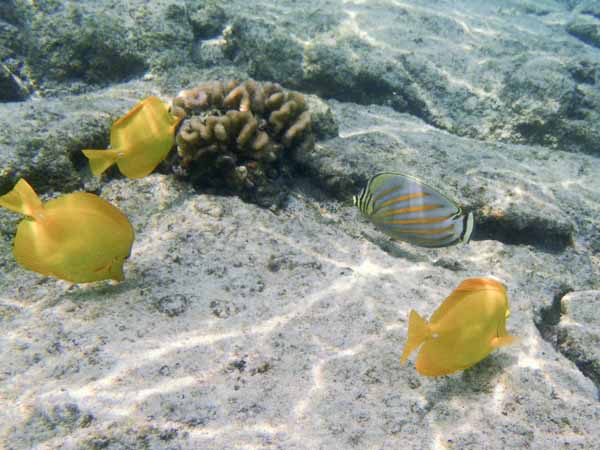
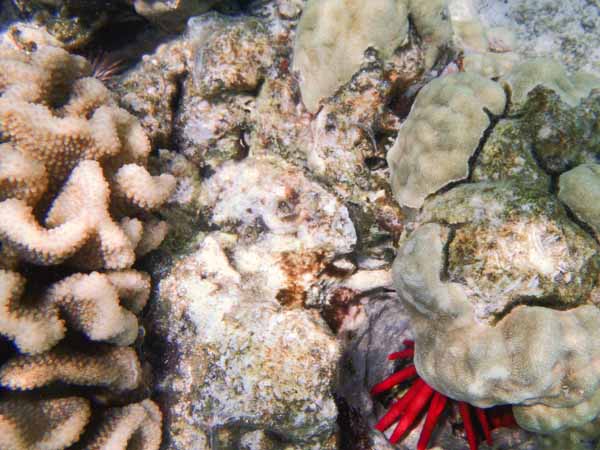
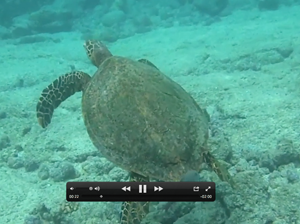
The Big Island is surrounded by shallow reefs lined with coral. Many of the popular beaches attract bathers for this exact reason. The coral is teeming with tropical fish and wildlife just a few feet below the water’s surface. Without heavy scuba equipment and expensive deep water photo gear, my small, relatively inexpensive camera makes it possible for me to record these amazing wonders of the ocean. Here’s some of my “catch” made simply by gently kicking my flippers, goggles and snorkel facing downward and camera in hand. |
|
|

|
|
|
|
|
|
|
|
|
|
 |
|
|
|

|
 |
|
|
|
|
|
|
|
|
|

|
|
|
|
So I returned home with a slight tan, a relaxed body and a nice set of photos of some spectacularly colorful fish. Of course these photos aren’t of the same quality that you’d expect from a full-blown underwater outfit. But I’m happy just the same having recorded some of nature’s gorgeous water landscapes with a very affordable camera.
Written by Arnie Lee
Wild Misdirection
16th March 2013
Making Wildlife Appear Even More Wild
I consider myself pretty honest and straight-forward – both in business life and in personal life.
So you may wonder why I am writing an article about deception. Maybe this is too harsh a word – let’s just call it misdirection.
Let me explain. Often photographs tell only part of the story. If I am clever, I can photograph a tiger in a zoo by carefully orchestrating the background, lighting, angle and surroundings to make it feel that it was taken in the heart of the Bengal jungle. I might lead you to believe that I shoot for National Geographic.
Following are a few examples of how you might creatively use point of view (POV) to enhance your wildlife photography skills and put you in line for work at the nature magazines.
|
|
|
 |
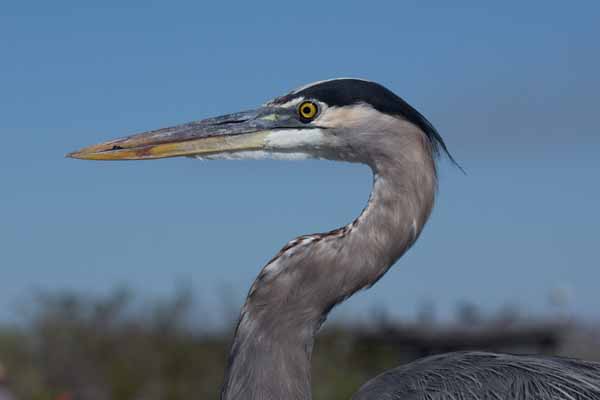
The blue heron on the left was standing across a shallow ravine about 50 feet from me. At that distance it was easy to capture him among his surrounding. By kneeling down and zooming the lens, I was able to isolate his head and avoid the cluttered background in the above photo. |
|
|
|
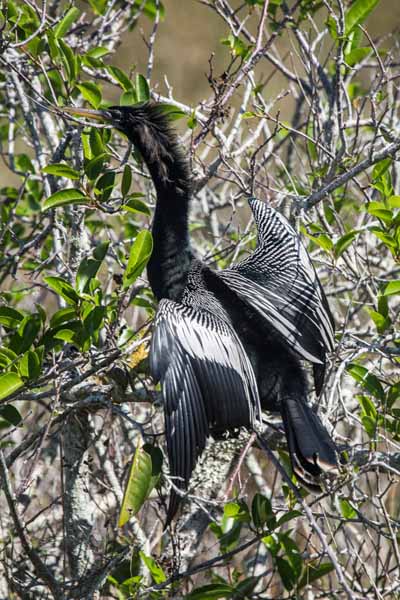 |
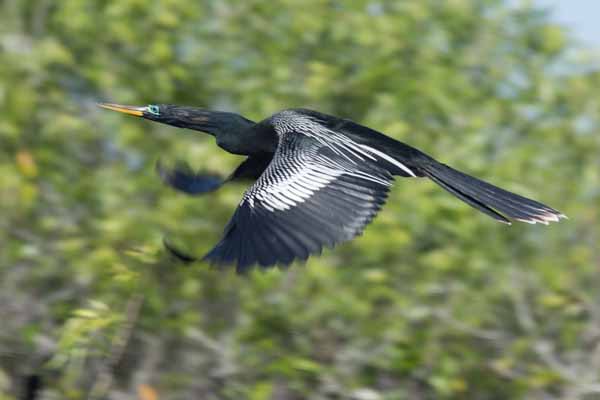
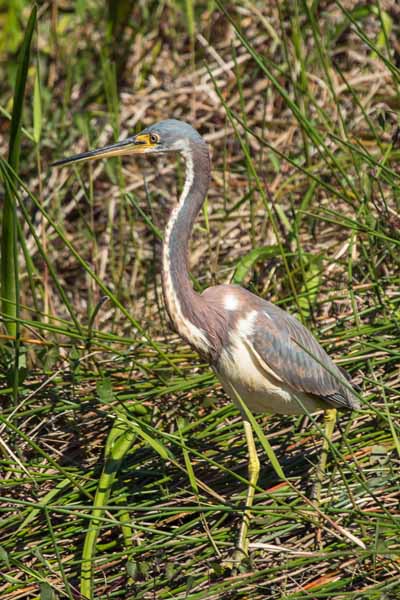
The lovely anhinga on the left was drying his wings on a nearby branch. Again the presence of the branches detract from the fine detail of the bird. A few minutes of patience paid off. I was perfectly positioned to capture this bird as he became airborne. The trees in the background are blurred by the shallow depth of field. Overall, this photo gives me a better sense of wildness. |
|
|
|
 |
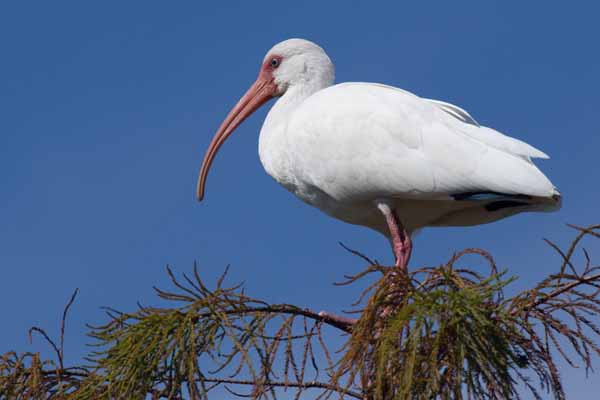 |
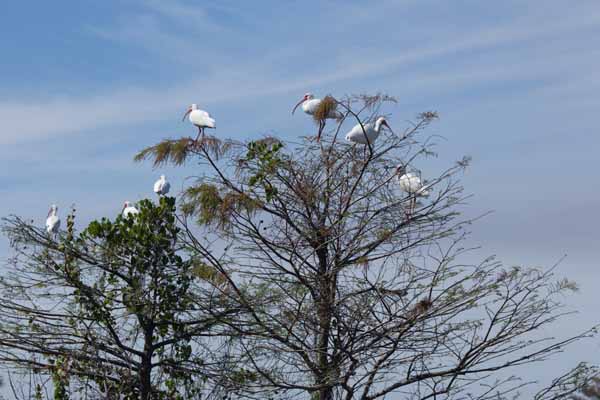
| These wood storks in the left photo were very fond of the tree. But somehow photographing a flock of birds in the tree wasn’t the feeling I was seeking. By isolating a single bird using a longer focal length, I was able to maintain more of a sense of wildness.
|
|
 |
 |
 |
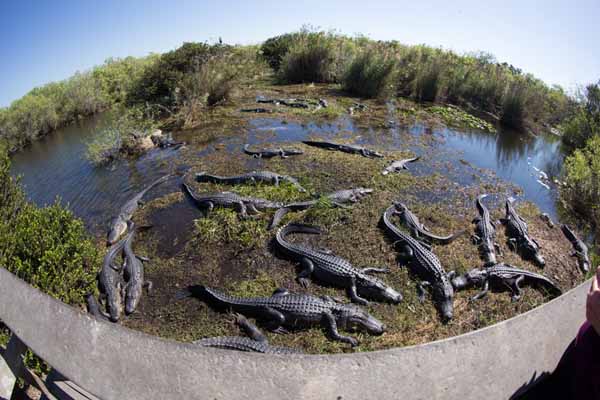
Here’s a series of photos that show that these vicious looking alligators were actually in a tame part of the Everglades. The wood deck protects the visitors from all of these alligators.
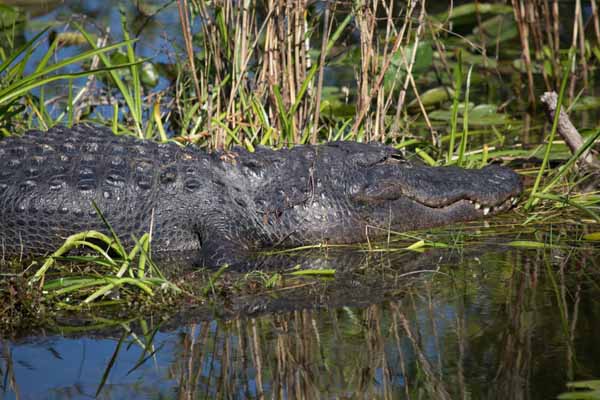
Above, without the onlookers, the group of alligators appear in a more “wild” environment except for the inclusion of the wood railing in the foreground. Left, I’ve again isolated the creature from the human elements. I think this method enhances the wildness factor. |
Those of you who have already used photographic misdirection, please raise your hands!
Of course, creative point of view can be used for any kind of photography, not just wildlife. So get out there and change your point of view around.
Written by Arnie Lee
Going Wireless with the Canon 6D
20th January 2013
Earlier this month I visited several of the photo equipment manufacturers at the annual Consumer Electronics Show. Of course the two majors are Canon and Nikon. And while sales by other camera makers including Sony, Olympus, Pentax and Fuji trail by a large margin, new features continue to arrive rapidly among all new models by all manufacturers. This year, one feature that was common in many models is the addition of wireless functionality.
Since CES, I’ve acquired and tested two of the new DLSRs with wireless capabilities: the Canon 6D and the Nikon D600.
Here’s a quick report on how wireless works with the Canon 6D.
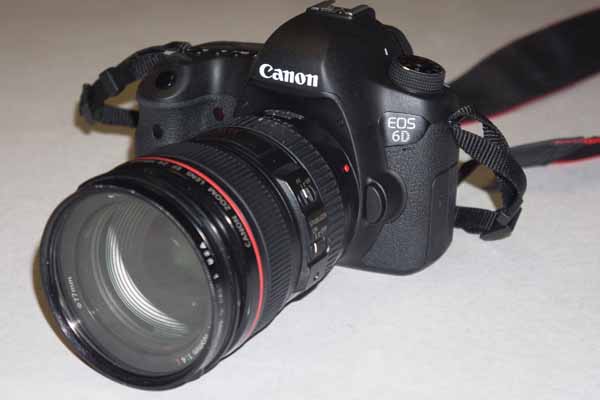
| The 6D is the newest DSLR from Canon. Its full-frame sensor has a resolution of 20MB with good low light performance. Its autofocus system uses 11 focus points. Compared to it’s bigger brother the 5D Mark III, it is smaller in size, lighter in weight and less expensive.
The two “new” built-in features are the GPS receiver and its wireless capability. Having GPS automatically adds location information (latitude, longitude and altitude) to the EXIF data of the images. My interest in the 6D was to see how its wireless capabilities worked. |
 |
|
|
|
| The Canon 6D can communicate wirelessly with several types of devices: another camera, a smartphone, a printer, a web service or a DLNA device.
For this review I’ll describe my experience connecting with a smartphone. For wireless, there’s a few preliminaries that have to be performed. The first is to give the 6D a wireless identifier. This step takes just a few minutes using the menus on the back of the camera. Here I’ve set it up with the identifier “Arnie 6D“. By completing this step, the 6D is now its own wireless station. |
 |
|
|
|
| The 6D can be used with either an Android or iPhone smartphone.
You’ll first have to install the free EOS Remote app for your particular smartphone. In my case, I installed the app onto my iPhone. Using the Settings menu on the iPhone, you connect to the camera with Wi-Fi. Look for the camera’s identifier – Arnie 6D. For security, you’ll have to enter the Encryption Key to establish the connection. |
 |
|
|
|
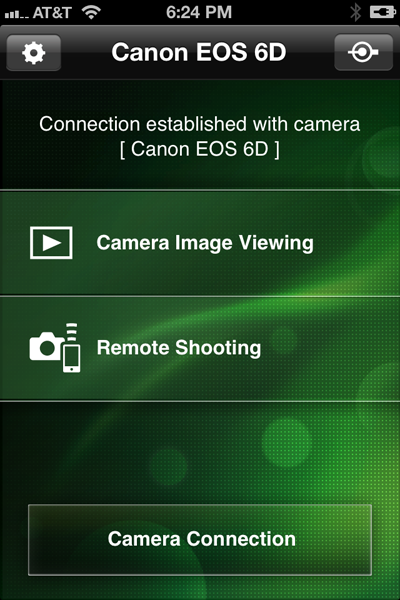
| After the camera and smartphone are connected, the EOS Remote app is ready to use.
It can perform two different functions. Firstly, you can view the images that have been captured with the 6D. Secondly, you can use the smartphone as a remote shutter release. |
 |
|
|
|
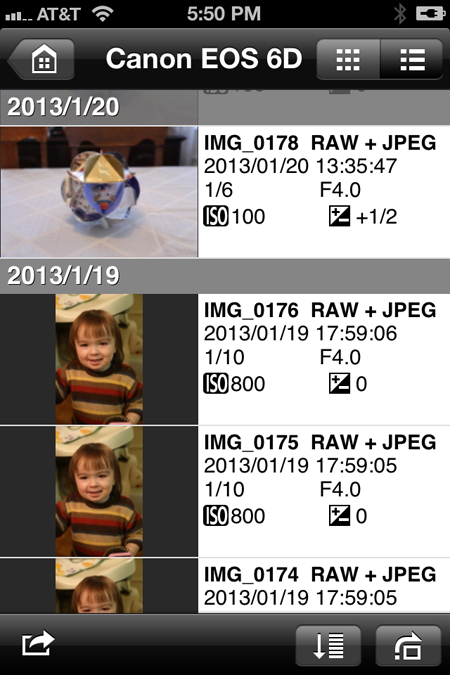
| Viewing Images from camera
Choosing Camera Image Viewing brings us to a screen on the smartphone that looks like this. By default the thumbnails are ordered by date but this can be changed to order them by rating (1 to 5 stars) or folder (if multiple folders are on the camera’s SD card). In addition to the thumbnail, the technical data each image is also presented. This is helpful if you plan to evaluate the images while still in the field with the purpose of adjusting the settings. |
 |
|
|
|
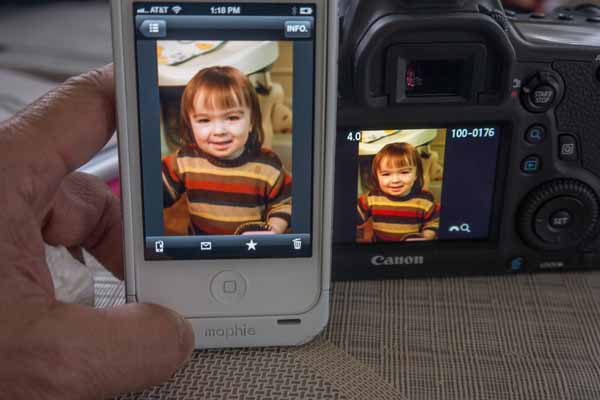
Tapping one of the thumbnails presents a larger version of the thumbnail. For each image you can:
|
 |
|
|
|
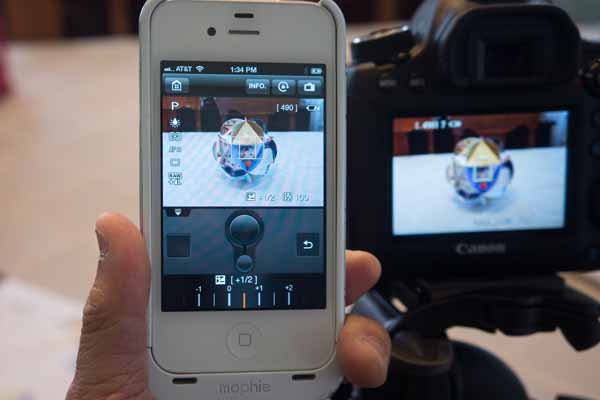
| Capturing Images using the smartphone
Your smartphone can be used as a remote shutter release with extra capabilities. Here I’ve set the camera on a tripod. Choosing Remote Shooting activates the 6D Liveview. The smartphone then presents the same view as the camera. By tapping on the different areas of the smartphone screen, I can change the autofocus. Depending on the 6D’s mode setting I can also change the ISO, shutter speed, aperture and exposure compensation using the smartphone. Another simple tap and the camera shutter is released. |
 |
|
|
|
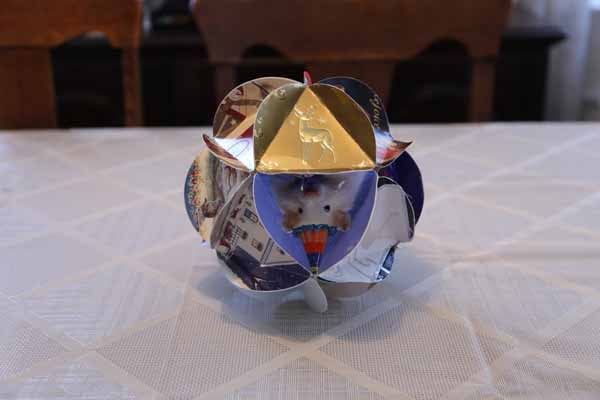
| Here’s the image that I took remotely.
And of course, the just captured image is immediately available if I change back to EOS Remote’s Camera Image Viewing. |
 |
|
|
|
There’s nothing earth shattering with this wireless capability. Yes, you can easily transfer images from the 6D to your smartphone and send them via email to others. And yes, it allows for backup, however the images are reduced to a smaller 1920 x 1280 jpg size.
I’ll cover more soon in another article about the Canon 6D’s wireless capability with a computer.
Also in the works is an article about the Nikon D600’s wireless capability.
Written by Arnie Lee
« Older Posts — Newer Posts »