Online Magazine
Recent Posts
- Safeguard your Cellphone Photos
- Black & White to Color – Instantly
- Wearing Many Hats
- Video Roundup
- Rescuing Your Blurry Pictures
- Showing Their Age
- What is Your Angle?
- Panorama Photos
- Humorous Photos
- Close Ups
- Fisheye Pictures
- Photo Antiquities
- Printing Big
- Appreciating Scale
- Celebrity Sightings
Tags
More Places to Go
- Free "How-To" Books “How To” books for popular cameras 0
- Vist Us on Facebook keep in touch with us on Facebook 2
Archives
- July 2023 (1)
- March 2023 (2)
- February 2023 (1)
- December 2022 (1)
- October 2022 (1)
- September 2022 (8)
- August 2022 (9)
- July 2022 (1)
- June 2022 (1)
- June 2021 (1)
- May 2021 (1)
- March 2021 (5)
- February 2021 (4)
- January 2021 (2)
- April 2019 (1)
- March 2019 (1)
- February 2019 (1)
- October 2018 (2)
- April 2018 (1)
- March 2018 (4)
- February 2018 (1)
- November 2017 (1)
- August 2017 (1)
- June 2017 (1)
- April 2017 (1)
- March 2017 (5)
- February 2017 (2)
- January 2017 (1)
- October 2016 (1)
- September 2016 (1)
- August 2016 (1)
- July 2016 (1)
- May 2016 (1)
- April 2016 (1)
- March 2016 (2)
- February 2016 (1)
- January 2016 (2)
- December 2015 (1)
- November 2015 (1)
- October 2015 (3)
- April 2015 (1)
- March 2015 (5)
- February 2015 (1)
- January 2015 (4)
- December 2014 (2)
- November 2014 (5)
- October 2014 (2)
- September 2014 (1)
- August 2014 (2)
- July 2014 (1)
- May 2014 (1)
- April 2014 (5)
- March 2014 (5)
- December 2013 (2)
- November 2013 (18)
- October 2013 (1)
- September 2013 (1)
- August 2013 (1)
- July 2013 (1)
- June 2013 (3)
- May 2013 (1)
- April 2013 (2)
- March 2013 (1)
- February 2013 (1)
- January 2013 (1)
- December 2012 (1)
- November 2012 (2)
- October 2012 (2)
- September 2012 (5)
- August 2012 (2)
- July 2012 (1)
- June 2012 (1)
- May 2012 (1)
- April 2012 (4)
- March 2012 (1)
- February 2012 (1)
- January 2012 (3)
- December 2011 (1)
- November 2011 (3)
- October 2011 (1)
- September 2011 (2)
- August 2011 (2)
- June 2011 (3)
- May 2011 (4)
- April 2011 (8)
- March 2011 (8)
- February 2011 (10)
- January 2011 (6)
- December 2010 (11)
- November 2010 (14)
- October 2010 (6)
- September 2010 (12)
- August 2010 (2)
- July 2010 (4)
- June 2010 (3)
- May 2010 (1)
- April 2010 (1)
- March 2010 (2)
- February 2010 (1)
- January 2010 (1)
- December 2009 (1)
- November 2009 (2)
- October 2009 (2)
- September 2009 (1)
- August 2009 (3)
- July 2009 (2)
- June 2009 (1)
- May 2009 (2)
- April 2009 (1)
- March 2009 (2)
- February 2009 (1)
- January 2009 (3)
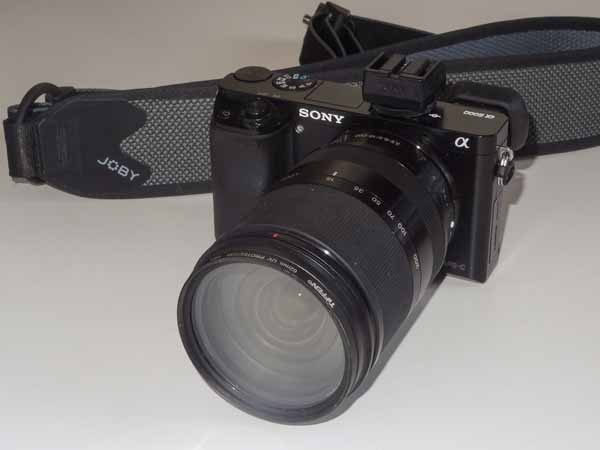
The Sony A6000 Mirrorless
14th August 2014
My 6300-Mile Field Test
On our recent vacation, my camera of choice was Sony’s newest mirrorless camera. While I also brought a much larger Nikon D700 conventional DSLR, I relied mostly on the the Sony A6000. As a comparison, I captured about 150 images with the Nikon D700 and more than a thousand images with the Sony A6000.
My setup was the A6000 coupled with Sony’s 18-200mm lens. This combination is lightweight and compact, produces quality images and just happens to fit beneath the driver’s seat for fast, convenient access.
Hopefully, the following photographic sampler illustrates the A6000’s versatility. I’ll add a few techie details afterwards.
 The A6000 is smaller than a conventional DSLR so it’s both lighter and more compact. |
 You can compare the sizes of the A6000 next to the conventional Nikon D700 DSLR. |
|
|
|
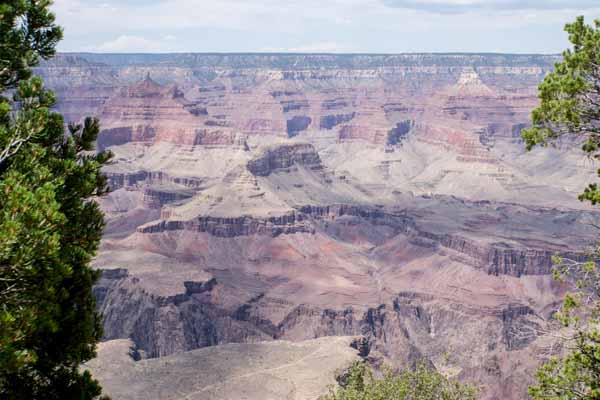 The A6000’s high resolution 24MP sensor renders scenics with very high detail. |
 Additionally, the camera can capture subjects that have a wide range of exposure levels. |
|
|
|
 The A6000’s articulated LCD makes it easy to capture stills and closeups. |
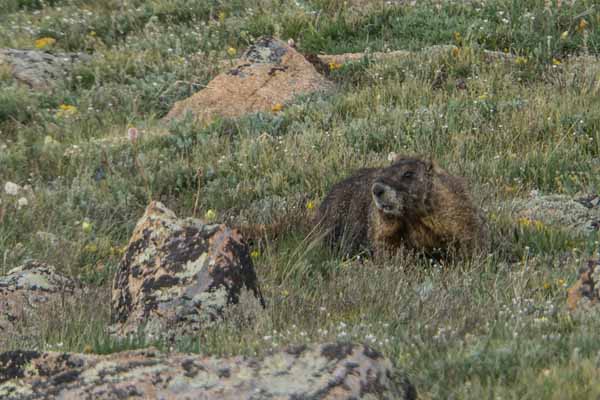 The much improved focusing system works well for wildlife shots. |
|
|
|
 With the 18-200mm lens, I can keep dry while still in on the action. |
 Here’s some quick, responsive focusing |
|
|
|
 The A6000’s bright viewfinder makes it easy to compose and frame in bright sunlight. |
 The electronic viewfinder previews the scene with the camera adjustments applied. |
|
|
|
 It handles action shots well and can capture up to 11 frames per second. |
 The exposure system works quite well with a wide variety of subjects. |
|
|
|
 I used the camera’s sweep panorama feature often to automatically produce some very pleasing large images. |
|
|
|
|
I suppose it doesn’t matter than I traveled 6300 miles with the camera other than I used it under a variety of conditions.
My “film” was a 32GB SD card, but I never filled it with the 200 pictures a day (the camera was set to record simultaneous RAW and JPG images). All in all, I’m very happy with the images that the camera produced. The one small gotcha is that the A6000 has a short battery life – probably due to the electronic viewfinder. Thankfully, I had an extra battery that I carried along.
Since this is my third Sony mirrorless camera, you can safely assume that I’d recommend this camera to others. In fact my daughter must have agreed with my assessment and purchased one.
For those interested, here’s a few of the technical specs for the A6000:
Sony A6000 os a mirrorless with a 24MP sensor. One of the reasons for choosing this camera is its fast and accurate hybrid focusing system that allows up to 11 frames per second capture. Other proven features are its “sweep panorama”, automated HDR capture, easy exposure bracketing, and Sony’s proven video recording.
List price for the A6000 body without lens is $650. The 18-200mm lens cost $850, more than the body but this single lens allowed me to enjoy the scenery without clutter of additional lenses.
Written by: Arnie Lee
Vacation Time
24th July 2014
Documenting the Memories
I have to admit that I like vacations.
I especially like the ones where we drive and see many different scenic parts of our vast country. Having just returned from another such jaunt, I’ve already recovered from being away from home these past few weeks. Here’s a look back to some of the photos that I took on the trip.
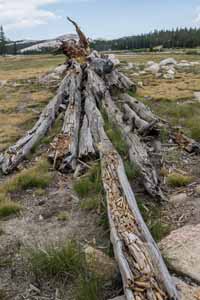
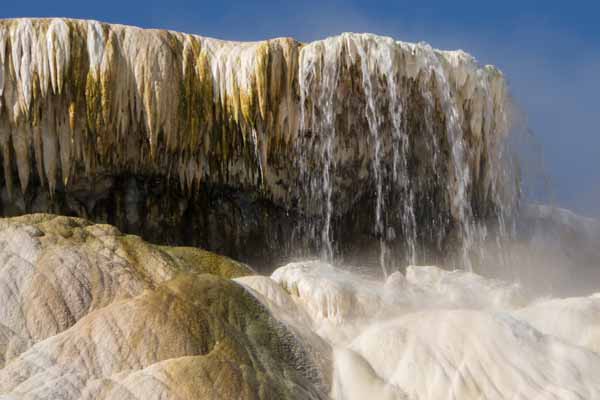
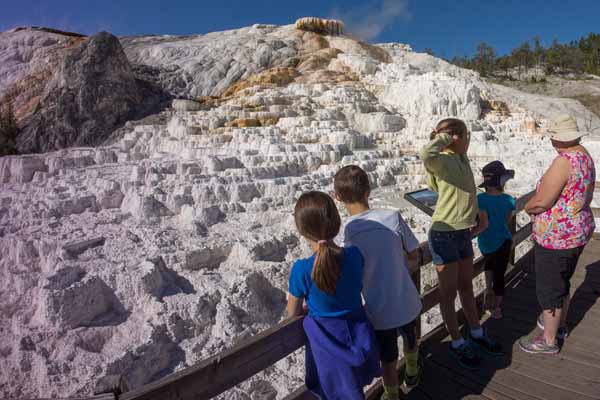
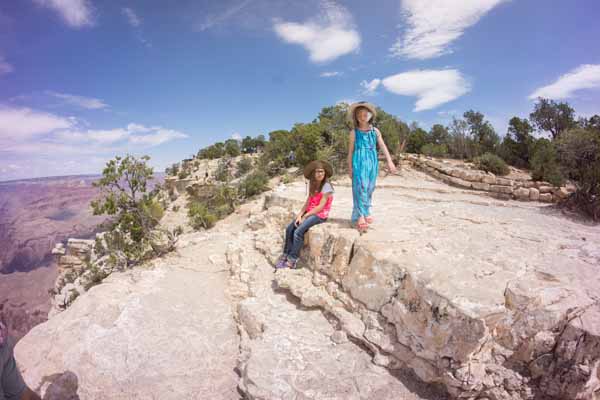
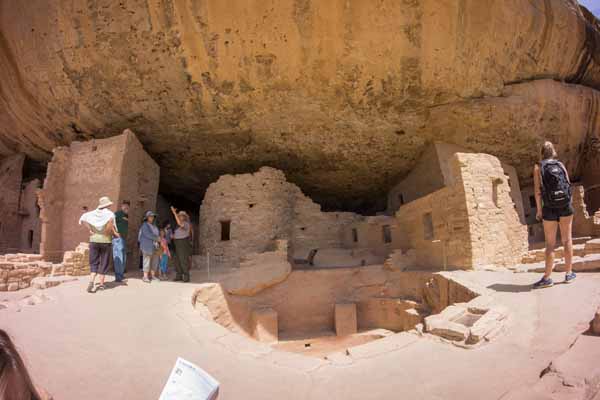
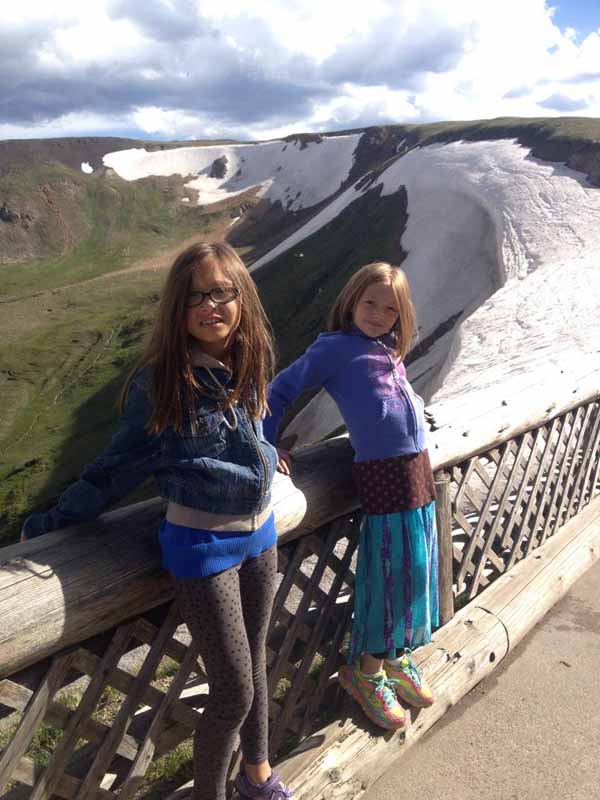
On this vacation we drove some 6300 miles and took in some wonderfully gorgeous areas including the Tetons, Yellowstone, Lake Tahoe, Yosemite, San Diego, Phoenix, Grand Canyon, Monument Valley, Mesa Verde and finally Rocky Mountain National Park.
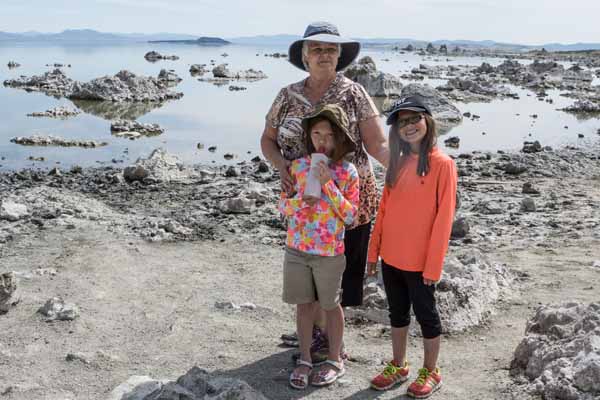
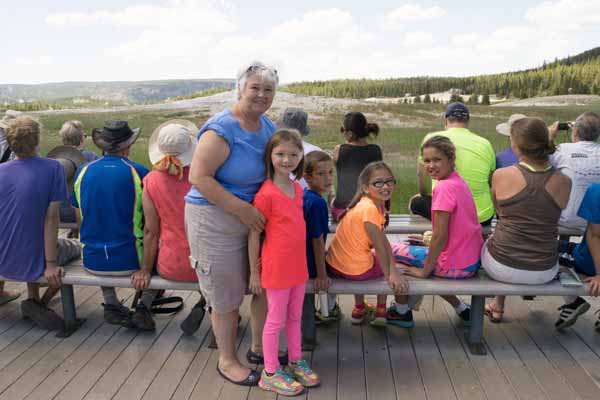
My wife Kris and I left Grand Rapids and at this time in our lives, instead of traveling with our children we had four grandkids in tow. One of our goals was to drop off two of the grandkids in Reno. But these two also had a wish to see Yellowstone, so we set the GPS to guide us to Old Faithful. Afterwards we would meet up with several of our adult children and additional grandchildren as we made our way to additional destinations.
Naturally I had several cameras with me to record our travels. And while I thoroughly enjoy photographing the amazing mountains, canyons, monuments, waterways, forests, sites and scenery, more importantly are the photos that let me recall the precious time that we spent with our family.
Here’s some of the pictures that illustrate those moments.
|
| |
 |
 |
|
| |
 |
 |
|
| |
 |
 |
|
| |
 |
 |
|
| |
 |
 |
|
| |
 |
 |
|
| |
 |
 |
|
| |
|
As you can see, we visited some very gorgeous landscapes: incredible mountains, pristine wildernesses, jaw-dropping gorges, crystal clear lakes, raging rivers, enormous farmlands, five sensational national parks – just a vast array of features that make up our amazing country. And while I have many more images that record these places that we visited, I’m just as content to see the faces of the grandkids, many of which we get to see but once a year. |
 |
|
| |
|
How lucky we are to be able to capture the smiles on their faces like this. |
 |
|
| |
Photographs are certainly a powerful way to record memorable events.
Whether I’m on vacation or not, I try to keep the most meaningful memories as part of my photos.
Written by: Arnie Lee
A Simple Photo Gallery
25th May 2014
Showing Off Your Photographs
Digital gives us the opportunity to take hundreds and hundreds of photos for almost no cost at all. This is an amazing turnaround compared to the price of using film cameras that had a processing charge saddled to each roll of film that we shot.
So what are we doing with all of these “free” photos? Are they sitting on the SD memory card or cell phone? I’m sure that my friends and relatives are impressed as I flick through the tiny screen to show them my recent vacation shot – NOT!
Well, to be frank, my fingers are tired of flicking the screen. And my friends and relatives typically avoid asking to see pictures of my travels. So I decided to print – yes you heard it correctly – print some of the photos.
|
|
||
 |
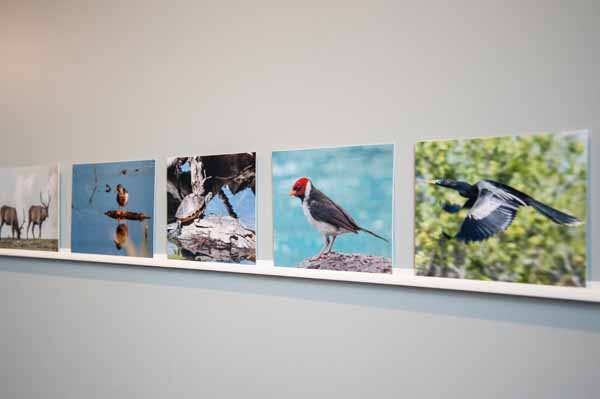
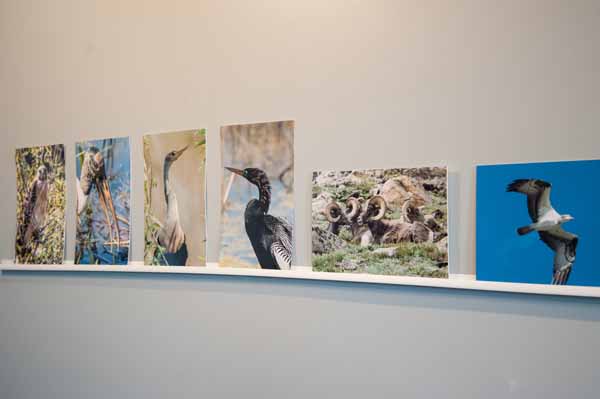
One afternoon I collected a set of my favorite nature shots and sent them to the photofinisher. A few days later received back a short stack of 8″ x 10″s and 8″ x 12″s Now the issue is how do I present them? I didn’t really want to arrange them in a conventional album that would sit on the top of a coffee table. No, I longed for a different way to display them. I decided that I’d show them off by making a small gallery in an unused room. The room is well suited for this purpose with a large, uncluttered wall painted white. |
|
|
|
||
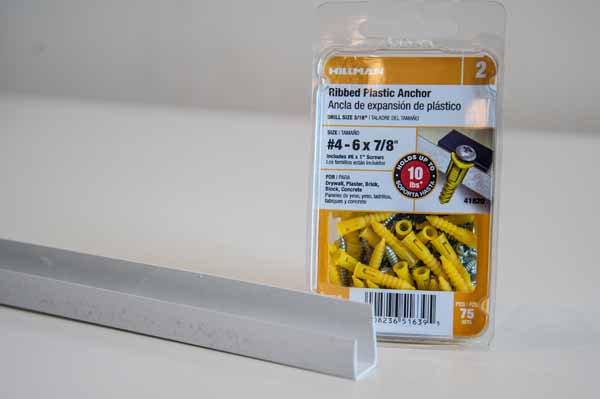
Rather than “hanging” the photos, I decided to make a very miniature shelf system. I bought a few 10-foot lengths of “J-TRIM” used to install vinyl house siding. These strips are lightweight and inexpensive. Use scissors to cut to desired length. |
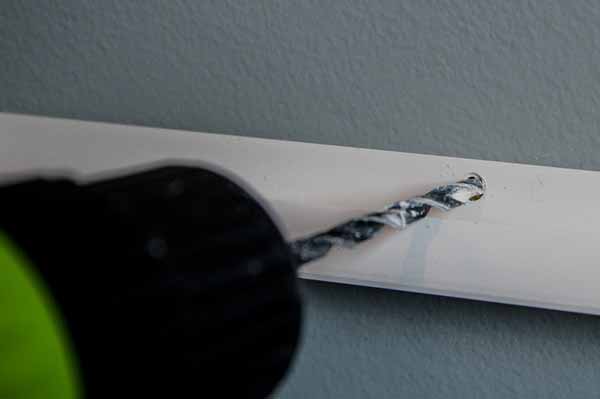
Use a tape measure to mount the J-TRIM level about 54″ above the floor. I used these ribbed plastic anchors (3/16″ size). Here I’m drilling a hole through the J-TRIM into the drywall. |
|
|
|
||
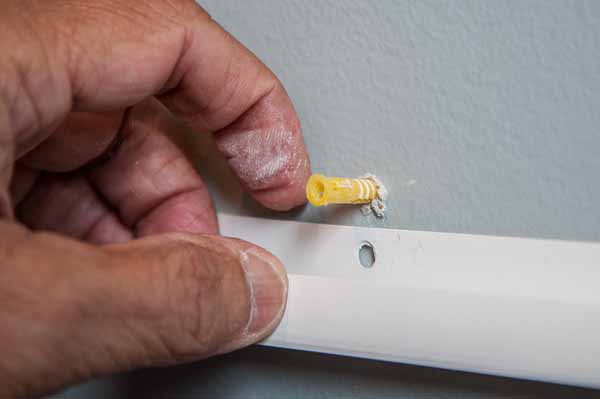
Next you push the plastic ribbed anchor into the drilled hole. |
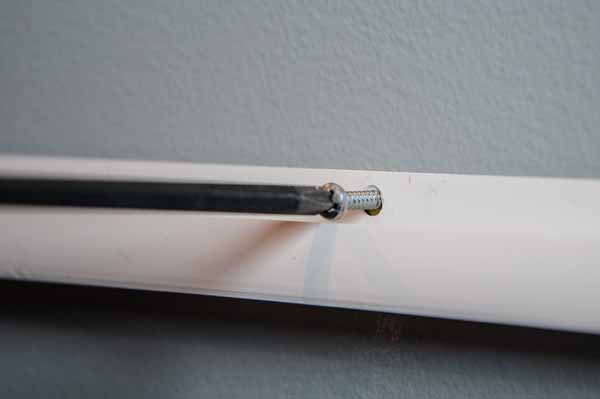
Then fasten the J-TRIM to the drywall with one of the screws. |
|
|
|
||
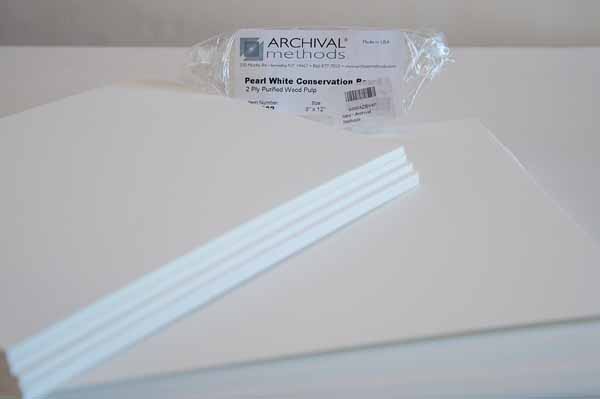
By themselves, the prints are too flimsy to stand on the miniature shelf. I purchased these sheets of mat board precut for the 8″x10″s and 8″x12″s. |

Using the 3M spray-on adhesive, I mounted the photos onto the mat board. |
|
|
|
||
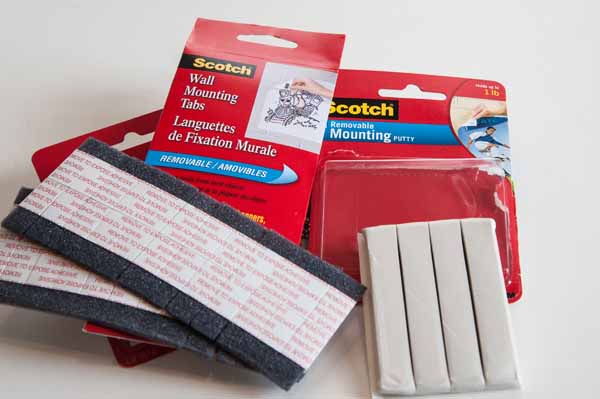
I found it necessary to use this Scotch “mounting putty” to keep the photos from falling from the miniature shelf. |
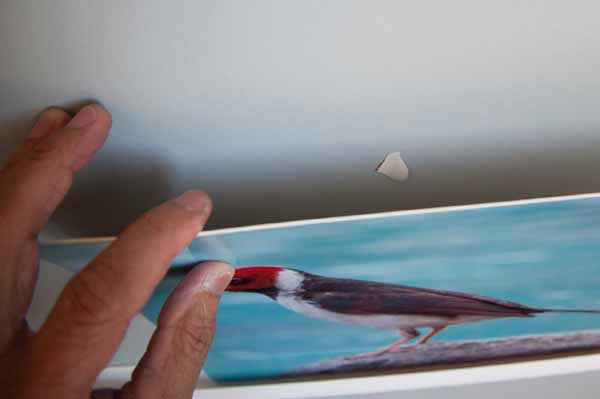
The putty is pasted between the photo mat board and the wall to keep the top of the photograph from falling. |
|
Here’s another view of the putty which hold the mat board agains the wall. |
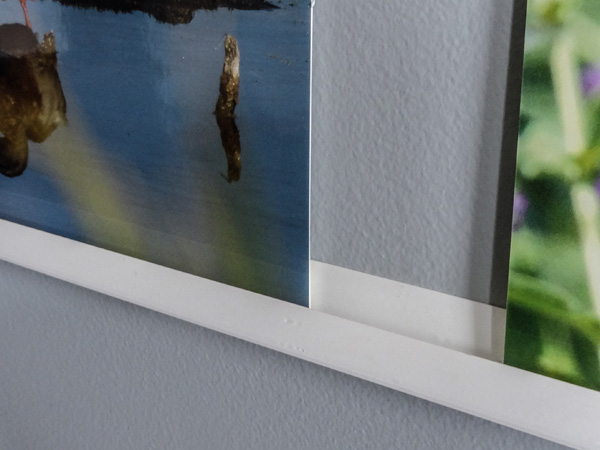
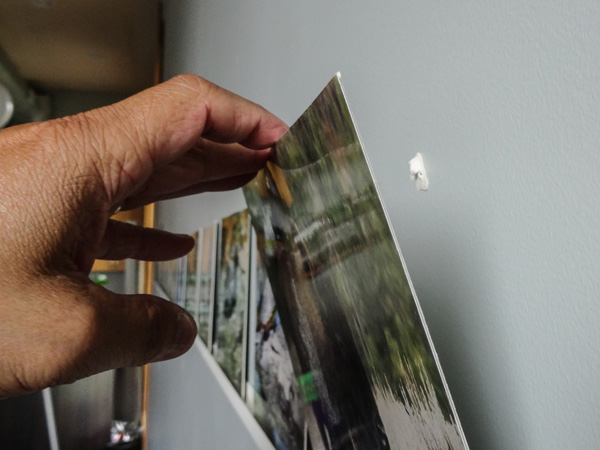
Here you can see the photo resting in the channel of the miniature shelf. |
|
|
|
||
 |
| |
|
When all is said and done, I have a small gallery of my latest travel photographs. As you might guess, when you’re tired of looking at this group of photographs, it’s very easy to change them. |
||
Material List:
2 pieces of J-Channel – 10′ Vinyl 1/2″ J_Trim @ $2.40 each (Home Depot)
1 pkg – plastic ribbed anchors #4 – 1″ @ $7.99
1 pkg – 8″ x 10″ or 8″ x 12″ mat board 25 sheets @ $12.50
1 can 3M General Purpose 45 spray mount @ $5.00
Written by: Arnie Lee